


Mt. Whitney Permits in 2021
…Plus Our Complete Guide on How to Safely Prepare for Your Hike or Climb!

Mt. Whitney - Why All the Hype?
Welcome to the first step in your journey to the highest point in the continental United States!
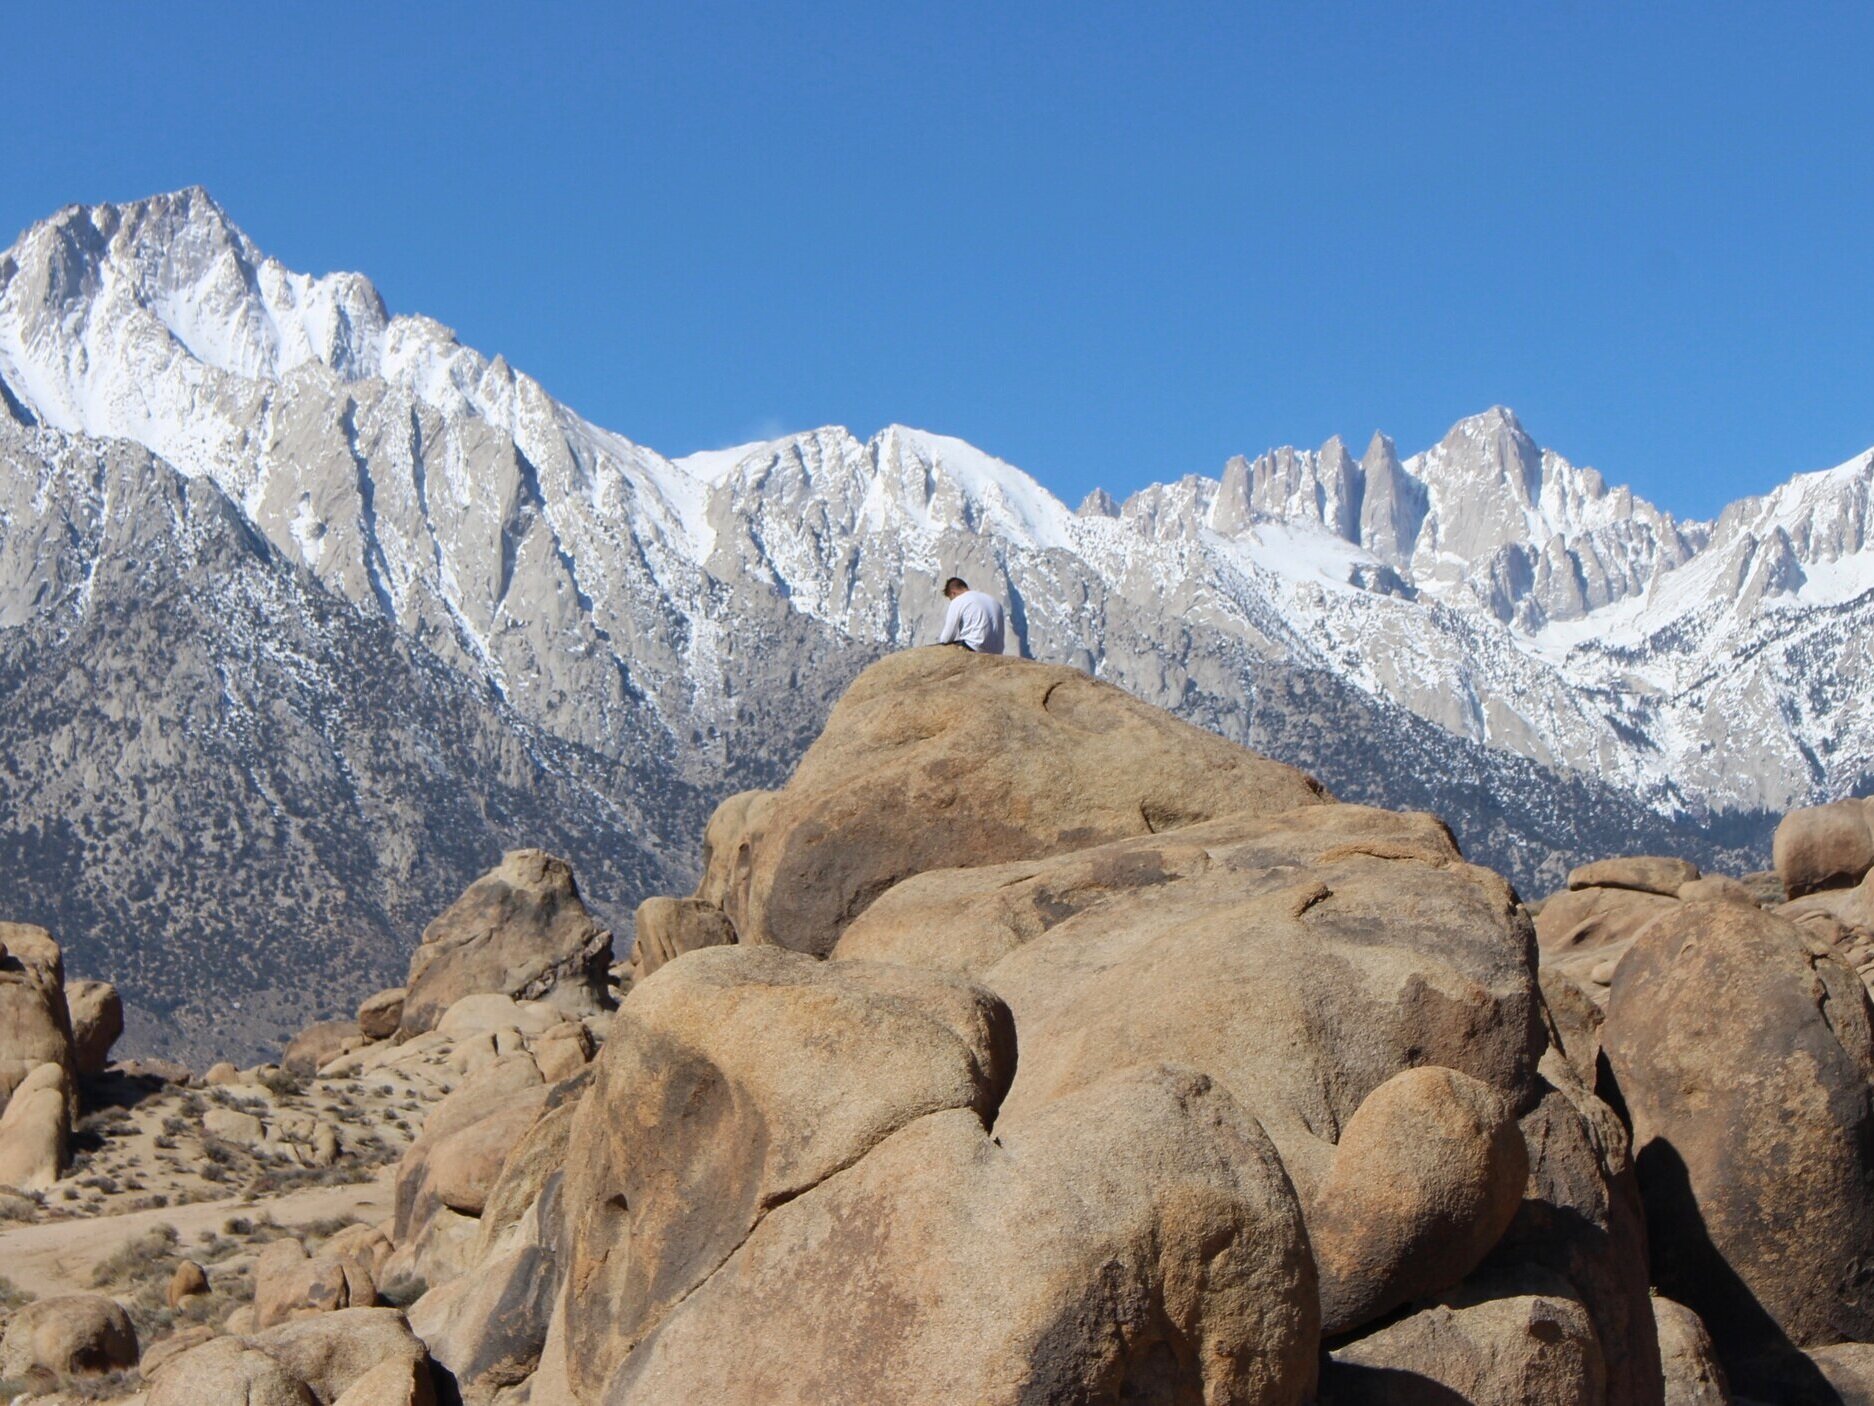
At a towering 14,505 ft., reaching the summit of Mt. Whitney has become a monumental rite of passage for adventurers all over the southwest, and a major accomplishment for even your most experienced outdoorsmen & women.
Of course, as with anything that’s popular in California, there’s a line. Not just anyone can show up and hike the Summit of Summits, and for the safety of both the unprepared hiker and the wild mountain ecosystem, that’s a good thing.
Luckily, if you play by the rules and show a little diligence—a symbol on its own of your preparation for this difficult journey—you’ll be on your way to the summit in no time.
We will happily guide you through this entire process.
The Quota System
You may have been hesitant to apply in the past, knowing the odds are traditionally not in your favor of getting selected for this hike. I’m here to tell you they’re not as bad as you think.
The US Forest Service’s website states that, on average, applicants has a 34% chance of winning in a given year. In this article, we’ll tell you how to increase your odds to roughly 70-80%. Seriously! And no, we’re not cheating. Not bad, eh?? Helps to have a guide. Whether you’re an ambitious hiker or a rugged mountaineer, getting your permit works the same way, and it starts several months before your hike. We’ll start from step 1…
The Permit Lottery Application Process

LOTTERY BASICS
—————————————————————
Quota Enforced:
May 1 - Nov. 1
Lottery Type:
Preseason annual lottery
How to Apply:
Online: Permit information |
Online application form
When to Apply:
Feb 1 - Mar. 15 for all permits in that calendar year
Permits Awarded Per Day:
Reserved: 100 day hikers, 60 overnight |
Walk-ups: 0
Odds of Approval:
Roughly 34% based on 2019 statistics.
Cost:
$6 per person when application is submitted + $15 per person once the permit is awarded in April
For more wilderness permit info, check out our section on Wilderness Permit Deadlines in the Southwest!
Important lottery application deadlines
Mark these dates in your calendar, or better yet, download our FREE Spearhead Wilderness Permit Calendar, and let us do the work for you.
FEB 1 - MAR 15: Enter the lottery online at Recreation.gov. All applications within this timeframe have an equal chance of winning.
MAR 24: Lottery winners announced
APR 1 - APR 30: Lottery winners must accept/decline dates awarded, verify group size, and purchase permits ($15 per person)
MAY 1, 7am PST: All unclaimed lottery dates are released for web reservations (hint: be there right at 7:00am)

Click Here for details :)
Where & when are permits required?
Anyone entering the Mt. Whitney Zone during the quota period (May 1 - Nov. 1) needs a permit earned through the lottery system.
The map below outlines the Whitney Zone boundaries. Due to its popularity, these trails are strictly enforced by rangers.
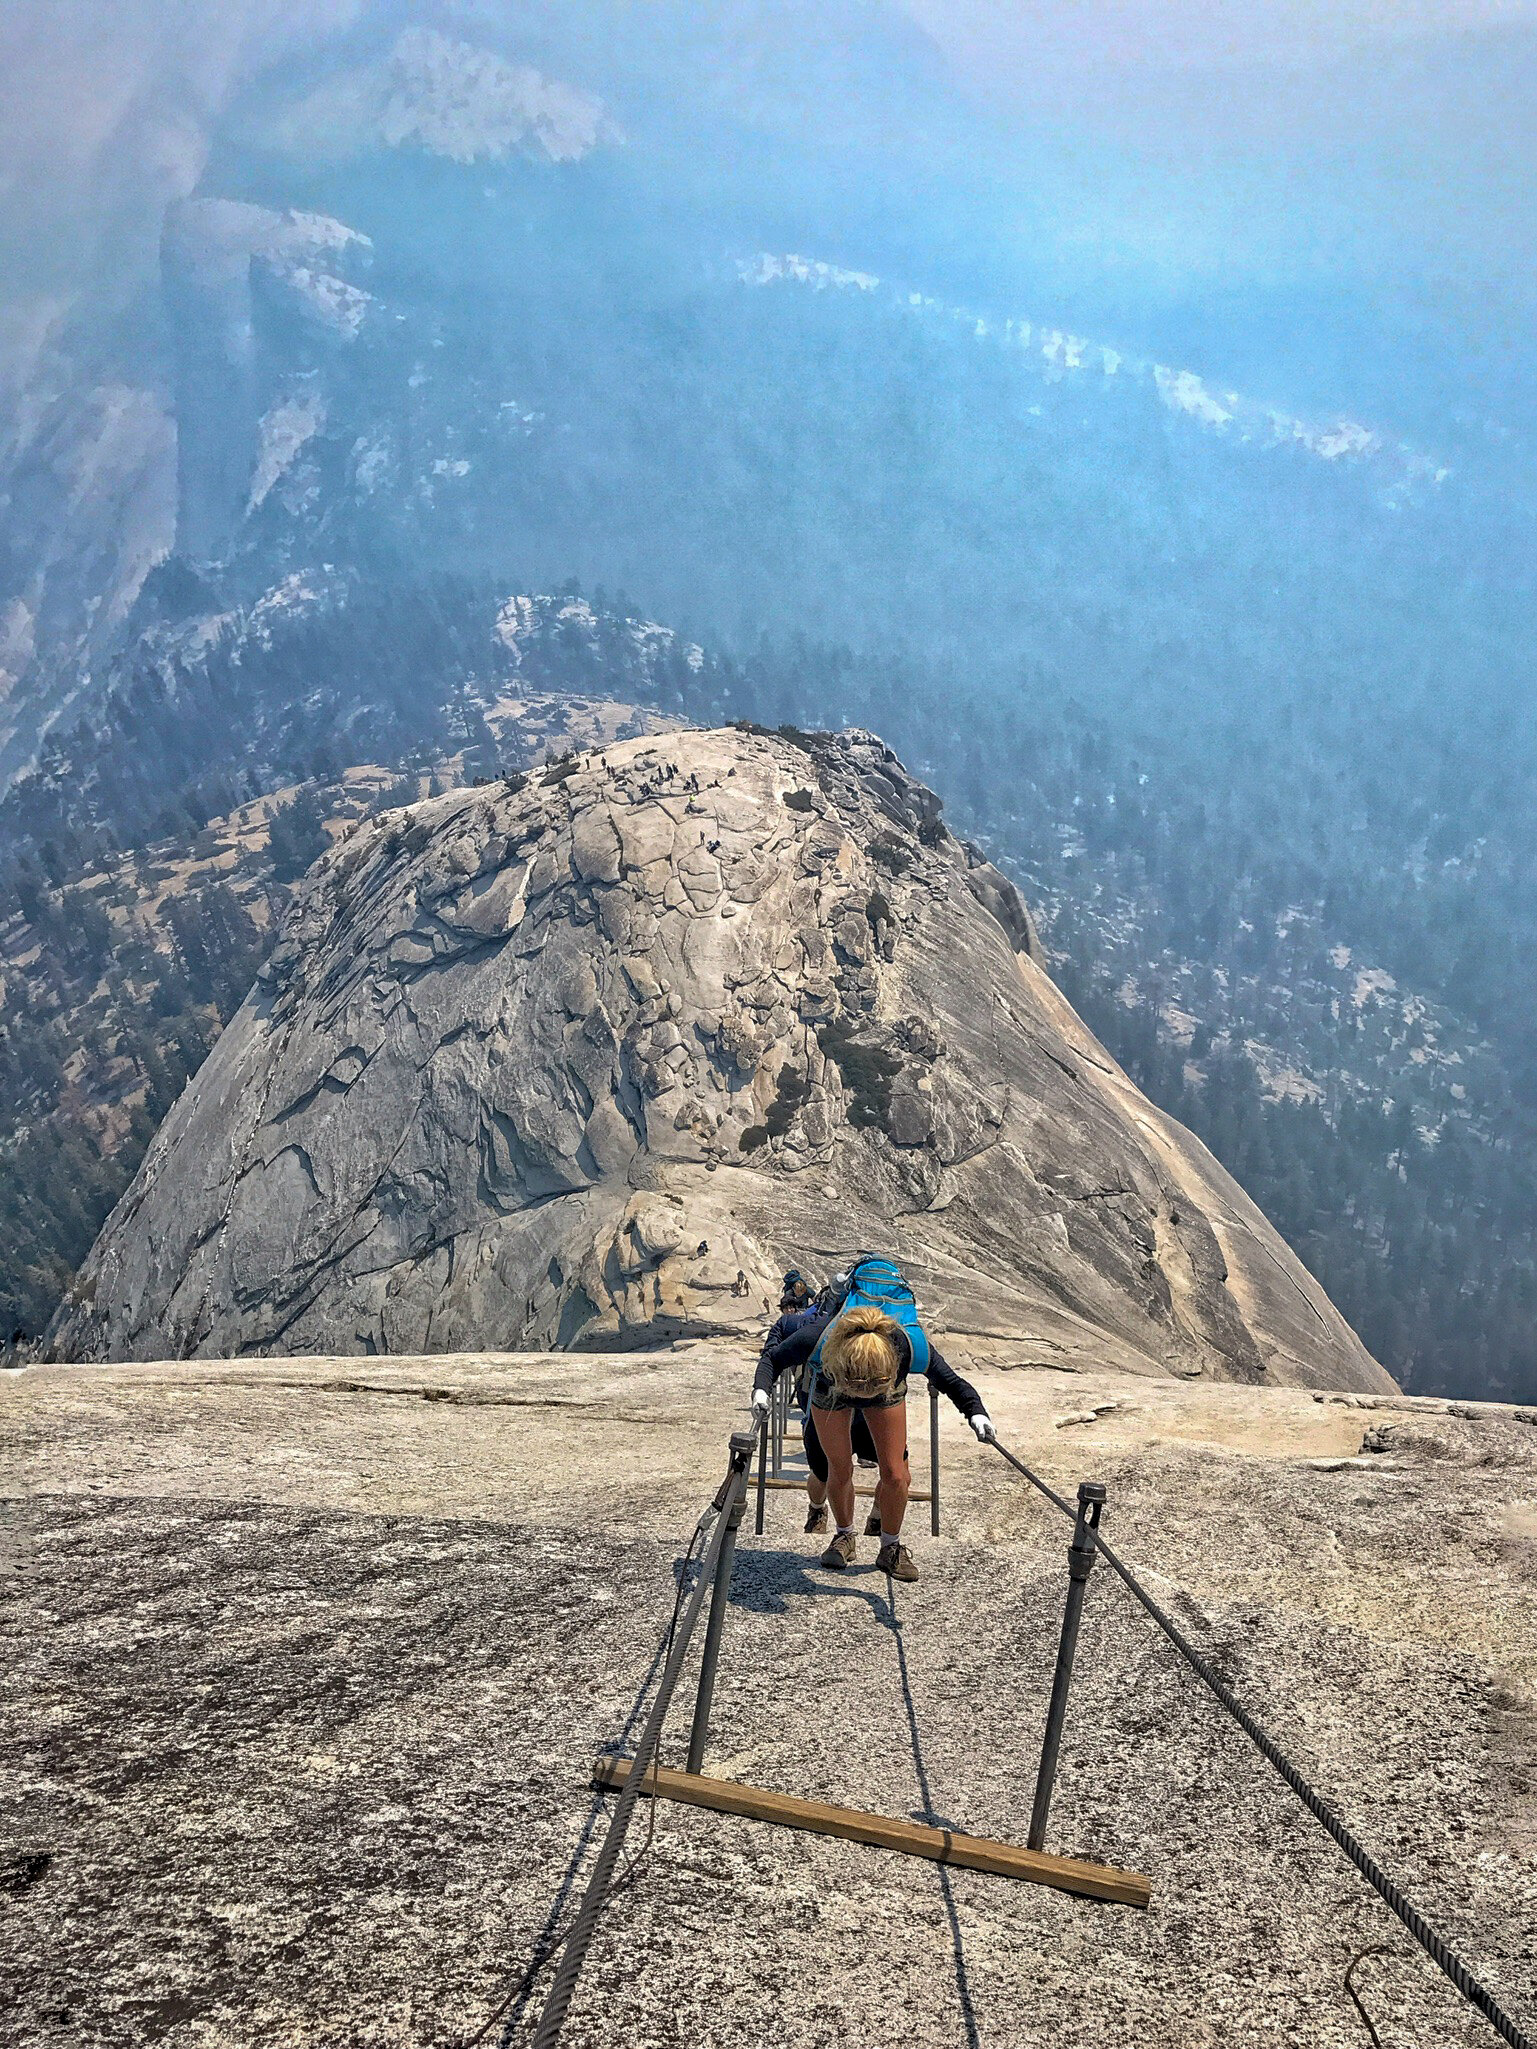
Mt. Whitney Trail is the popular non-technical hiking route, which wraps around along the western red borderline to the summit. The North Fork of Lone Pine Creek marks the Mountaineers Route, which takes a more direct shot to the peak.
Click to expand | Source: US Forest Service - Inyo National Forest
Permit types
Applicants have two different permit options to choose from:
Option 1: Hike the entire trail in a single day - The day hike is a grueling 22 mi. high-altitude slog up 6,100 vertical feet of elevation. The advantage of this option, for people willing to take on the challenge, is that day hikers are much more likely to be selected. Each day, 100 day-use permits are given out as opposed to 60 backpacking permits.
Option 2: Split the hike up into multiple days as a backpacking trip - Splitting the trip up into two days gives hikers more time to acclimatize and enjoy the journey, but is much harder to win (more on this below).
Whether you’re hiking, backpacking or mountaineering, your application process starts the same way on Recreation.gov. You’ll simply indicate if you’re planning a day hike or multi-day trip. Winners are selected from a randomized drawing—no preference is given to people who submit early.
Do hikers need a different permit for the Mt. Whitney Trail vs. the Mountaineer’s Route?
Nope, not anymore. Permits give people access to the entire Mt. Whitney Zone rather than specific routes within it.
Previously, Mountaineer’s Route applicants had a limited number of permits set aside for walk-ups. As of 2019, permits for the Mountaineer’s Route are sadly no longer issued in-person to same-day walk-ups.
Applicants for both trails pull from the same pool of permits. In fact, your permit doesn’t actually assign you to one specific route. Some people in the summertime even climb up via the Mountaineer’s Route and down the Mt. Whitney Trail (or vice versa).
We cover both routes in more detail below (click these links to zip down to them):
The Mt. Whitney Trail - Hike the summit via the Mt. Whitney Trail (non-technical)
The Mountaineer’s Route - Climb the summit via the Mountaineer’s Route (technical)
Acquiring permits outside the quota period
During the off-season, Whitney Zone permits have no daily quota, are self-issued, and can be acquired through the Recreation.gov website.
Prior to COVID, self-issued permits were available through the Lone Pine visitor center. As of February 2021, no word exists on if/when the visitor center will be resuming its former capabilities.
Most commonly, these are acquired by people climbing or skiing on the Mountaineer’s Route during the winter & spring. If your goal is a snow-free hike to the top, these easy-to-get permits unfortunately won’t apply to you.
Has the process changed in 2021 due to COVID?
Slightly, yes. The permit process has been entirely digitized in 2021—you can find a complete list of new updates at the Inyo National Forest Permit Office website.
After all is said and done, the new system isn’t too unreasonable, especially since you can now print out your permit ahead of time. Some might ague it’s even easier unless you’re a walk-up. The primary point to note is: don’t miss that pre-season lottery!
Also note that anything you were formerly required to do in-person at the visitor center is no longer available due to COVID. Quoted off the Inyo National Forest website: “ALL 2021 wilderness permits are reserved and issued online only. There is no walk-up service, self-issue, drop-box or night-box.”
After you win, you’ll be required to digitally check in between 2-14 days before you can officially print out your permit. They’ll make you watch a safety video and sign a few waivers—essentially the same conversation you previously had to have with the ranger at the visitor center.
Additional Resources
Inyo National Forest Permit Office - Wilderness Permit Instructions | (760)873-2483
HikingGuy - Mt. Whitney Hike: Planning, Maps and Turn-By-Turn Directions (GREAT resource)
Recreation.gov - Apply for Your Mt. Whitney Permit
Stacking The Lottery Odds in Your Favor
During the quota season, only 100 day hikers and 60 backpackers are allowed into the Whitney Zone each day.
As mentioned, applicants have a 34% chance of winning on average in a given year (much lower if you’re a backpacker). With so much popularity, there’s no guarantee of winning, but with the tips below, you can significantly increase your chances.
Earlier we promised you a 70-80% chance of winning your permit this year. Here are four strategies you can use to make that happen (hint: check out #5).
Tip #1: Day hiking > overnight
In these 2019 Lottery application stats as well as our figures in tip #5 below, notice that day hiking permits are requested in far fewer numbers (40% of applicants vs. 60%) and have nearly twice the supply. While the overnight trip might offer a more sustained and exciting adventure, you'll double your chances of winning by applying for a single push.
Tip#2: Keep group sizes small
One permit is assigned per group, and each group is allowed up to 15 people. However, be mindful that the larger the group size, the harder it will be to win the permit. The flip side of that applies too—the smaller your group, the more likely you’ll win.
For this hike, 2-4 people will be the ideal range. For safety purposes, consider avoiding a three-person scenario. That way if one person lags on the hike, they won’t be forced to hike alone.
Note: you ARE allowed to reduce the number of hikers in your group after winning your trip, prior to purchasing your permit.
Tip #3: Pick your dates carefully
A few important takeaways on date selection:
Late July and August are the most popular months, with the first weekend in August being the most requested window of the year.
Fridays and Saturdays are the most popular days of the week. Schedule your trip during the week if possible.
If you want to maximize your chances, shoot for weekdays in September or the first two weeks of October. After that, winter storms are a roll of the dice.
May and June are technically the least-busy time, but for good reason–snow and ice. Per our safety recommendations below, anyone planning trips before mid-July should expect and be prepared for navigating through snow.
Plan around the full moon if possible! Chances are high you'll be hiking in the dark at some point, especially if you're doing a single-day push. Take advantage of the moonlight to brighten your path and add beauty to your adventure. However, understand that you run the risk of these nights having higher demand in the lottery.
For your reference, this report from Inyo National Forest indicates how many permits were requested on every single day of the quota period.

Tip #4: Fill out ALL of your alternate dates
The permit application form will ask you for up to 15 alternate date options. Fill out all 15 slots. Rangers will throw out your application when you run out of available dates.
Tip #5: Have each person in your group apply!
This is the granddaddy of all tips! We’ve done a little math for you below, and the numbers don’t lie.
Just for context, when each hiker submits an application, he/she indicates the number of people in the group, and upon winning, is assigned permits for every person in the group.
If each person in your group applies separately as a group leader, notice how significantly you can improve your chances of being selected from the figures below. These numbers are based on 2019 data:
Backpackers
In 2019, from the 10,092 backpacking applications submitted, 2,358 applications (or 14% of the total 16,842) were accepted.
With these probabilities, adding additional applicants from your group would have the following affect on your group’s total chance of winning:
With 1 applicant, your odds of winning are 23%
With 2 applicants, your odds increase to 41%
With 3 applicants, your odds increase to 55%
With 4 applicants, your odds increase to 65%
With 5 applicants, your your odds increase 74%
Day Hikers
In 2019, from the 6,750 backpacking applications submitted, 3,368 applications (or 20% of the total 16,842) were accepted.
With these probabilities, adding additional applicants from your group would have the following affect on your group’s total chance of winning:
With 1 applicant, your odds of winning are 50%
With 2 applicants, your odds increase to 75%
With 3 applicants, your odds increase to 87%
With 4 applicants, your odds increase to 93%
With 5 applicants, your your odds increase 96%
Click to expand | Source: US Forest Service - Inyo National Forest
Important note! Understand that this “group effect” will be slightly less significant in practice, because the park service can more easily fit small groups into the schedule than large ones. However, with relatively low group numbers (4 people or less), you can clearly see this method still helps your chances.
Also note that your odds of winning essentially double if you bite the 22-mile bullet and opt to day-hike the Mt. Whitney Trail as opposed to splitting the trip up into multiple days. The attached pie graph from Inyo National Forest report supports that conclusion as well.
Finally, just to put any worries about application cost to rest with this method, the application fee structure works as follows:
$6 for the application upon submission
$15 per hiker in your group when you claim your permit after your application is accepted
For those of you who want to make sure this application method won’t break the bank, it’s only $6 per application.
We’ll warn you—this is a bit of a system hack, but no part of the Inyo National Forest’s website mentions or restricts the use of this strategy described above.
Additional Resources
Excellent Article: The Orange County Register - Secrets to Winning Mount Whitney Lottery
Inyo National Forest, Mt. Whitney - What Are My Chances (of Winning the Permit Lottery)?
Inyo National Forest, Mt. Whitney - Application Tips
Secondary Options (If you don't get picked)
Pick up unclaimed lottery permits on May 1st
For anyone who doesn't receive a permit in their initial application, this May 1st release date is a second chance! All remaining unclaimed permits are posted onto Recreation.gov.
Hint: The key to getting one of these is diligence! These permits are first-come-first-serve and are posted right at 7am PST. Have your browser window open at 6:59 ready to claim your permit as soon as the clock hits 7:00.
Check Recreation.gov at random times for openings
Trip cancellations are not uncommon throughout the season, including automatic cancellations for group leaders who fail to check in prior to their hike.
Join & check the online hiking communities
People on pre-scheduled hiking trips bail all the time! I’ve seen how often it happens with my own friends—there’s usually at least one person on every trip.
Group leaders often look to fill those empty spots allotted by their permits, if anything to keep from losing out on their $15 fee.
Join an Eastern Sierras and/or Mt. Whitney hiking group on social media, and search for Whitney permits. You’re bound to find someone trying to fill an open spot in their group. I’d recommend starting with Facebook Groups and Reddit.
You might also want to check the Mt. Whitney Hostel Message Board, which has become a famous spot for Whitney related communication.
Plan a backpacking trip to Whitney Summit from elsewhere in the JMT
If you’re a skilled backpacker, you can access the Mt. Whitney Summit from the backside via NOBO or SOBO trails on the JMT. Cottonwood Lakes is a great starting point from the south, and Onion Valley works just as well from the north.
If you’re inexperienced with backpacking don’t start with this trip.
Training & Preparation
Both the Mt. Whitney Trail AND the Mountaineer’s Route require serious preparation
This is not some mandatory liability statement. Mt. Whitney has become a symbol in the hiking community for inexperienced hikers showing up unprepared and suffering tragic injuries.
While its popular summer ascent is Class-1 non-technical hiking in ideal conditions, don't let that fool you into thinking that this is a simple show-up-and-hike kind of day. Common estimates put the success rate for hikers who take on the Mt. Whitney Trail close to 33%!
Given this trail’s steep elevation grade, high-altitude side-effects and unpredictable weather conditions over a grinding 22 mile stretch, this task require several weeks of preparation and training.
If you’re taking on the Mountaineer’s Route, that’s an even better reason to take this section seriously.
Fatalities happen on this mountain, and they’re more common than you think
At the time of this article in 2021, no official database exists to record annual deaths on the mountain, but fatalities are anything but rare.
From my own experience - A girl in her twenties died the week after our hike. Her friend contacted us via social media wondering if we had seen her. We heard later that she had wandered off trail on the Mountaineer’s Route and stepped onto a thin layer of snow & ice covering a quickly flowing stream. The rushing water forced her body down underneath the ice shelf she was walking on and sent her tragically off the edge of a tall cliff face to her death. Two other hikers had been killed that year on Whitney, and it was only May.
Constantly underestimated obstacles on this mountain
I've mapped out a few of the most common causes of people failing to reach the summit below.
Bad or Unexpected Weather:
Late afternoon thunderstorms are extremely common in the Sierras, especially during the summertime. Weather changes quickly in the Sierras and often doesn't follow predicted forecasts.
Moreover, the summit of Mt. Whitney is the worst possible place to be during a thunderstorm. Day hikers—start between 3-4am to avoid afternoon thunderstorms during your summit push and ensure enough daylight on your descent. As you make your approach, keep a close eye on the sky and look for building clouds, especially those coming from the west over Sequoia National Park (check out this video for more info).
Weather resources:
Youtube - High Elevation Hiking Tips and Lightning Storm Protection
Mountain-forecast - Mt. Whitney Weather Forecast
Whitney Portal Hostel Message Board - Whitney Portal Hostel & Hotel (great resource for mountain conditions and last minute permit openings)
Effects of High Altitude:
Altitude is the most common cause of people who fail to reach the summit. Its effects add multitudes of difficulty to your challenge at best and can be life threatening at worst (see: Acute Mountain Sickness (AMS)).
To combat this, spend as much time as possible above 8,000 ft. prior to the hike, both in the initial days before and weekends leading up to the adventure (more on this in our Training section below).
From a medicinal standpoint, you may want to look into Diamox if you’re sensitive to altitude. Diamox is a prescription only medication designed to relieve AMS symptoms but also causes frequent urination, which provides its own set of problems on a steep hike and technical climbs.
Melting Snow in the Spring:
When the snow begins to melt in the spring, hidden streams running underneath the snow & ice that climbers walk on are a life threatening hazard, unfortunately leading to the tragic death of the young woman mentioned above. In addition to staying on the trail, knowing where stream beds are and how to avoid them is absolutely mandatory.
To point out another example, climbing steep slopes of snow & ice, even with proper safety gear, can be extremely dangerous in above-freezing temperatures, as everyone knows snow softens and eventually gives away as it melts.
This hazard applies to both the Mt. Whitney Trail and the Mountaineer’s Route alike, as both are known for their high-exposure areas.
Avalanches and Severe Winter Conditions:
This is obviously a massive concern for mountaineers. Anyone without sufficient technical experience should hire a guide. We won’t touch this topic here since it’s so extensive, but for our recommended list of mountaineering resources, see our Mountaineer’s Route section below.
The four hazards above are just a handful in thousands of potential dangers to be aware of, emphasizing the importance of building a skill set slowly through experience and understanding what you’re getting into with high altitude hikes or climbs.
Here’s how you can show up prepared
Know the conditions of the time in which you’re applying.
This one is big. The quota season begins on May 1st, but many applicants don’t realize that snow typically doesn’t melt off the trails until mid July (depending on that year’s snowfall).
That said, anyone hiking in May & June without crampons and an ice axe is probably going to be dangerously underprepared. If winter conditions aren’t your thing, you’d be better off applying July through September.
Of course, checking weather conditions on the mountain prior to your trip is also extremely important. Here are a couple resources that can help:
Mountain-Forecast.com - Mt. Whitney
WhitneyZone.com - Mt. Whitney Weather
The Whitney Portal Message Board (look under a discrete section on the right side of the screen that says “Last Post”)
Expect & prepare for the most common pitfalls on the mountain.
Mapped out in the section right above this.
Train HARD for your hike.
Mapped out in the section right below this.
Bring the proper gear and know how to use it.
This includes bringing crampons and an ice axe for snowy conditions, but also knowing how to self-arrest properly.
Arrive several days early to acclimatize.
Don’t try to knock this hike out on a weekend. Even if you do & get away with it, you’ll still be significantly more miserable and vulnerable to accidents than if you’ve acclimatized properly.
At 6,100 ft., the Whitney Portal Campground is a great place to camp if you're looking to acclimate just before to your hike.
Know how you personally react to high altitude, and have a solution for it.
The knowledge element of this comes with experience through training.
The solution will be a mix of completing your training, properly acclimatizing, staying hydrated during the hike and potentially using some form of medicine for those who are sensitive.
Bring a GPS device or Satellite Communicator.
Hopefully you’ll never have to use it other than for route finding. Invest in a GPS satellite communicator if you haven’t already—it could save your life. It could very easily save other people’s lives as well.
Mt. Whitney training plans
Below, we’ve listed several training programs designed specifically for Mt. Whitney. The high altitude peaks included in these plans (most which are 10,000 ft.+) usually allow wilderness camping and are jaw-dropping adventures in their own right (i.e. check out our article: Mt. Langley Summit via Cottonwood Lakes):
TheHikingGeek - Endurance and Altitude Training for Mt. Whitney
ModernHiker - Best Mt. Whitney Training Hikes
Additional Resources
Inyo National Forest - Preparing for the Mt. Whitney Trail (Must-Read)
Whitney Portal Hostel - This Message Board has become a famous source for climbing conditions, updates & info
The Mt. Whitney Hiking Blog - Great source for conditions, trail updates articles, etc.
Outdoor Magazine - Whitney Has Turned Into an Overcrowded Catastrophe (great article on hiker inexperience issues)
Hiking the Summit via the Mt. Whitney Trail
While this article is more of a prep guide than a turn-by-turn instruction manual (we’ll link to those below), we do have a few tips that can prepare you on the day of your hike.
Trail Stats
Distance - 22mi. round trip
Elevation - 8,374 ft. to 14,505 ft. (net gain 6,131 ft.)
Difficulty - Very hard (Class 1 & 2)
Hiking Time - 12-16 hours
Snow-Free - Usually mid July - early October
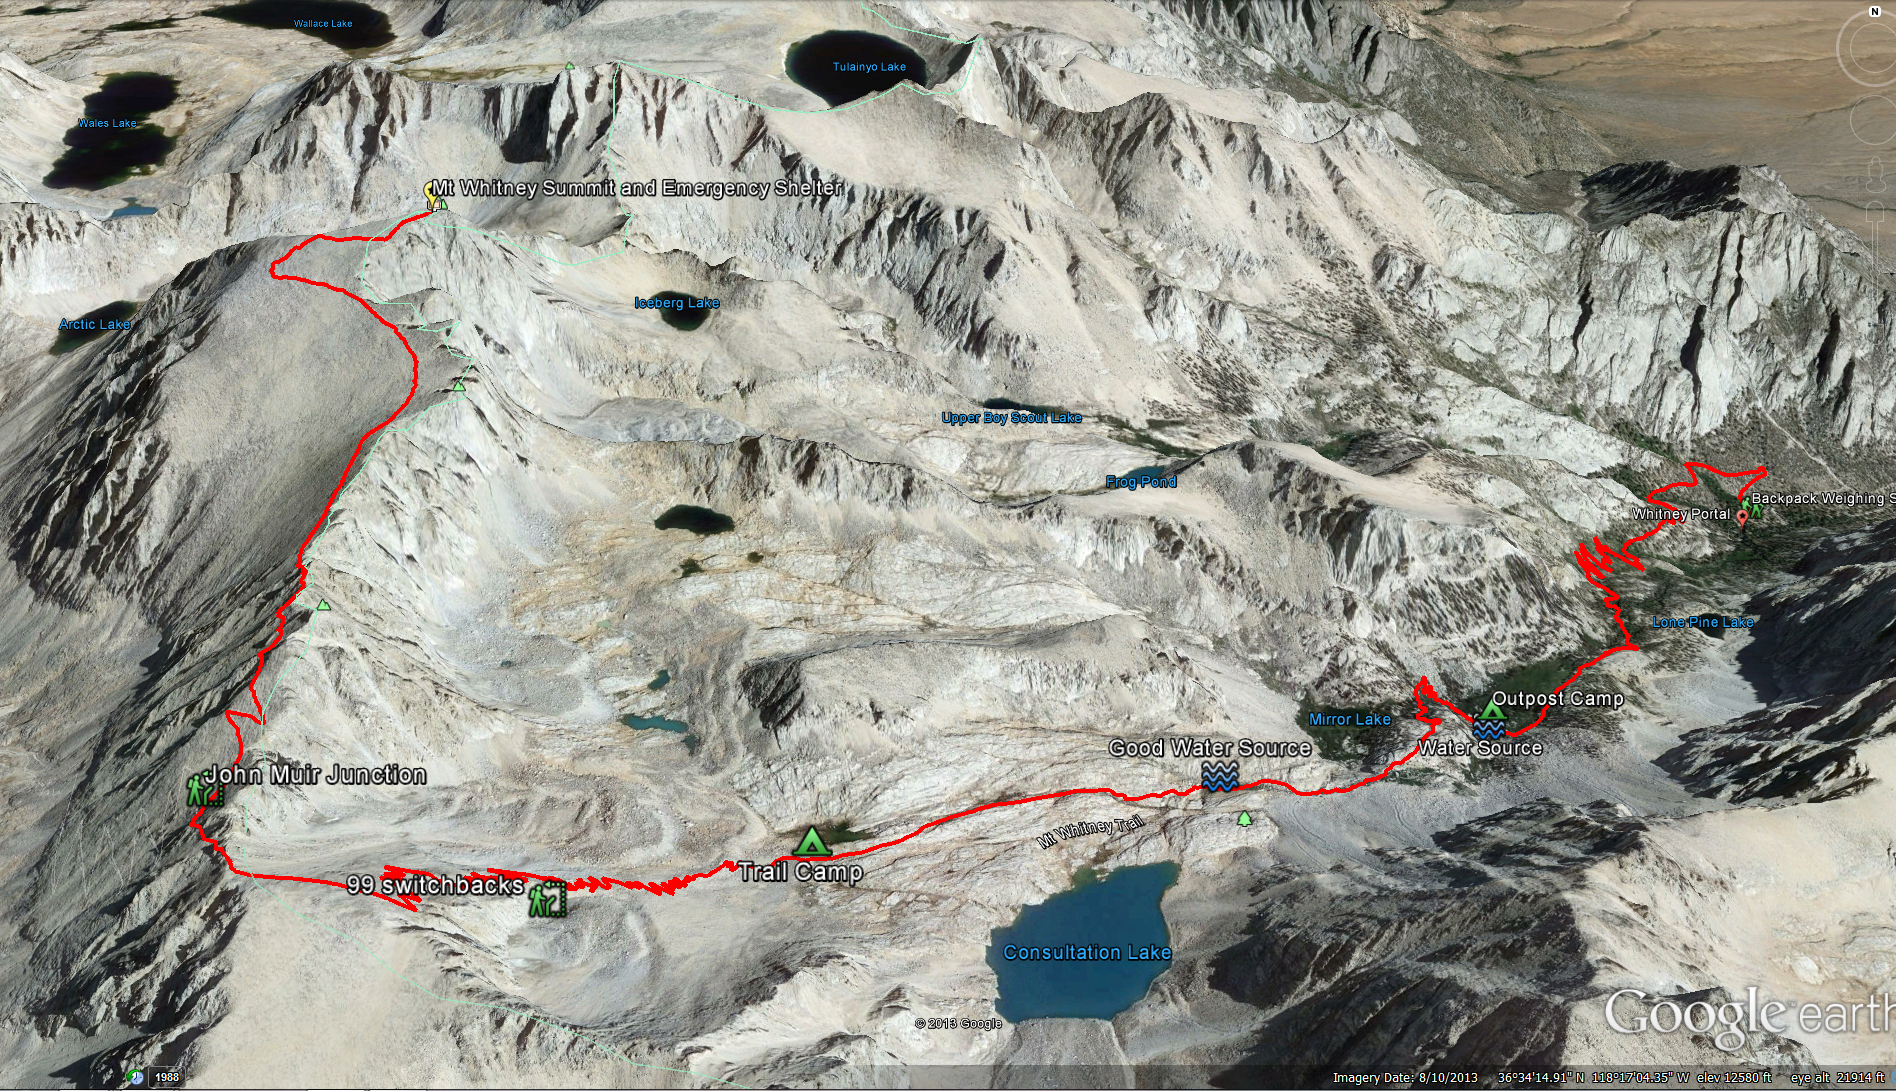
Maps & Trail Navigation
Click to Expand. | 3D Map of the Mt. Whitney Trail | Courtesy via IHikeSanDiego.com
Here are a few great resources for turn-by-turn directions:
HikingGuy - Mt. Whitney Hike: Planning, Maps and Turn-By-Turn Directions
TimberlineTrails - The Mt. Whitney Trail
Helpful maps:
iHikeSanDiego - 3D Map of the Mt. Whitney Trail (see photo)
US Forest Service - The Mount Whiney Zone
TimberlineTrails - National Geographic Mt. Whitney Trail Map
Dreampusher - Another great 3D trail map of Mt. Whitney Trail
What to pack
Here's a brief list of essential gear specifically relevant to this hike:
Your Permit - Seriously, don’t for get this
A WAG bag - Everyone in the Whitney Zone is required to carry, use and pack out a WAG bag for solid human waste. Trust me, these are tons of fun.
A bear canister (overnight only)
A detailed trail map AND at least one GPS device or emergency beacon + 1-day power bank
Clothes for bad conditions: long pants, gloves, a winter hat, a good shell, and light down jacket
Micro-spikes/crampons and gaiters if hiking before August or after mid September (depending on trail conditions)
Protective gear for unplanned overnight emergencies (a lightweight tarp, space blanket, warm clothes and extra food)
Slightly more food than you think you'll need
There’s plenty of excellent water sources on the trail, but you should have at least 2L of water on you between fill-ups as well as a proper water filter.
These items are in addition to your normal hiking gear (see: the 10 Essentials)
Summit beers :)
Here are a couple comprehensive packing lists designed specifically for Mt. Whitney:
OutdoorPrime: Mt. Whitney Summer Ascent Checklist
YouTube: 2016 Mt Whitney Kit - Gear List
Additional resources
Lone Pine Ranger Station - Eastern Sierra Visitor Center | (760)876-6200
Climbing the Summit via the Mountaineers Route
Trail Stats
Distance - 9.5mi. round trip
Elevation - 8,374 ft. to 14,505 ft. (net gain 6,131 ft.)
Difficulty - Ridiculous (Class 3 & below)
Hiking Time - 2-4 days in snow; under 10 hours in snow-free conditions
Snow-Free - Usually mid July - early October
Summary of the Mountaineer’s Route
The North Fork of Lone Pine Creek (a.k.a. the Mountaineer’s Route) is a steeper and more direct line to the Mt. Whitney summit.
The legendary John Muir put up the first ascent of this historical route in 1875.
This route can be completed by anyone with a permit during quota season, but any snow cover whatsoever is going to instantly make it technical.
Made up of Class 2 & 3 climbing, this route’s difficulty and exposure increase significantly as you narrow in on its high-elevation summit. As a result, its past is infamously filled with unfortunate errors and fatalities.
You can find great resources on the internet for discussing the technicalities of this ascent, which I’ll include below. This dedicated section will be better used to outline what a beginning mountaineer can expect from hiring a guide service.
When to plan your trip
While the mountain is open year-around, guide companies don’t start leading expeditions until February. Climbers new to the sport of mountaineering generally attempt from mid March until late May when weather is likely to be warmer.
Guide companies
Here's a couple reputable guide companies to look into:
Sierra Mountaineering International - We used these guys. They've been around for 20+ years and did an incredible job. The owner, Keith, was patient, attentive and personally involved in our planning. Their guides, Alex and Amy, are mountaineering legends—exactly the kind of people you want to have guiding you on such a big journey.
How long does a winter or spring summit take?
If you're relatively new to technical mountaineering, stick with the guide company's recommendation and extend the journey over 3-4 days.
You can do a two day option, and it's cheaper, but I'd only recommend it if you're in great shape or used to high elevation climbing. For most people, one night isn't enough time to acclimate to the elevation. It also significantly lengthens the mileage on Day 2, which requires an early no-miss turn-around time as you're making your summit approach.
In summary, your initial reaction will be to go with the cheapest option when the initial sticker shock hits you. Allow me to me talk you out of that. This trip will be expensive either way. The extra $200 for a third day after you’re already bound to spend $1,000+ will seem insignificant compared to the shitty feeling of turning around before the summit if you're not physically prepared or properly acclimatized.
What to pack
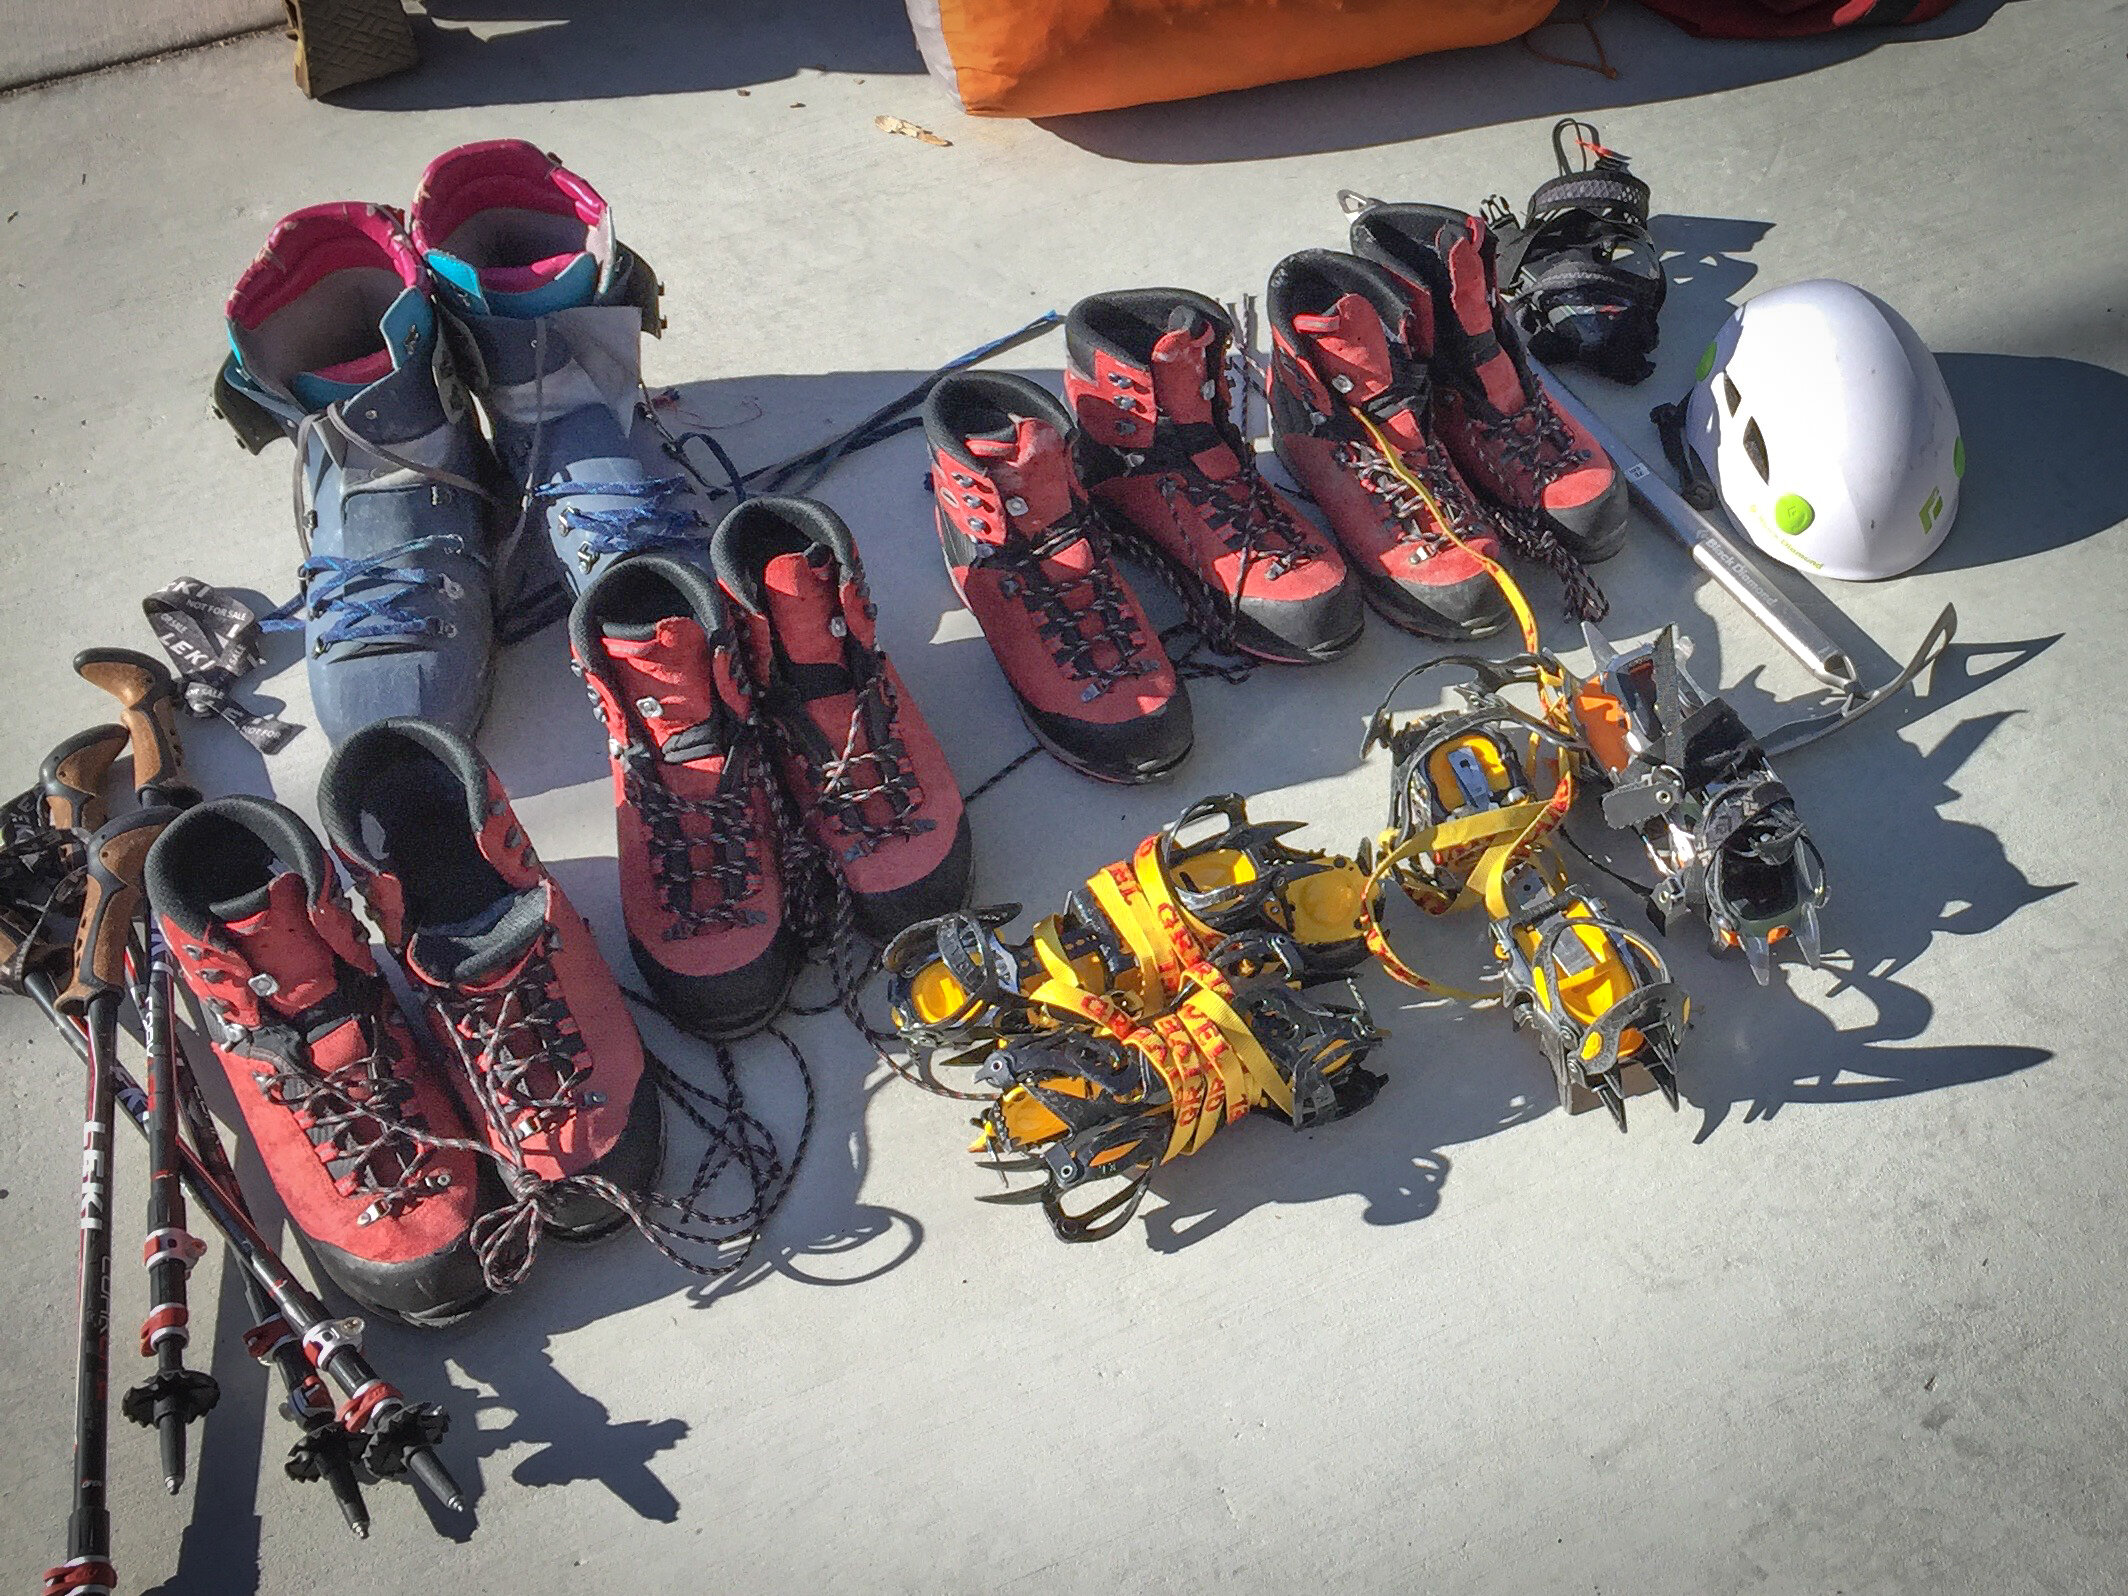
Here's a copy of the gear list provided by our guide company, Sierra Mountaineering International:
Mt. Whitney Mountaineer's Route Equipment List Winter-Spring (see below)
A WAG bag
A bear canister (overnight only)
A detailed trail map AND at least one GPS device or emergency beacon + 1-day power bank
Stick to the gear list your guide company gives you. Don't pack anything extra, because they're probably going to reduce your pack by half anyway.

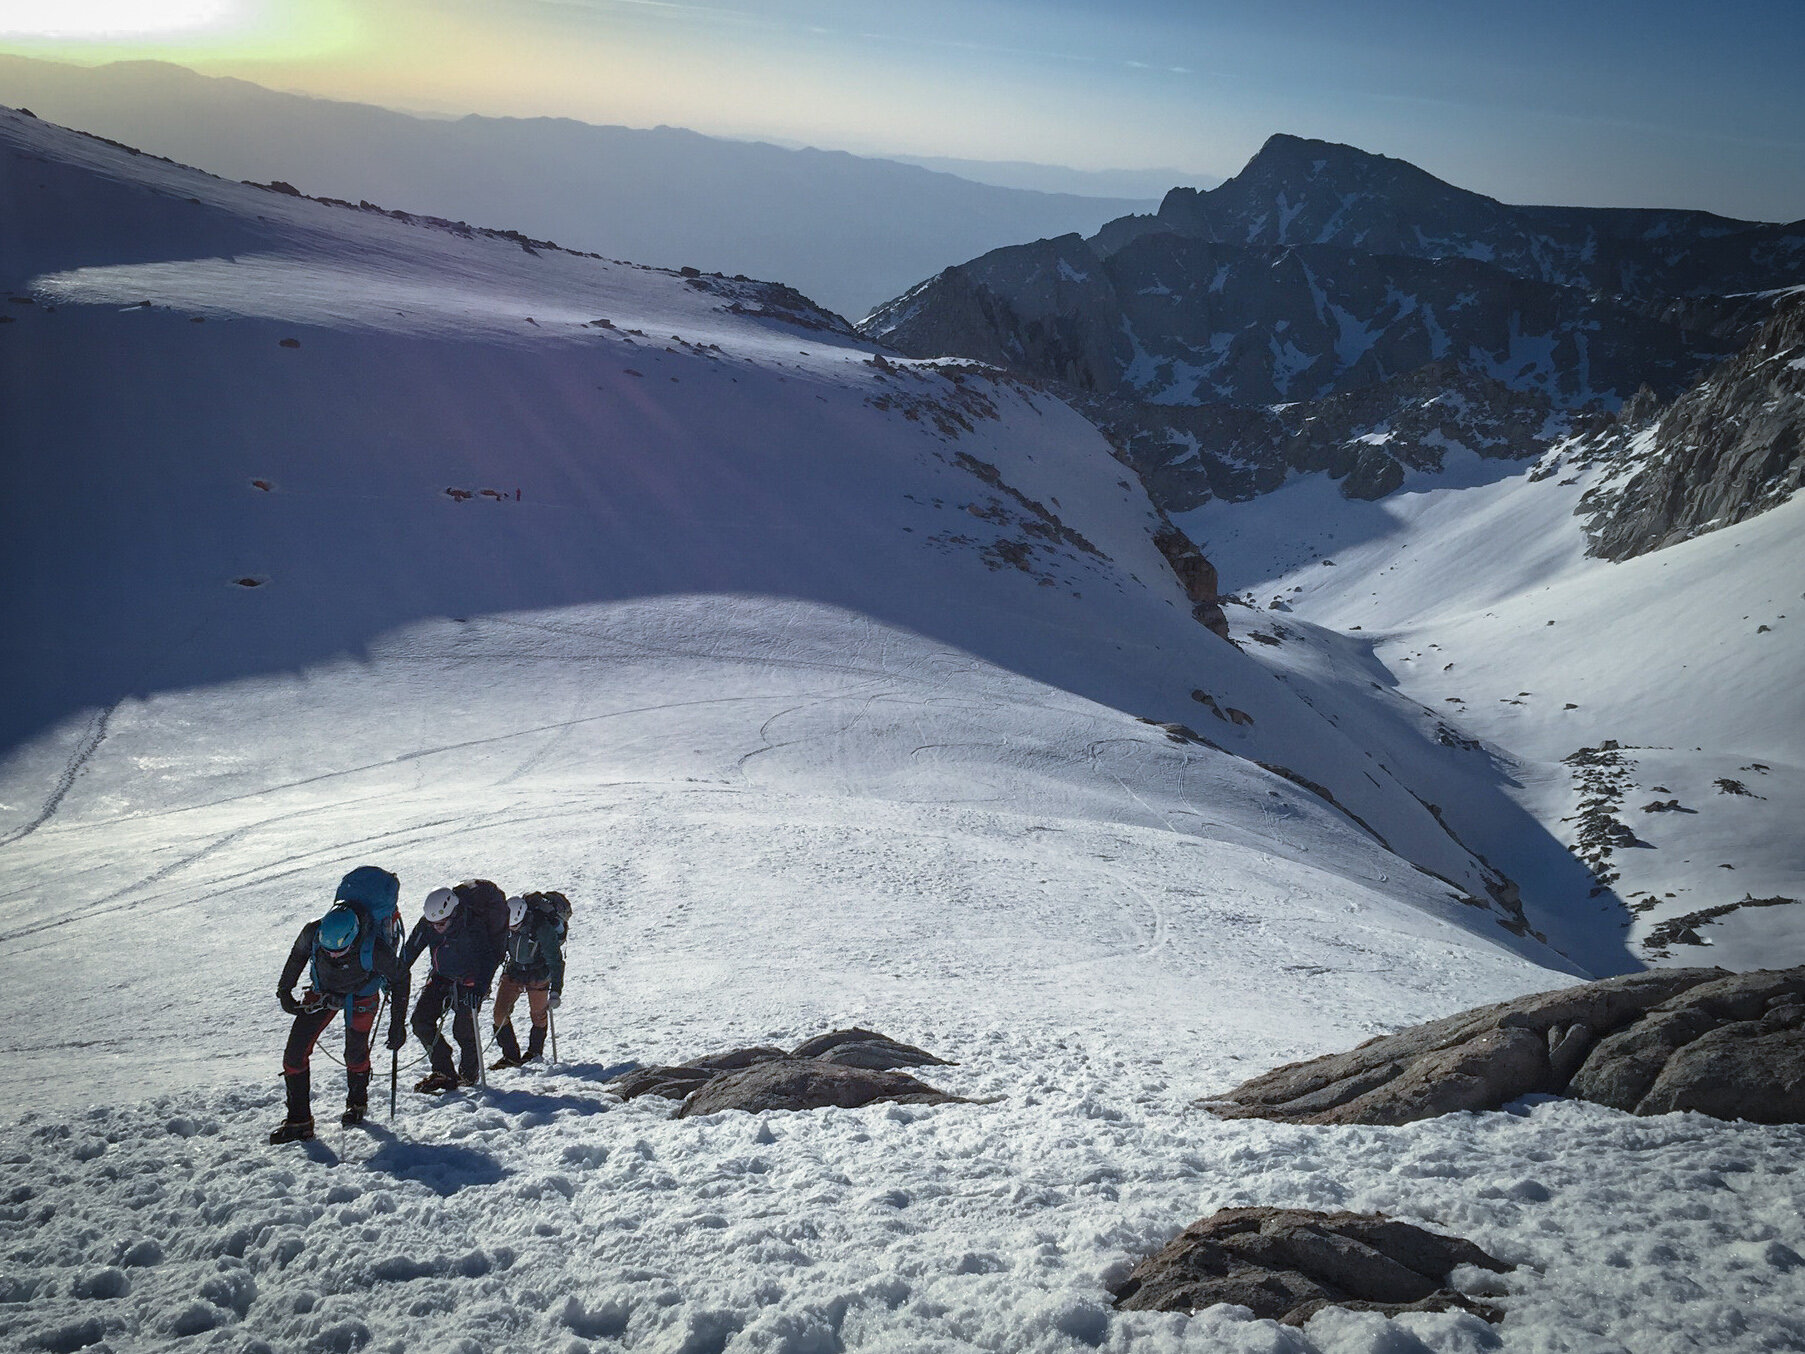
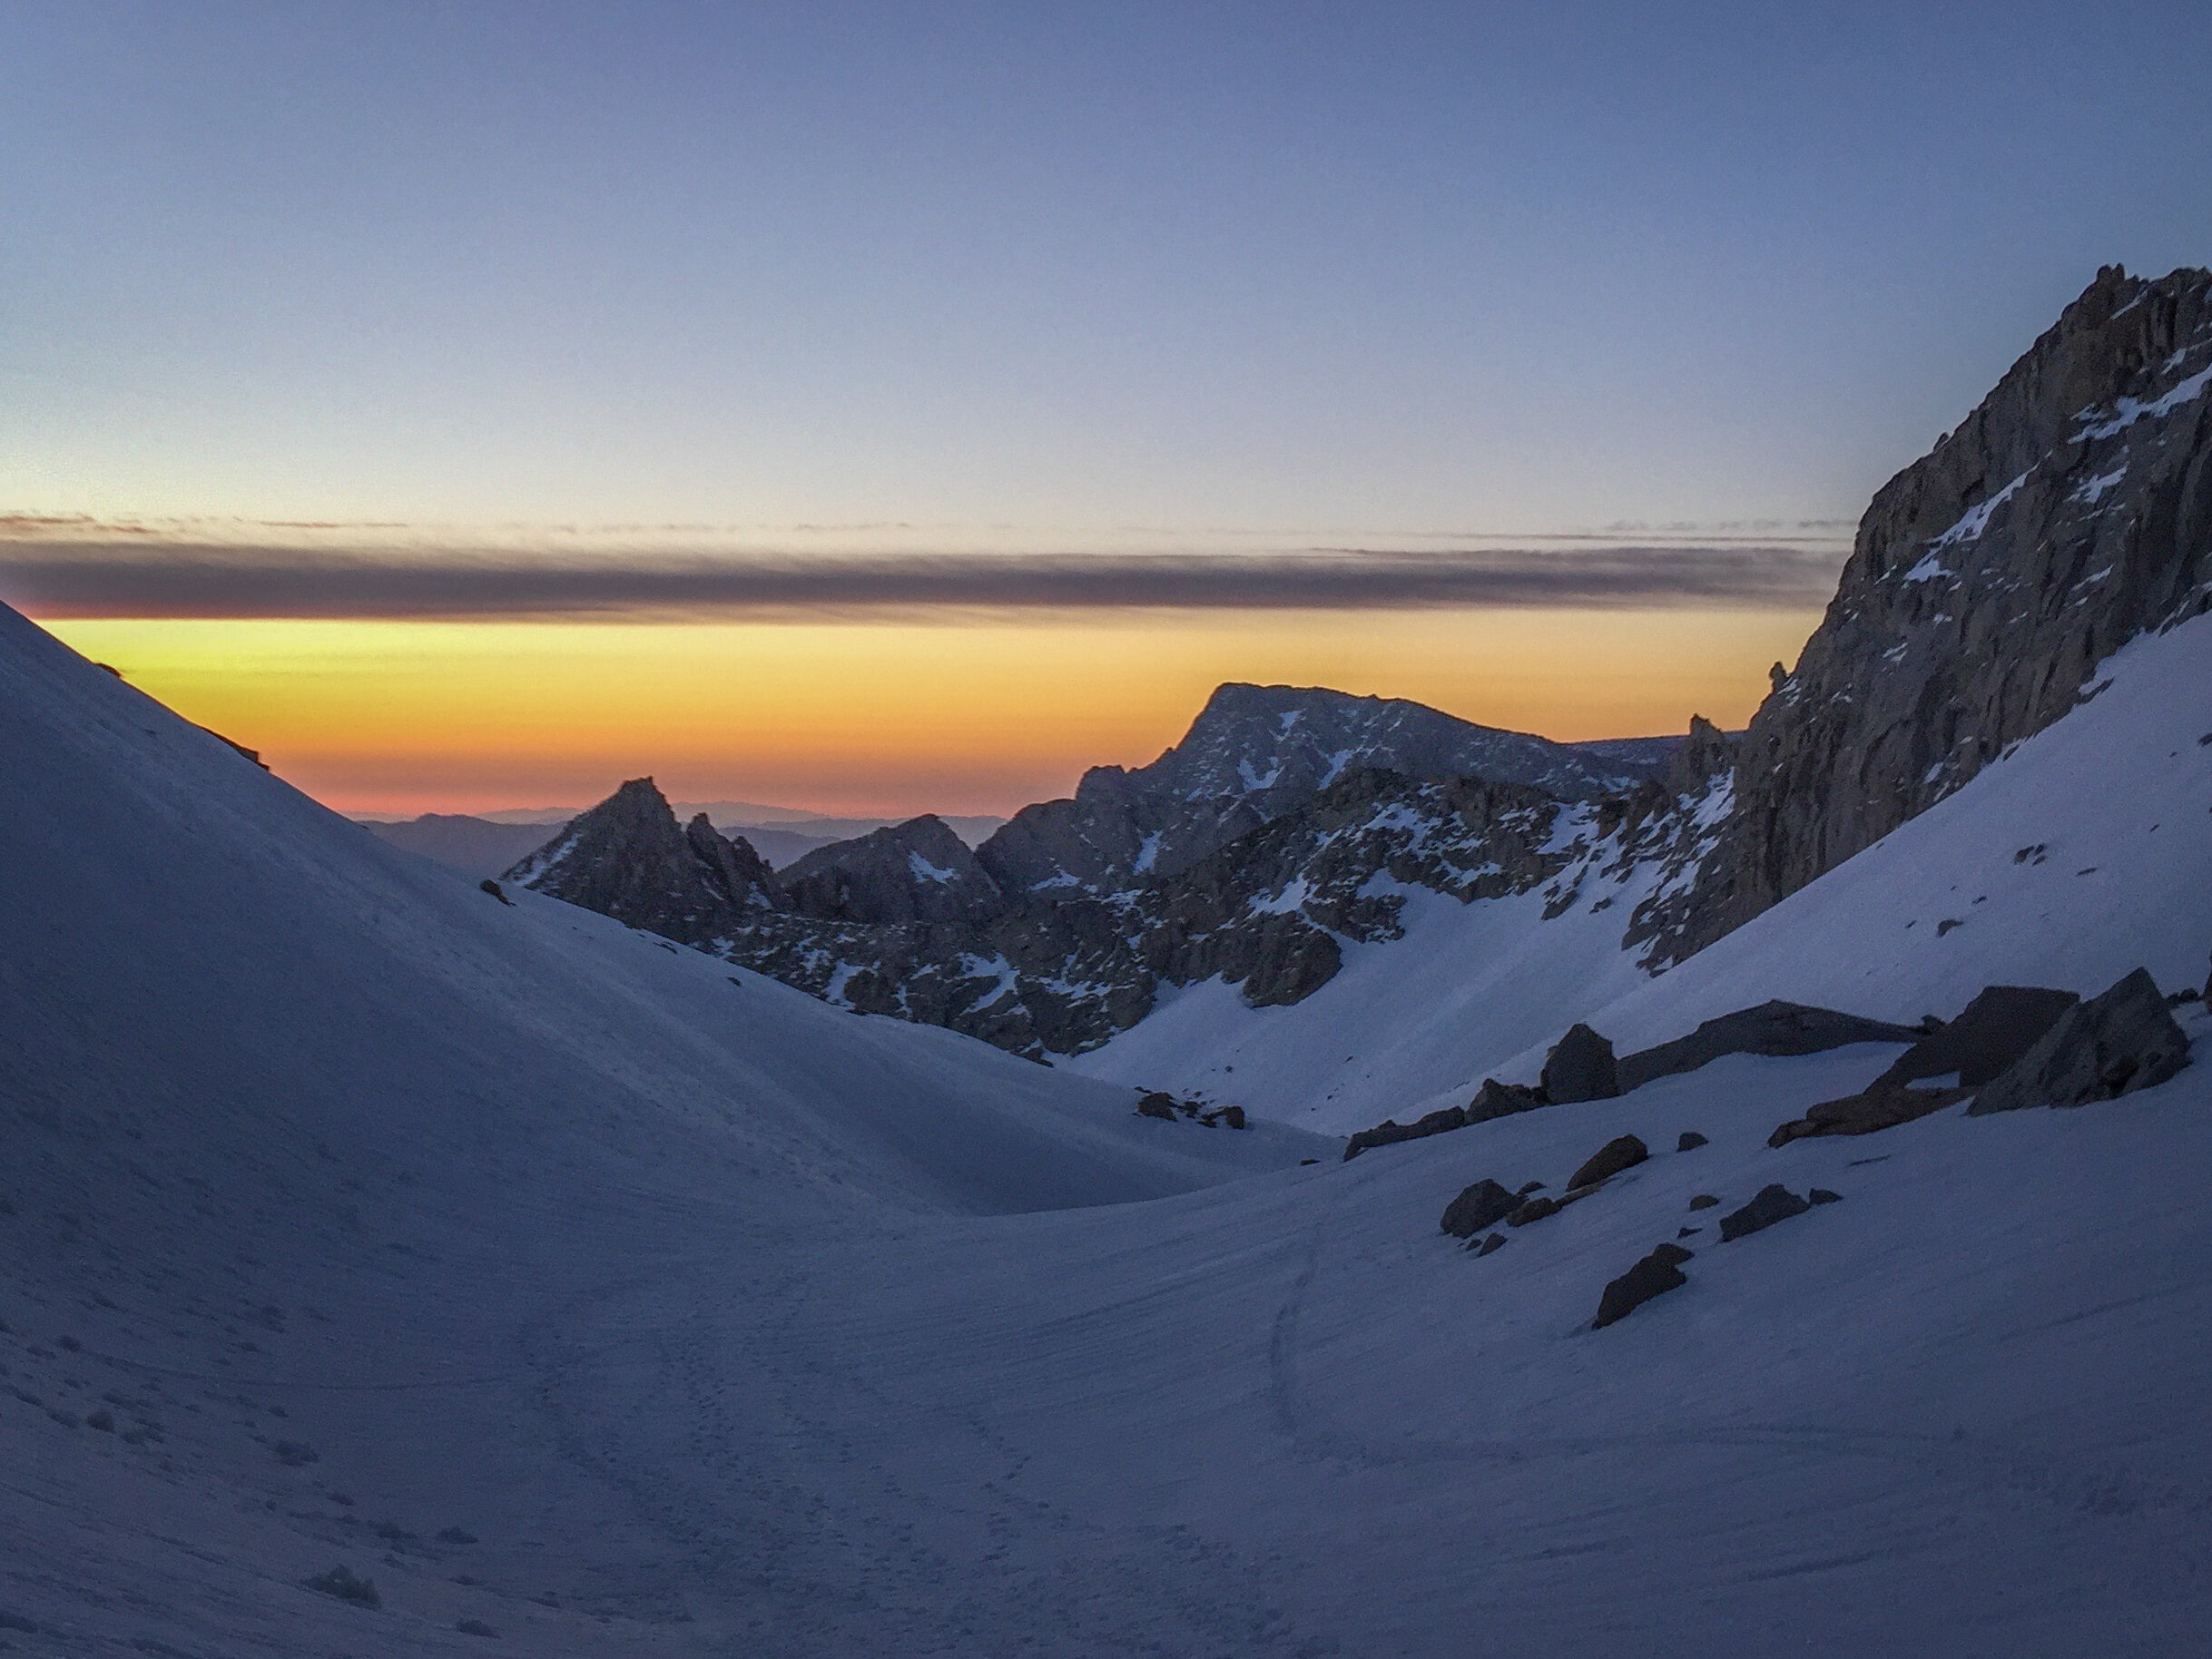
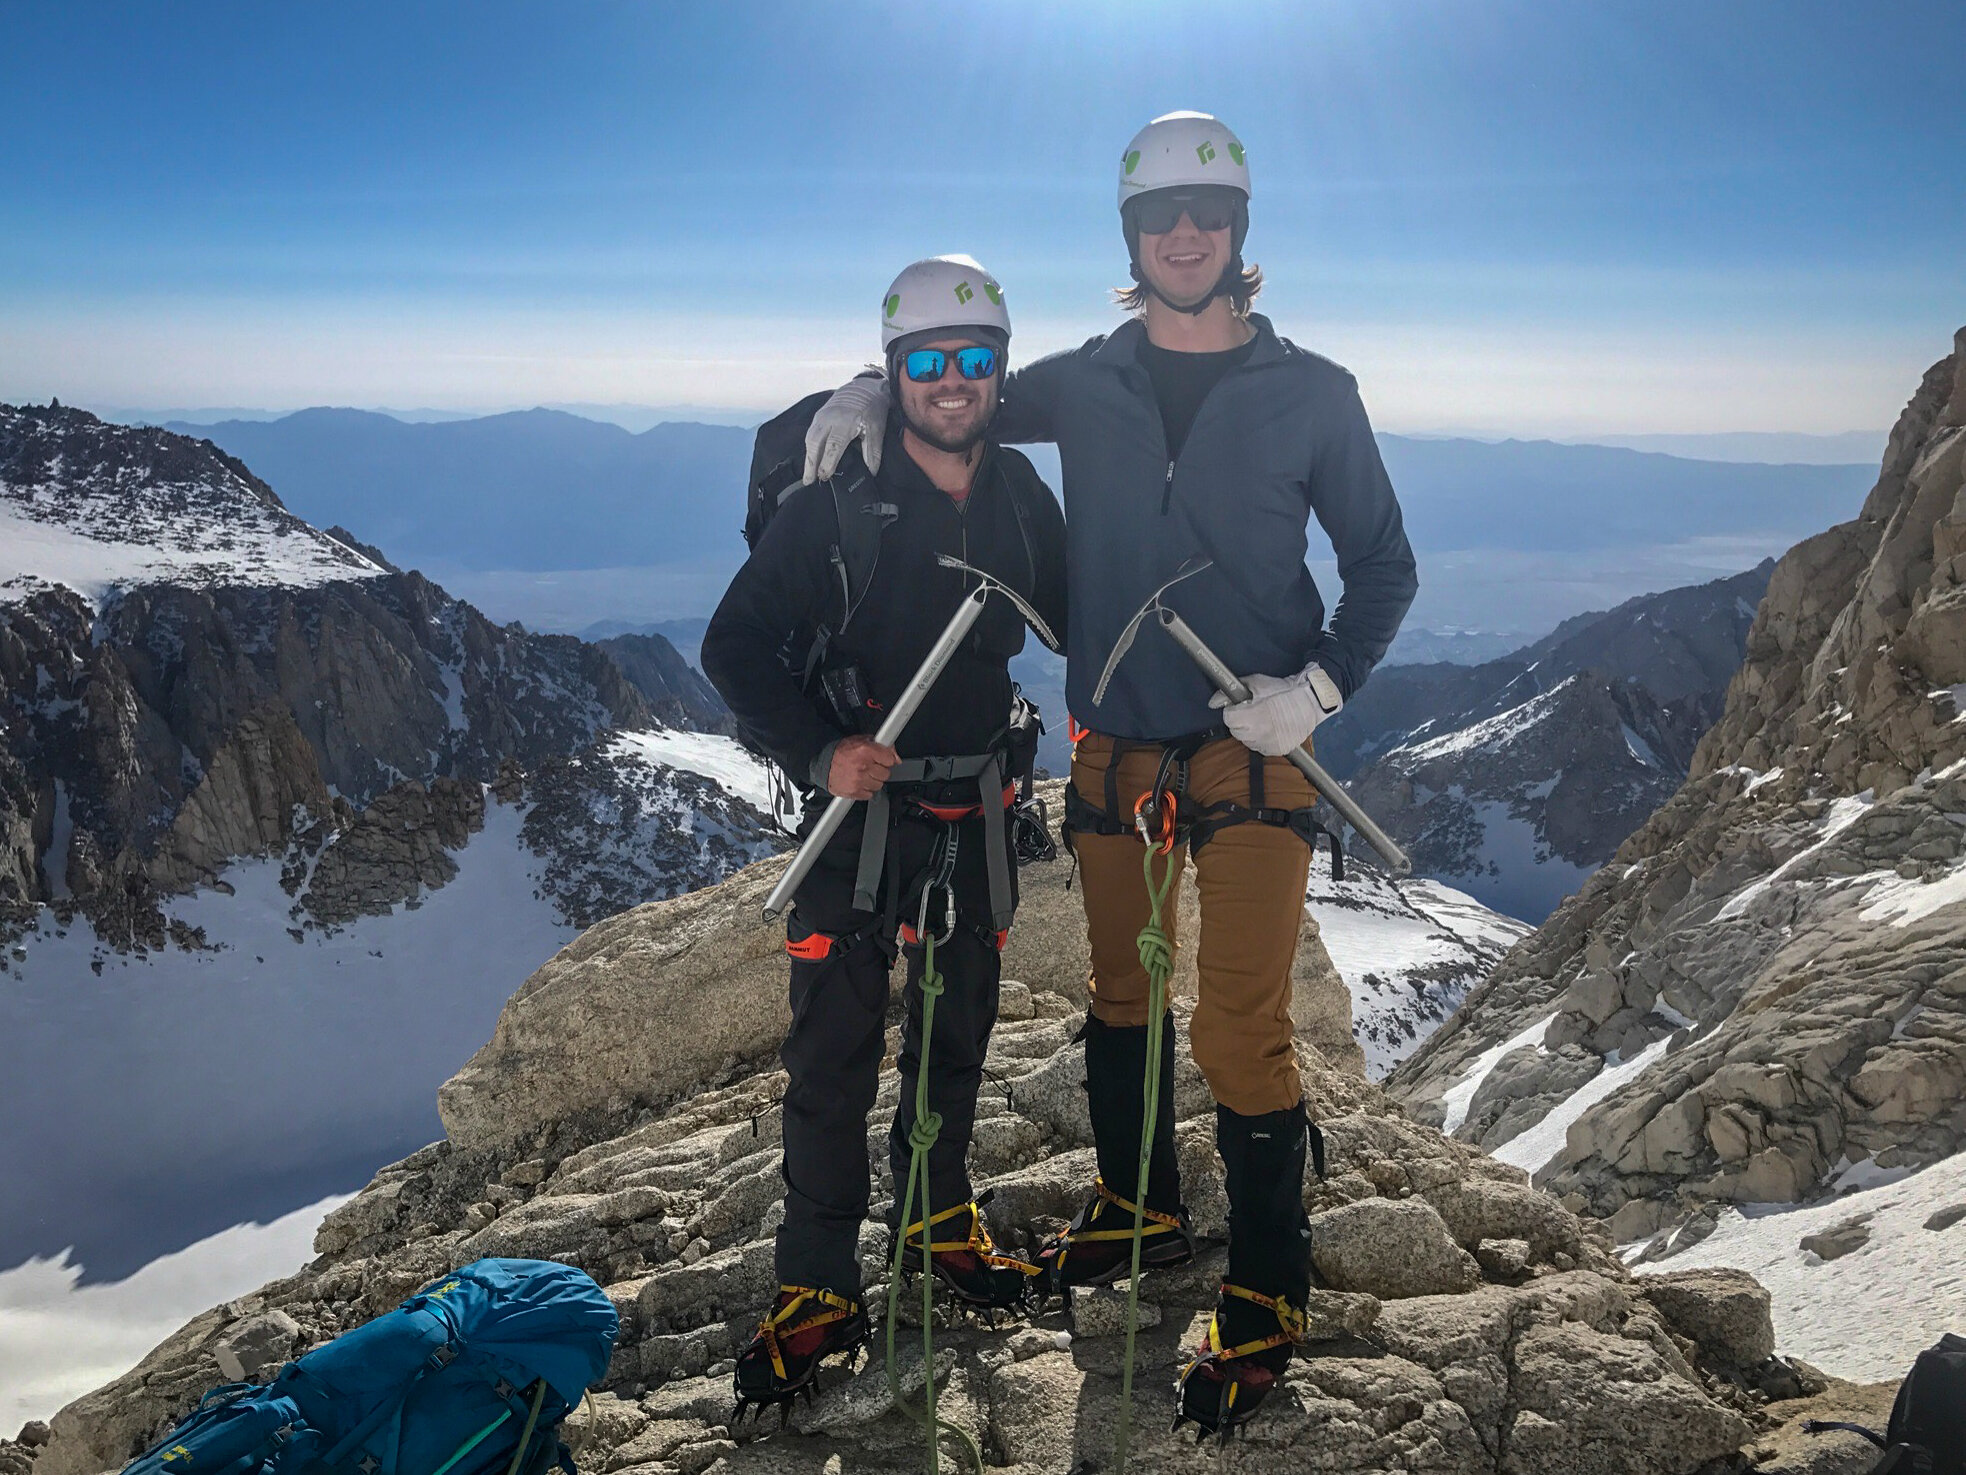
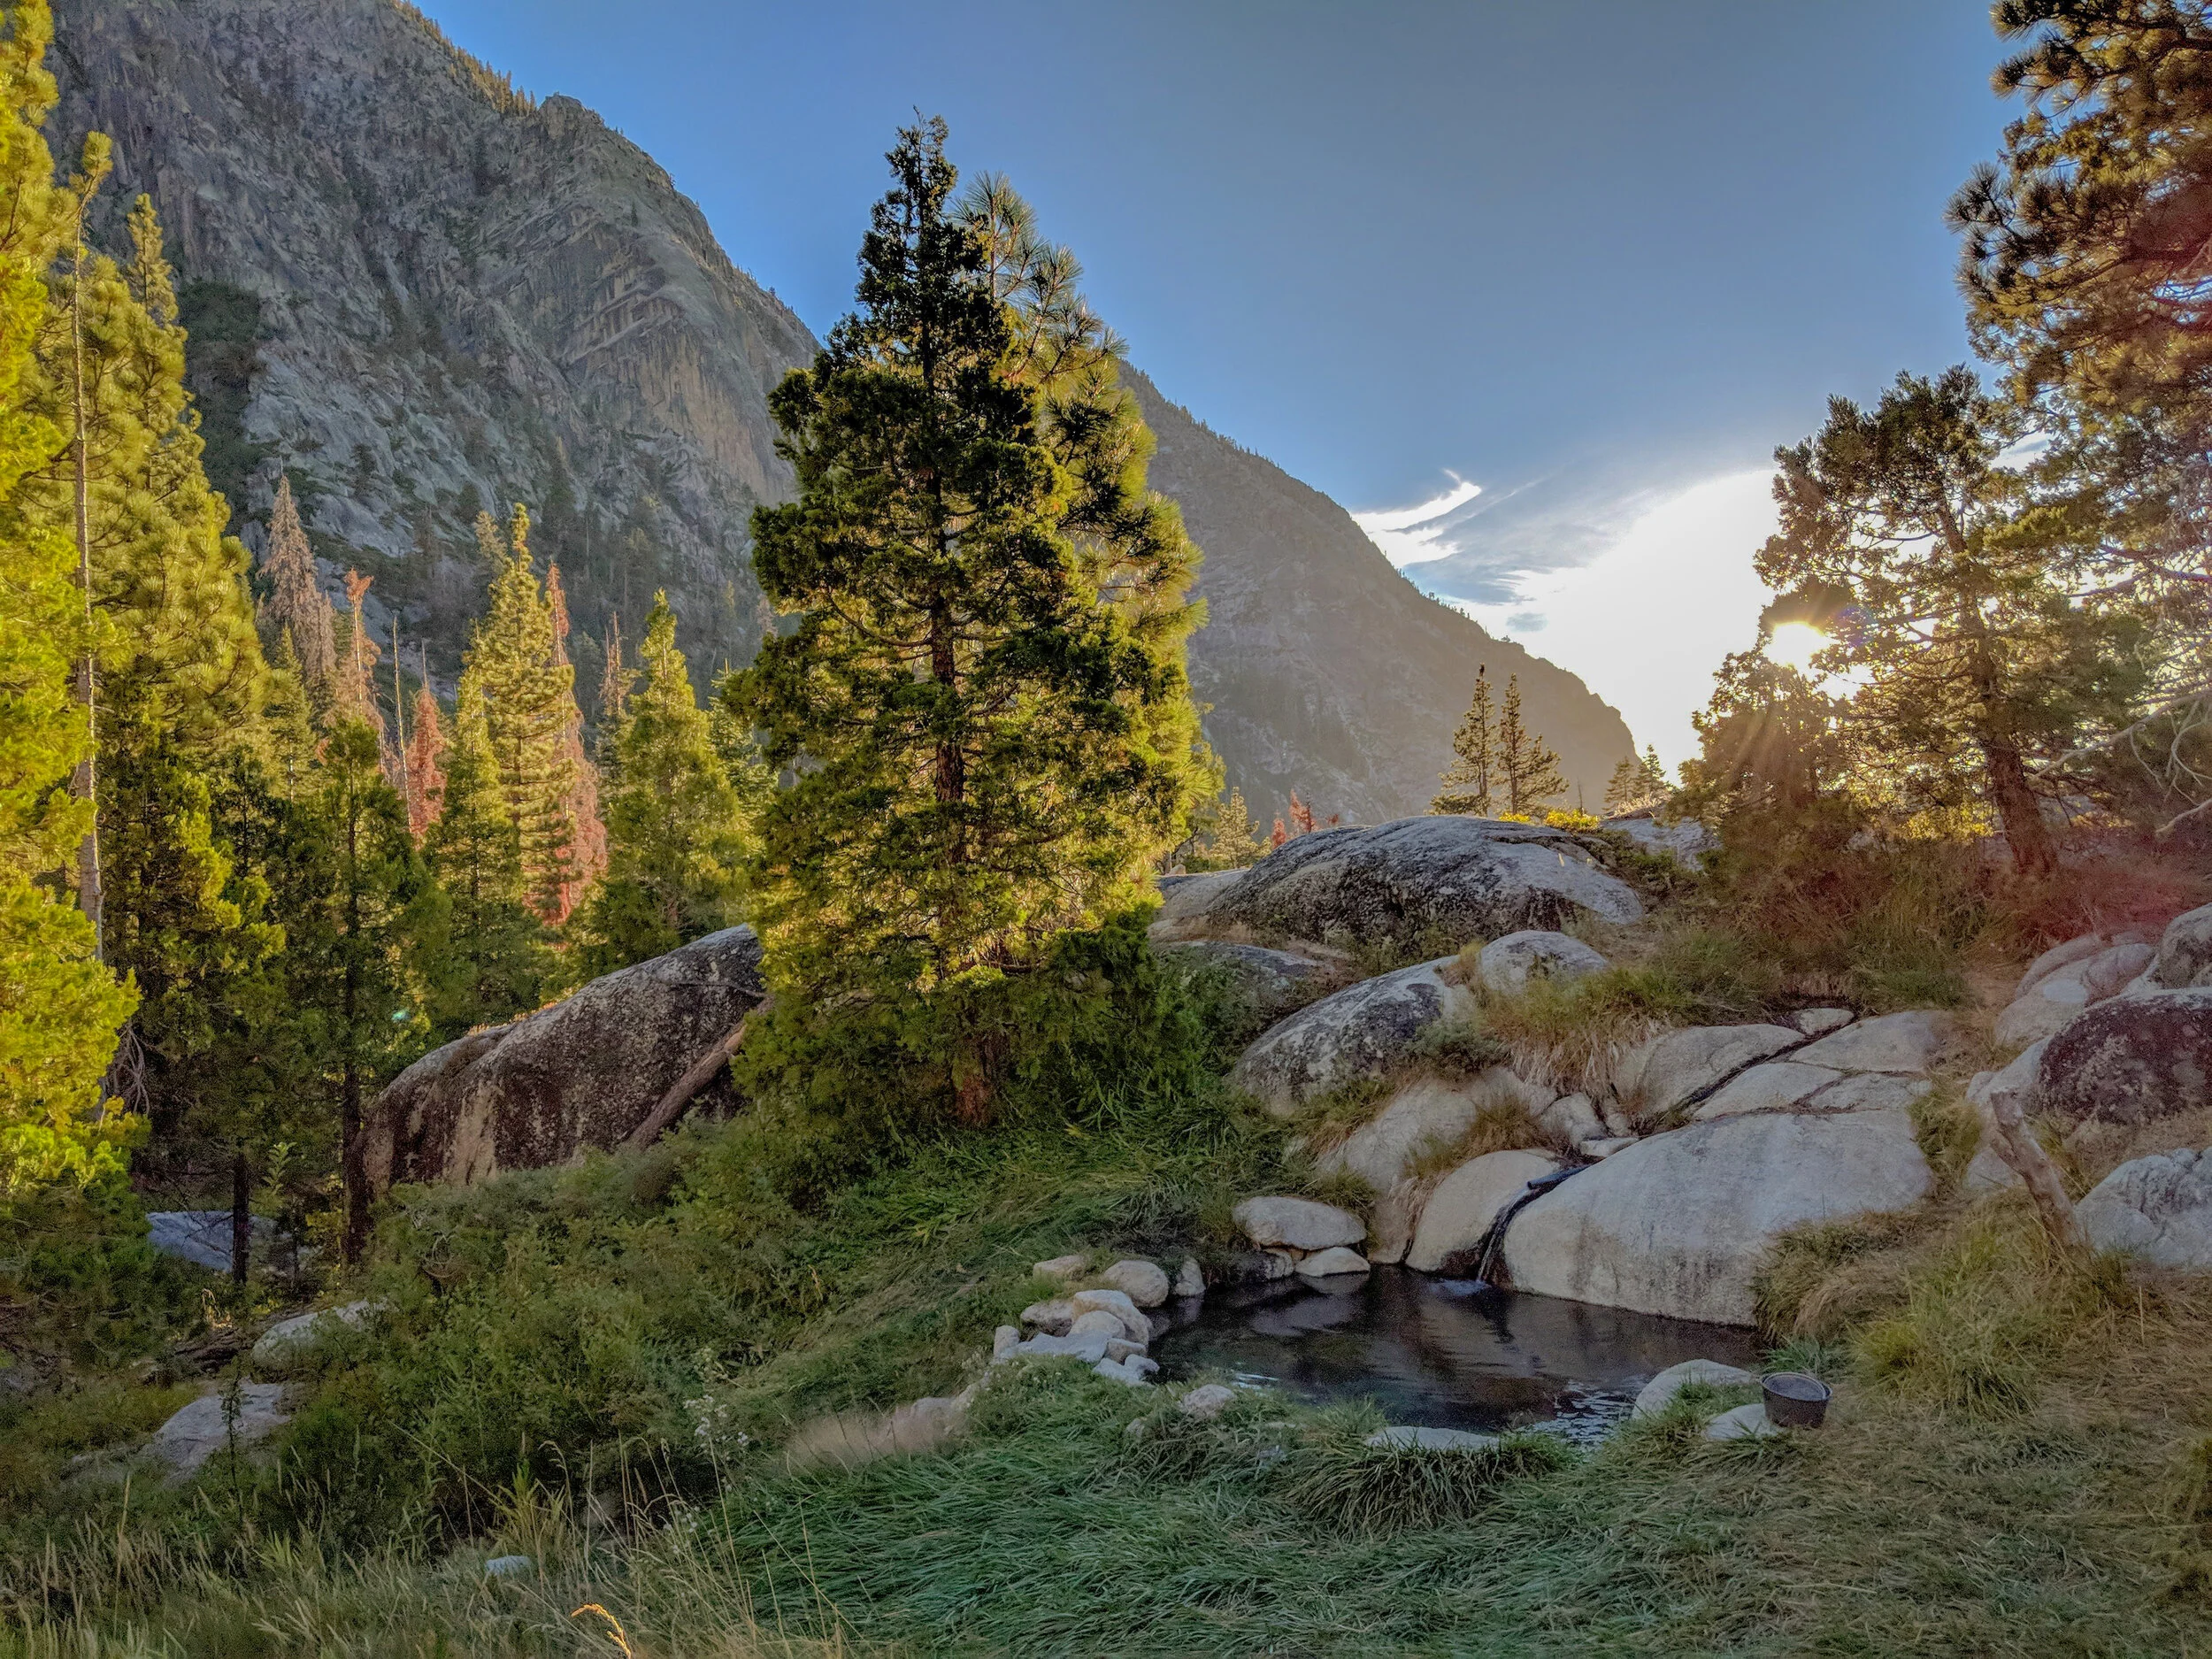
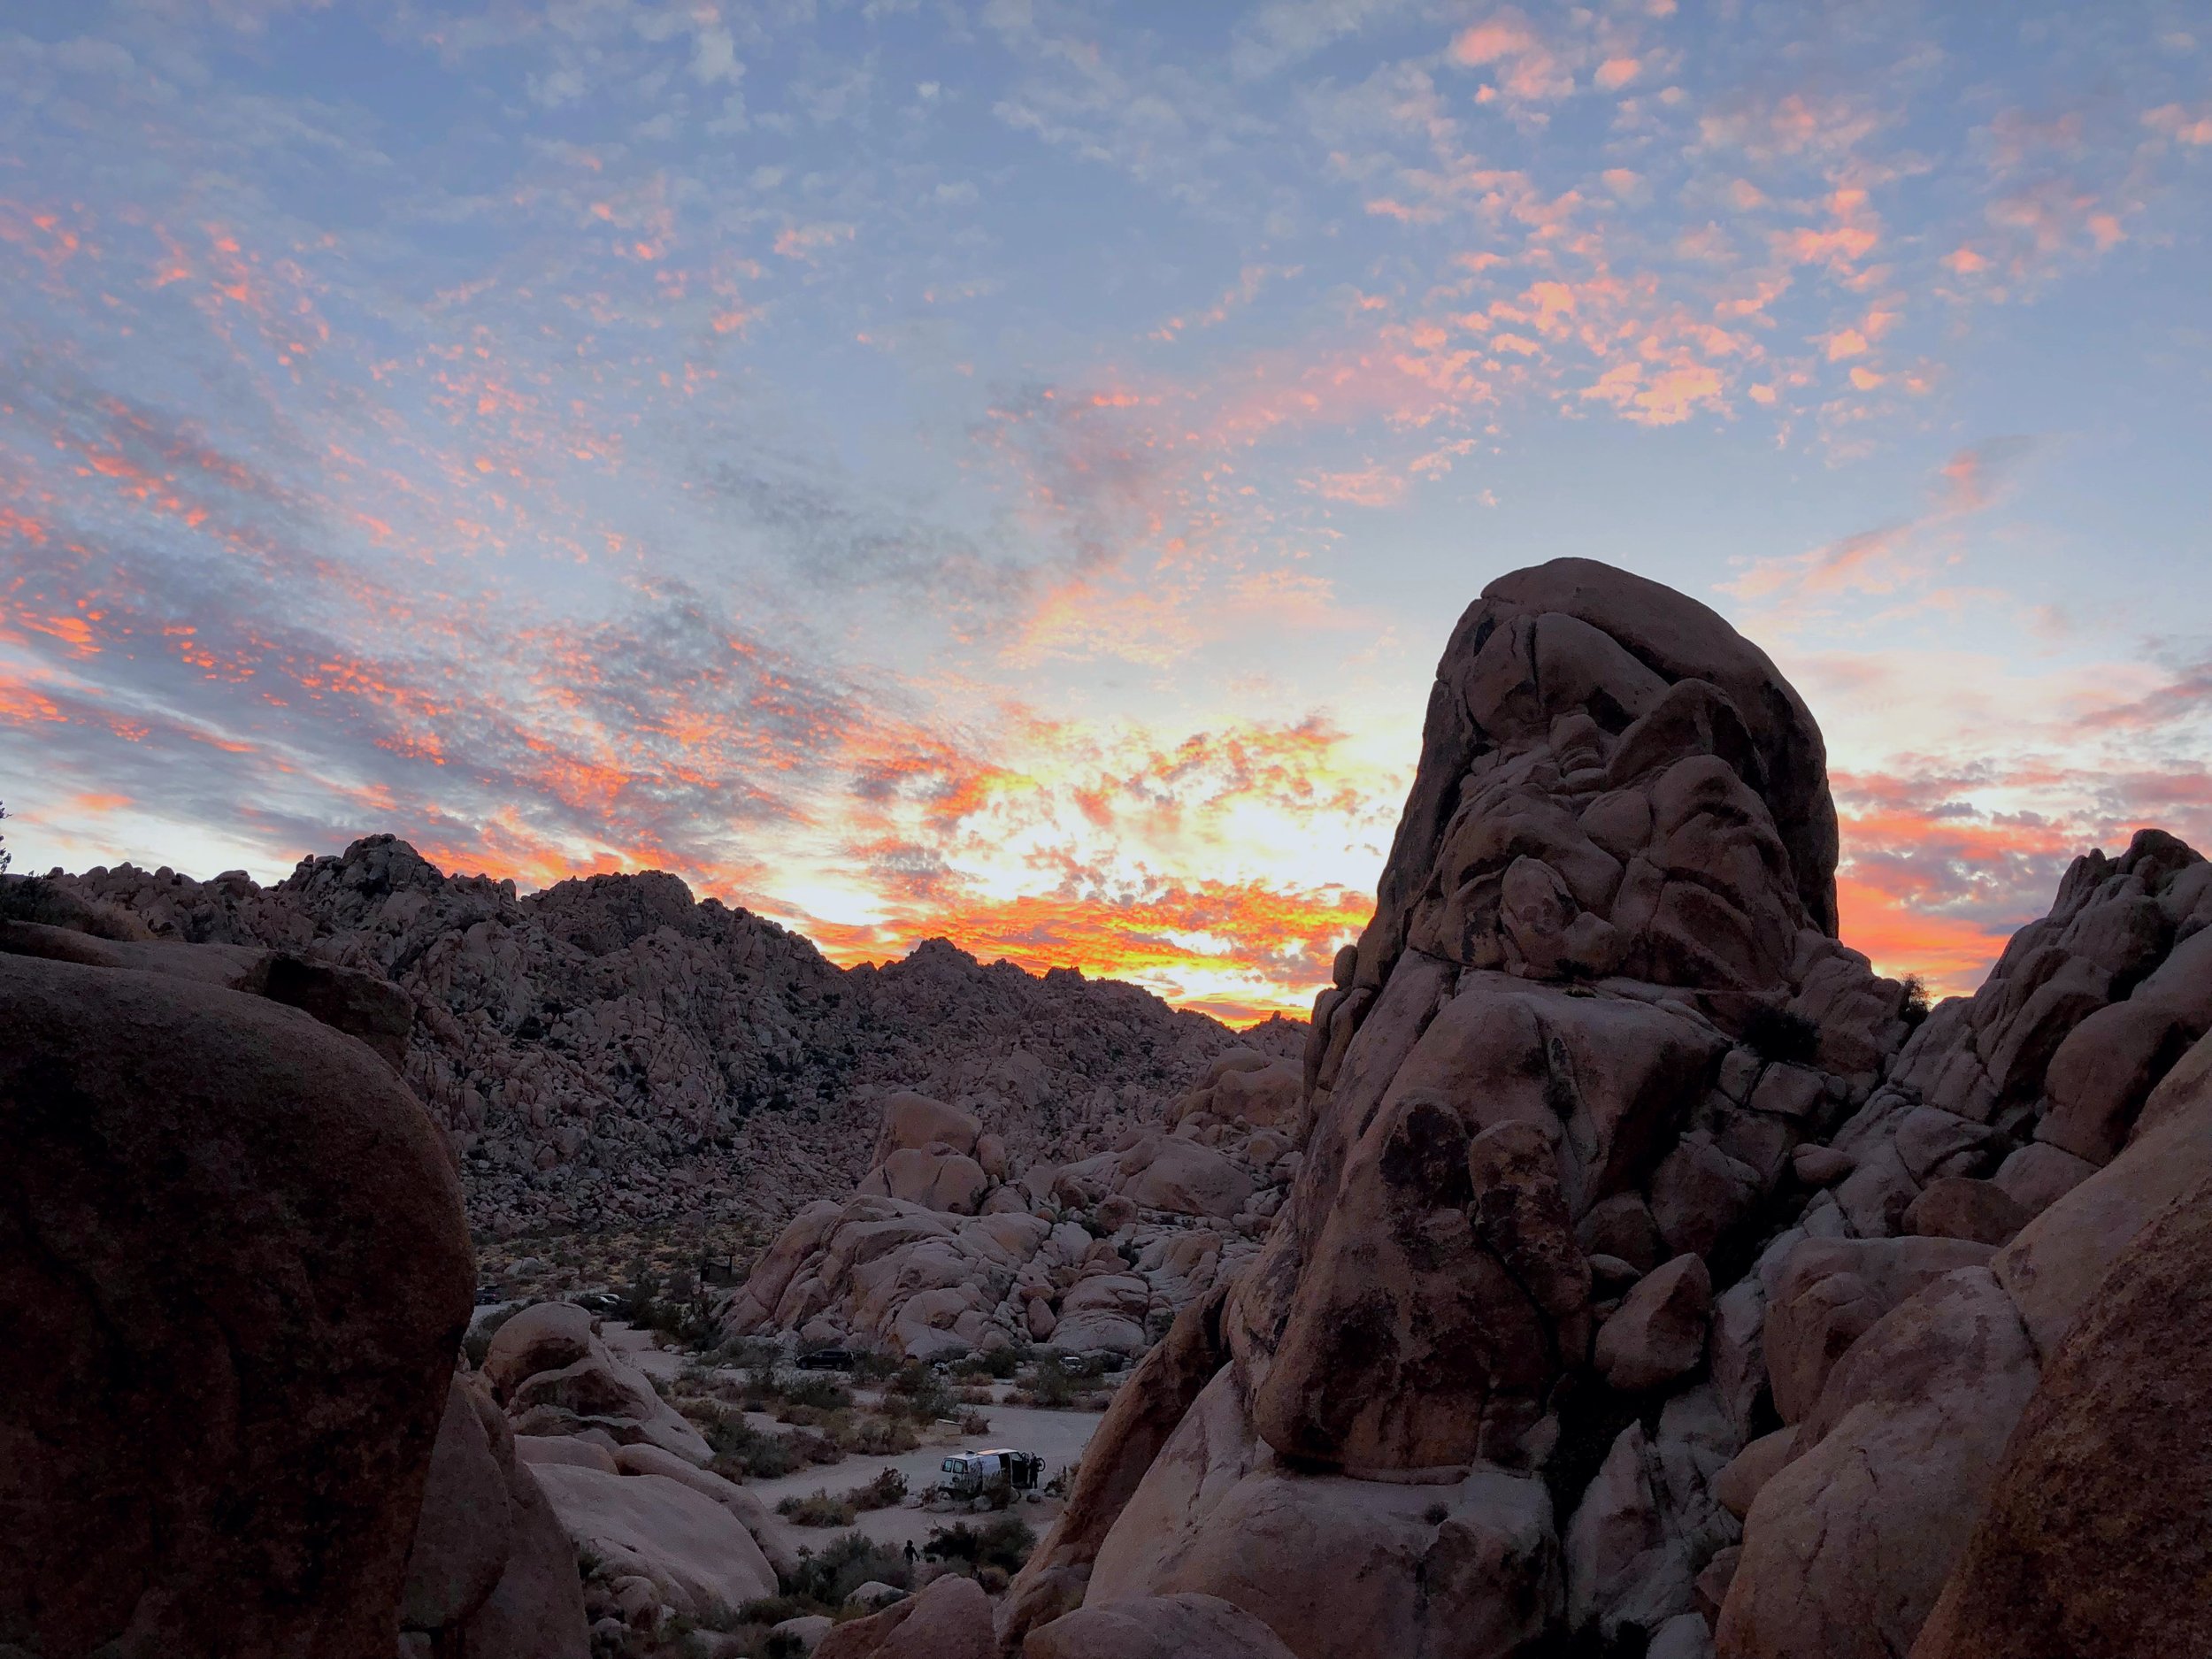
Photo: For obvious reasons, seeing this vivid sunrise over the blue Sierra mountain landscape was one of the most magnificent and serene moments of our entire experience.
Our Budget - Mt. Whitney Mountaineering using a guide service
Guide Fees:
2-day - $500-600 (plus 20% tip)
3-day - $700-800 (plus 20% tip)
4-day - $1000 (plus 20% tip)
Gear Rentals:
Avalanche Transceiver ($10), mountaineering boots ($20), crampons ($10), thick down jacket ($20), helmet ($10), ice axe ($10), sleeping bag rated for mountain temperatures ($20), trekking poles ($10) = $110 total
Additional Mandatory Gear:
Waterproof gaiters, waterproof/synthetic climbing pants (can't be a slick material like a common ski pant, which would facilitate sliding), synthetic or waterproof t-shirts/jackets/thermals, waterproofing spray, climbing harness, webbing & carabiners
To state the obvious, you won't want to have a single item of cotton in your pack; it’s going to be too cold, wet, spacious and heavy.
Optional but Recommended:
World Nomads Trip insurance - covers you in high altitudes with extreme activities, all medical and evacuation costs up to $1 mil (some insurance carriers don't cover) - $80
Total Expenses for a Mt. Whitney Guided Trip
2-day trip - $540 ; Gear Rentals - $110 ; Additional Gear - $350-400 ; Food & Gas - $150 ; Guide Tip (20%) - $100 = $1,200-1,300
See: Lone Pine Budgets Appendix.
Additional Resources
Route Info:
SummitPost - Mt. Whitney via the Mountaineer’s Route
Weather:
Mountain-Forecast.com - Mt. Whitney
WhitneyZone.com - Mt. Whitney Weather
The Whitney Portal Message Board (look under a discrete section on the right side of the screen that says “Last Post”)
Day Hikes From Whitney Portal That Don't Require a Permit

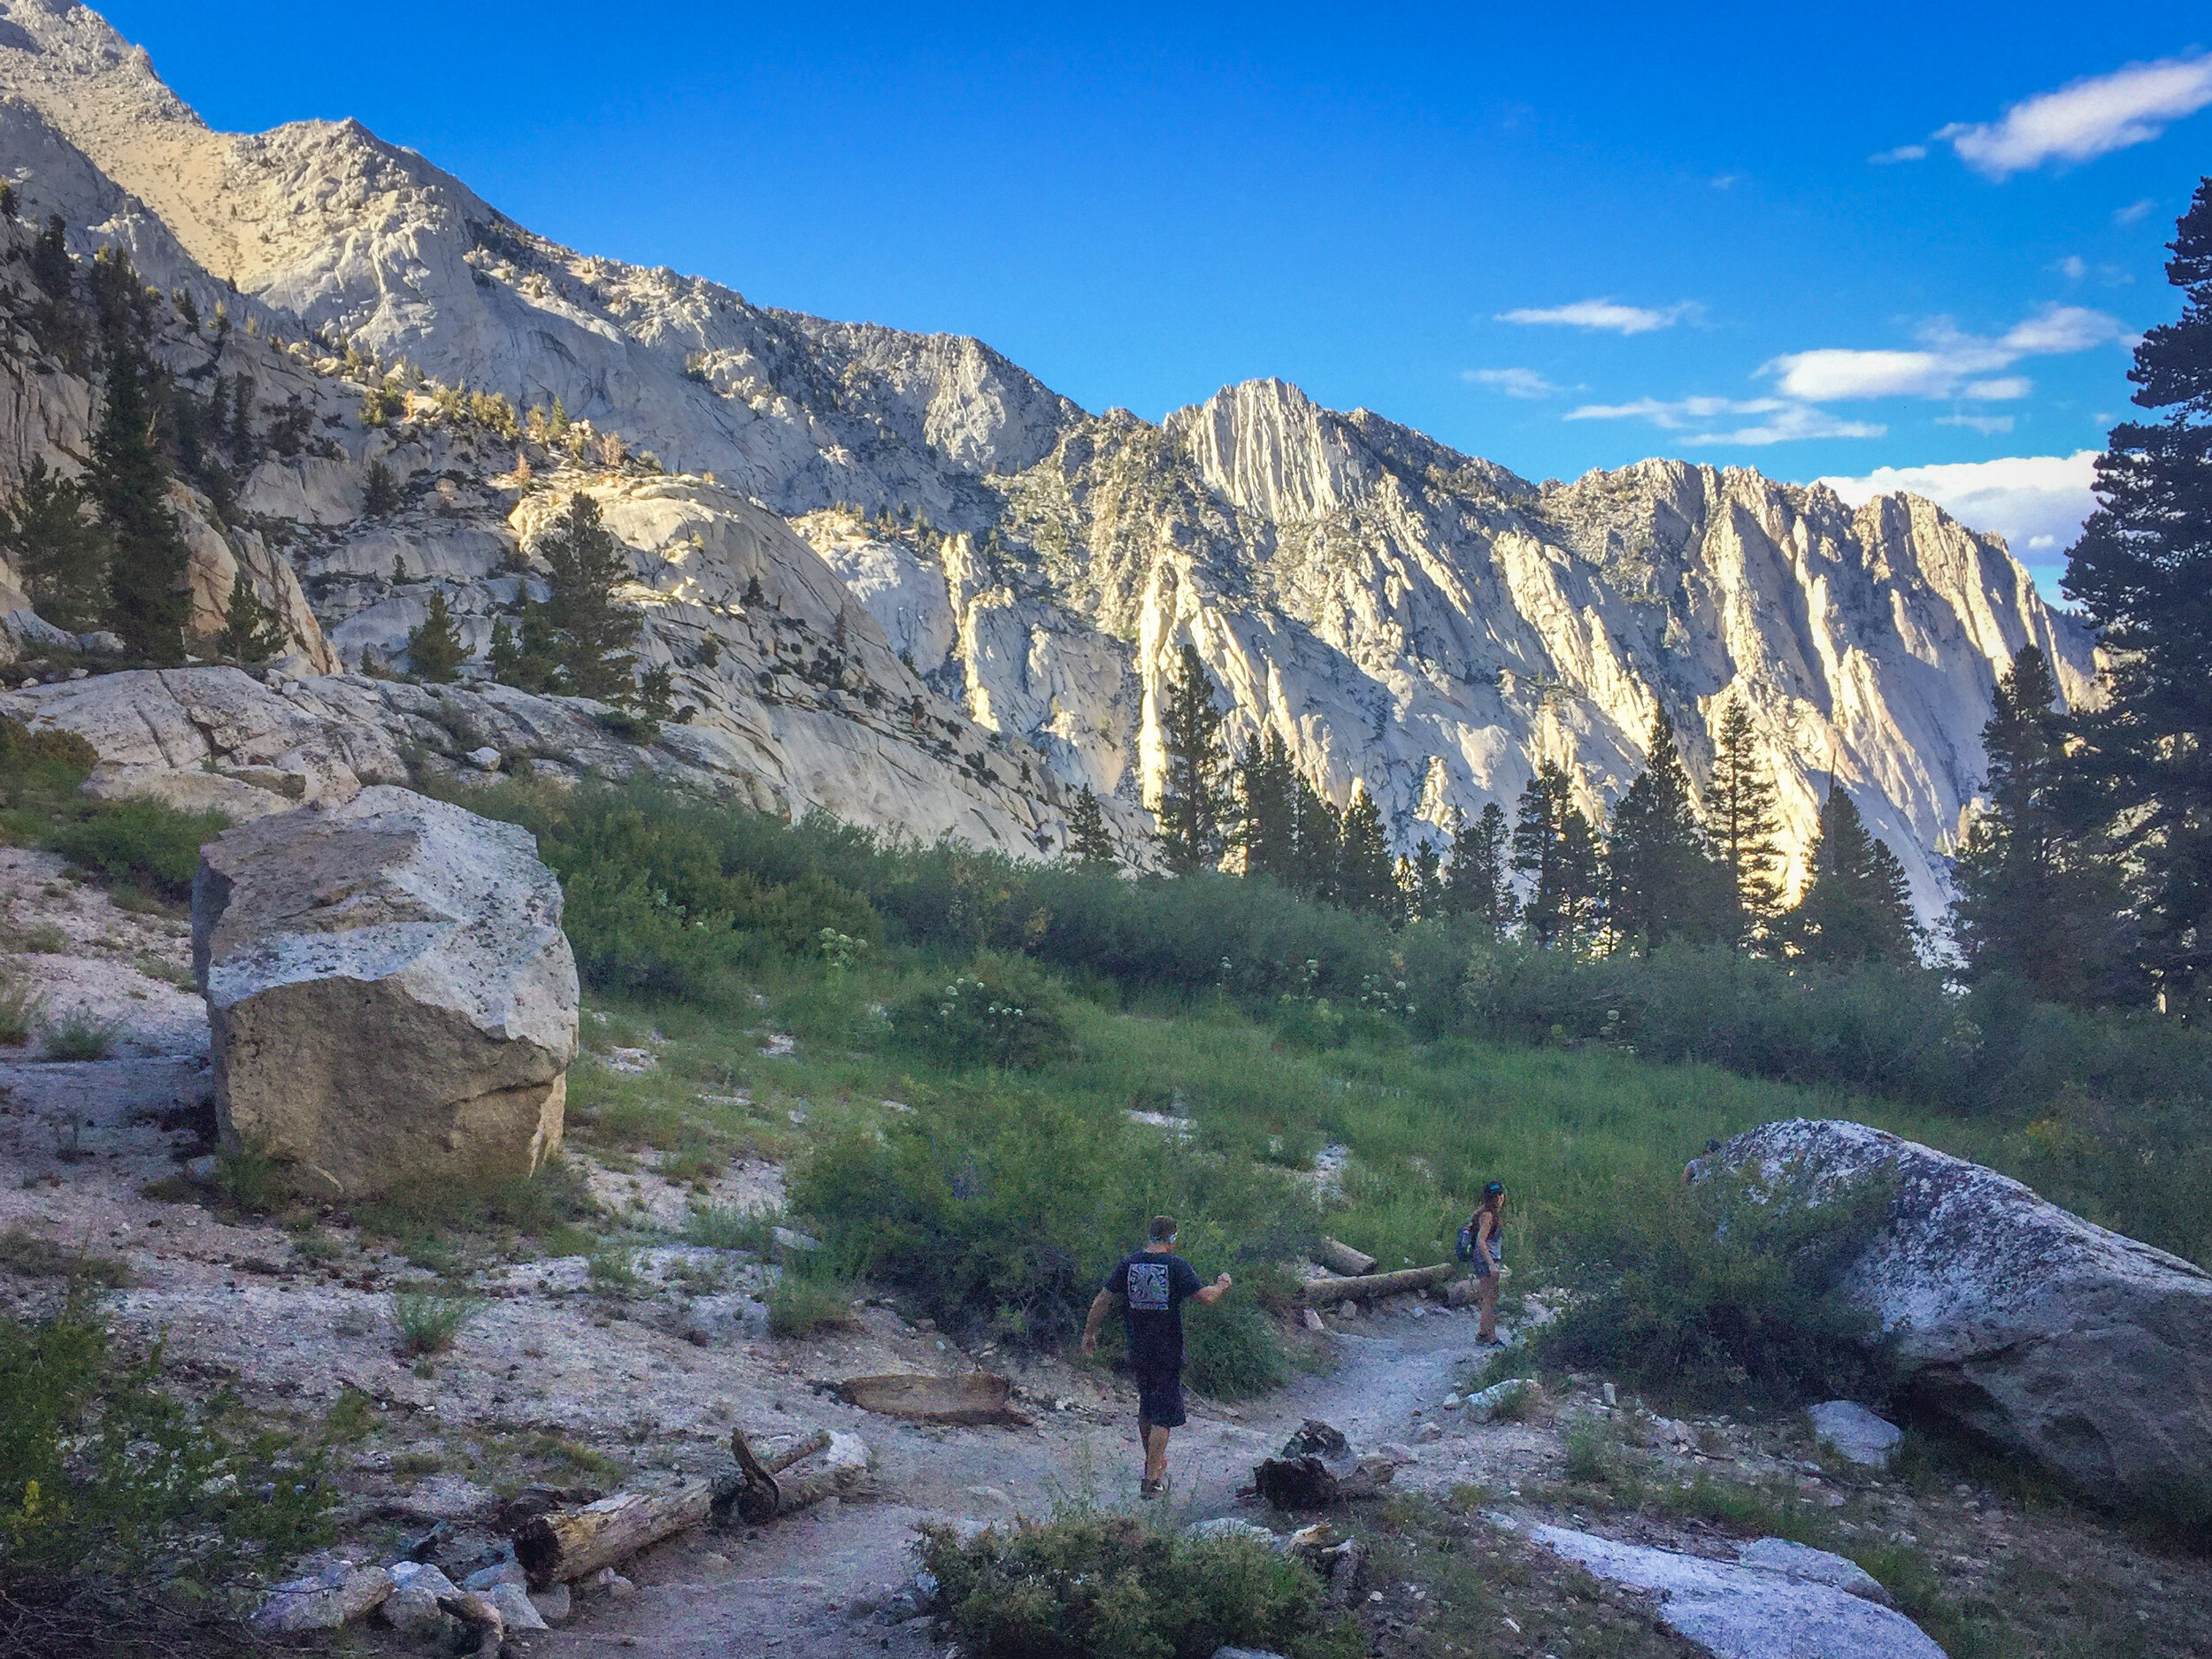
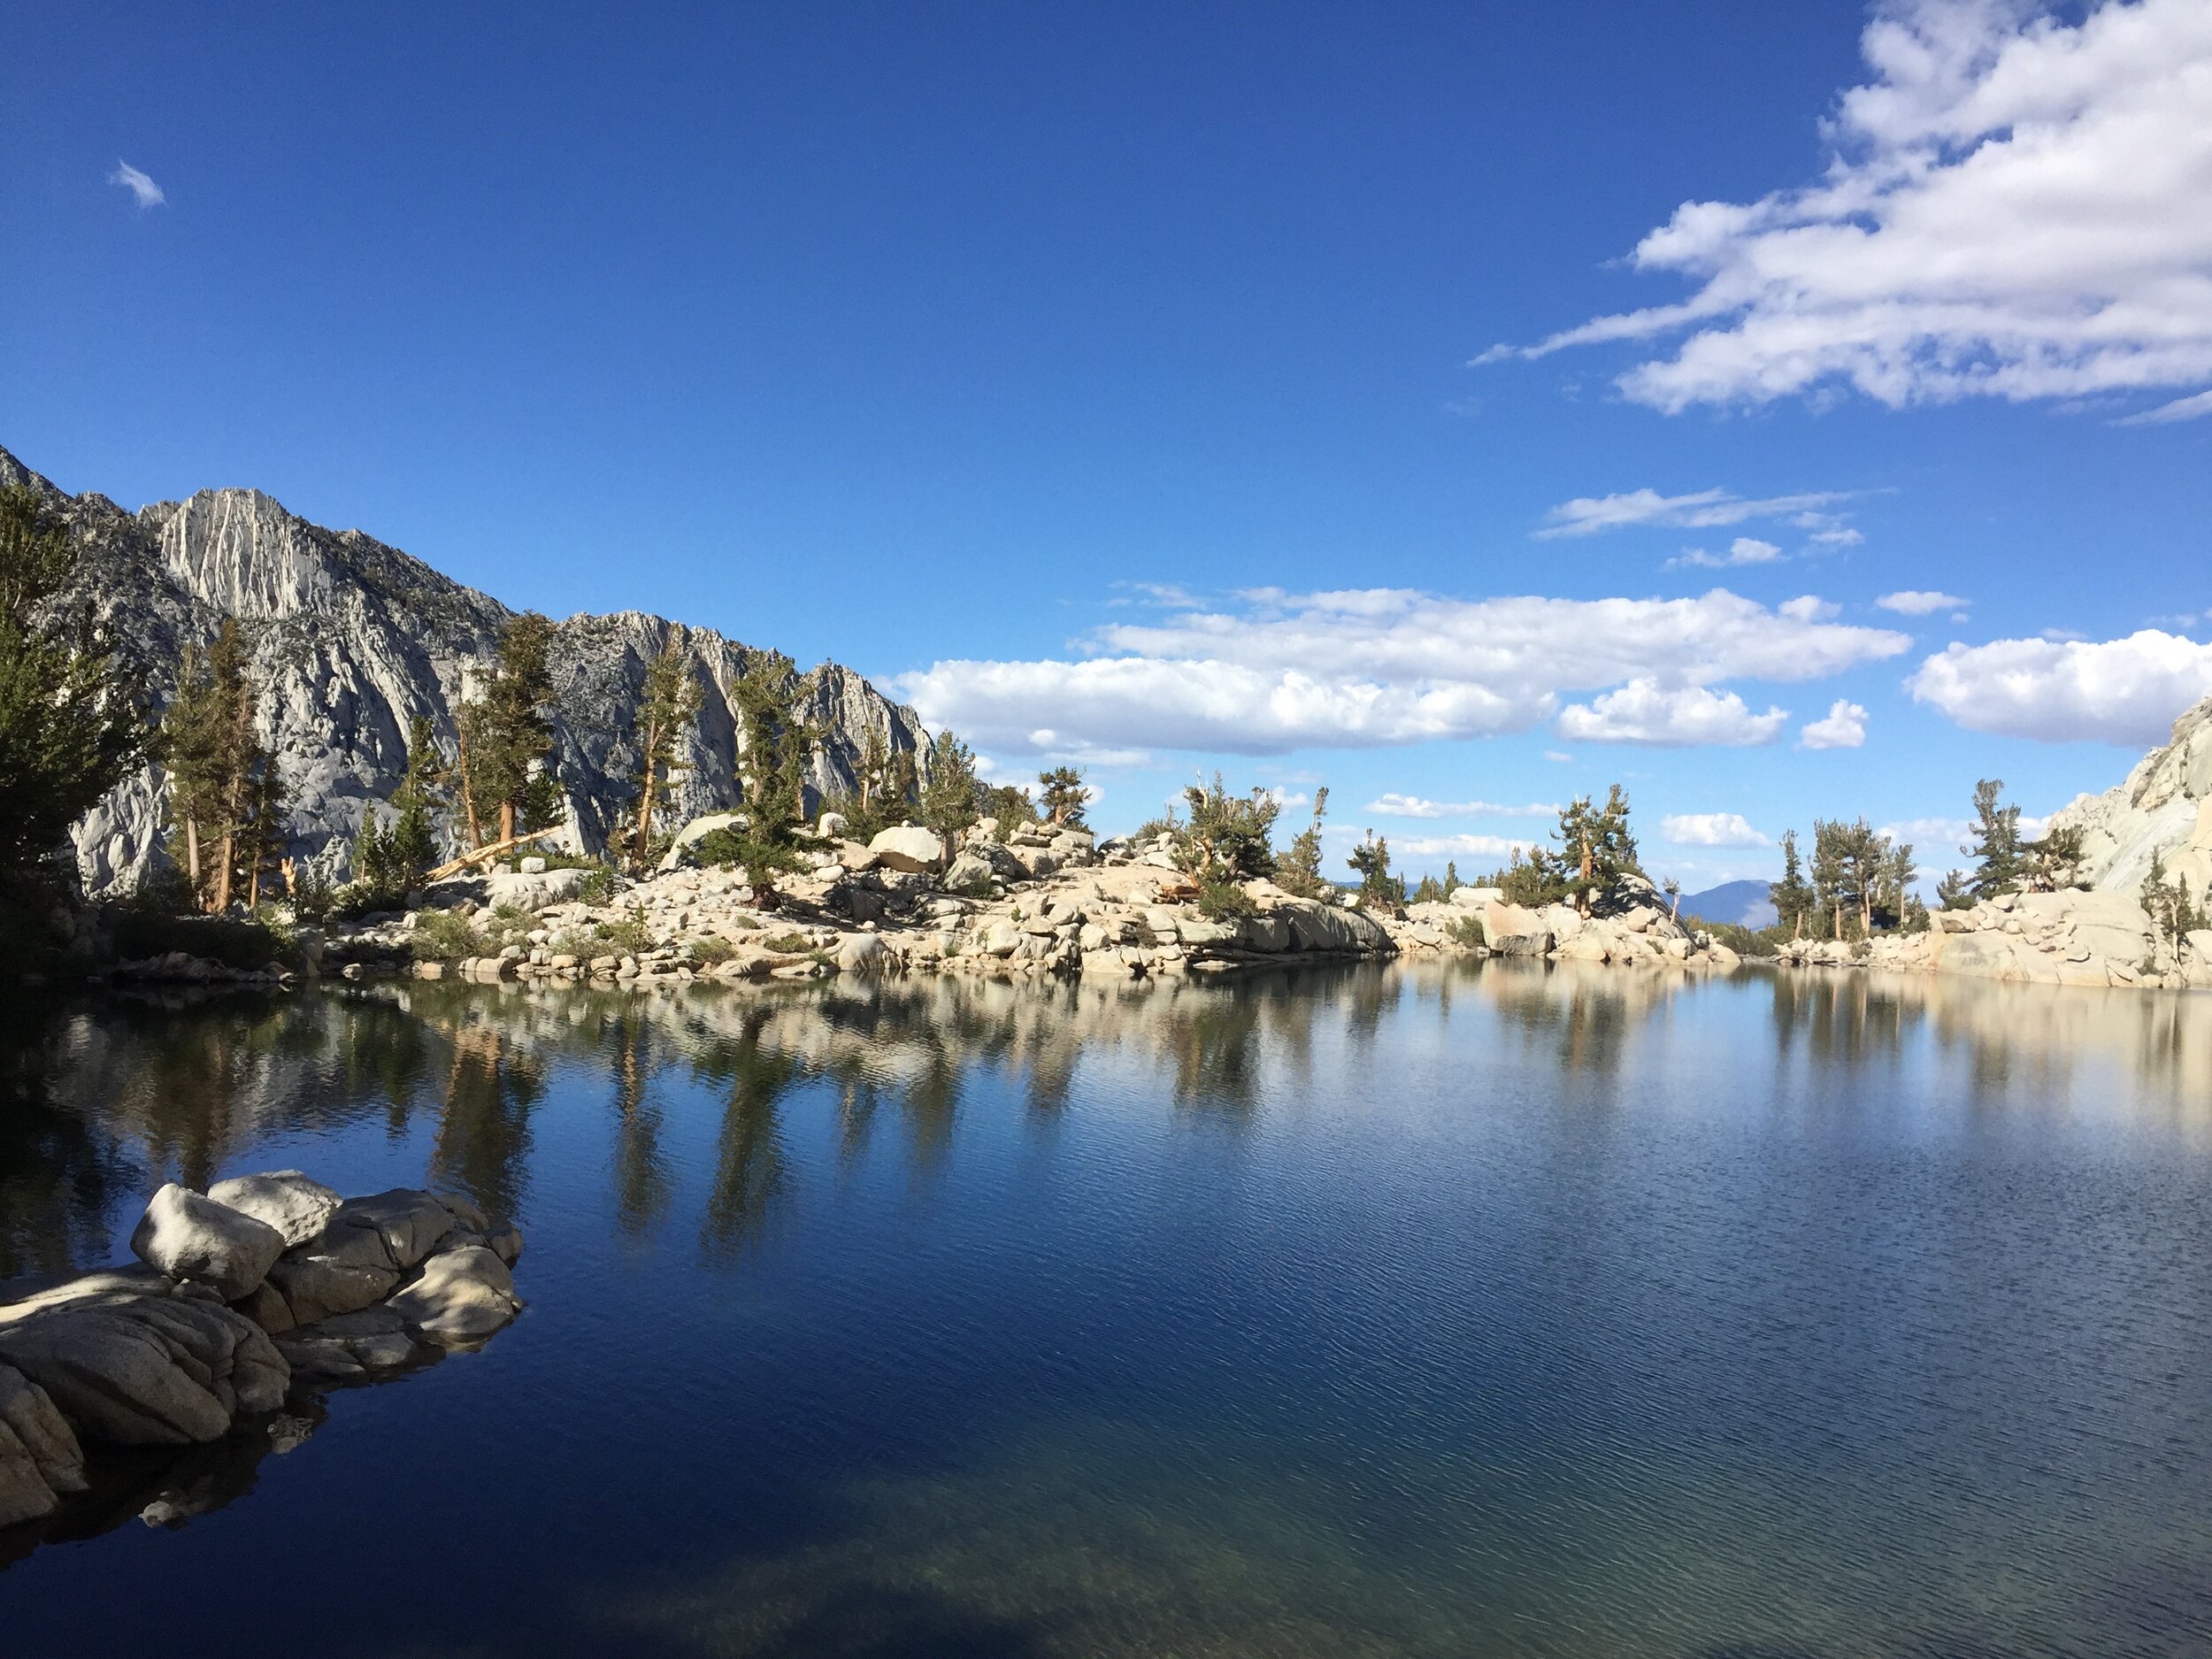
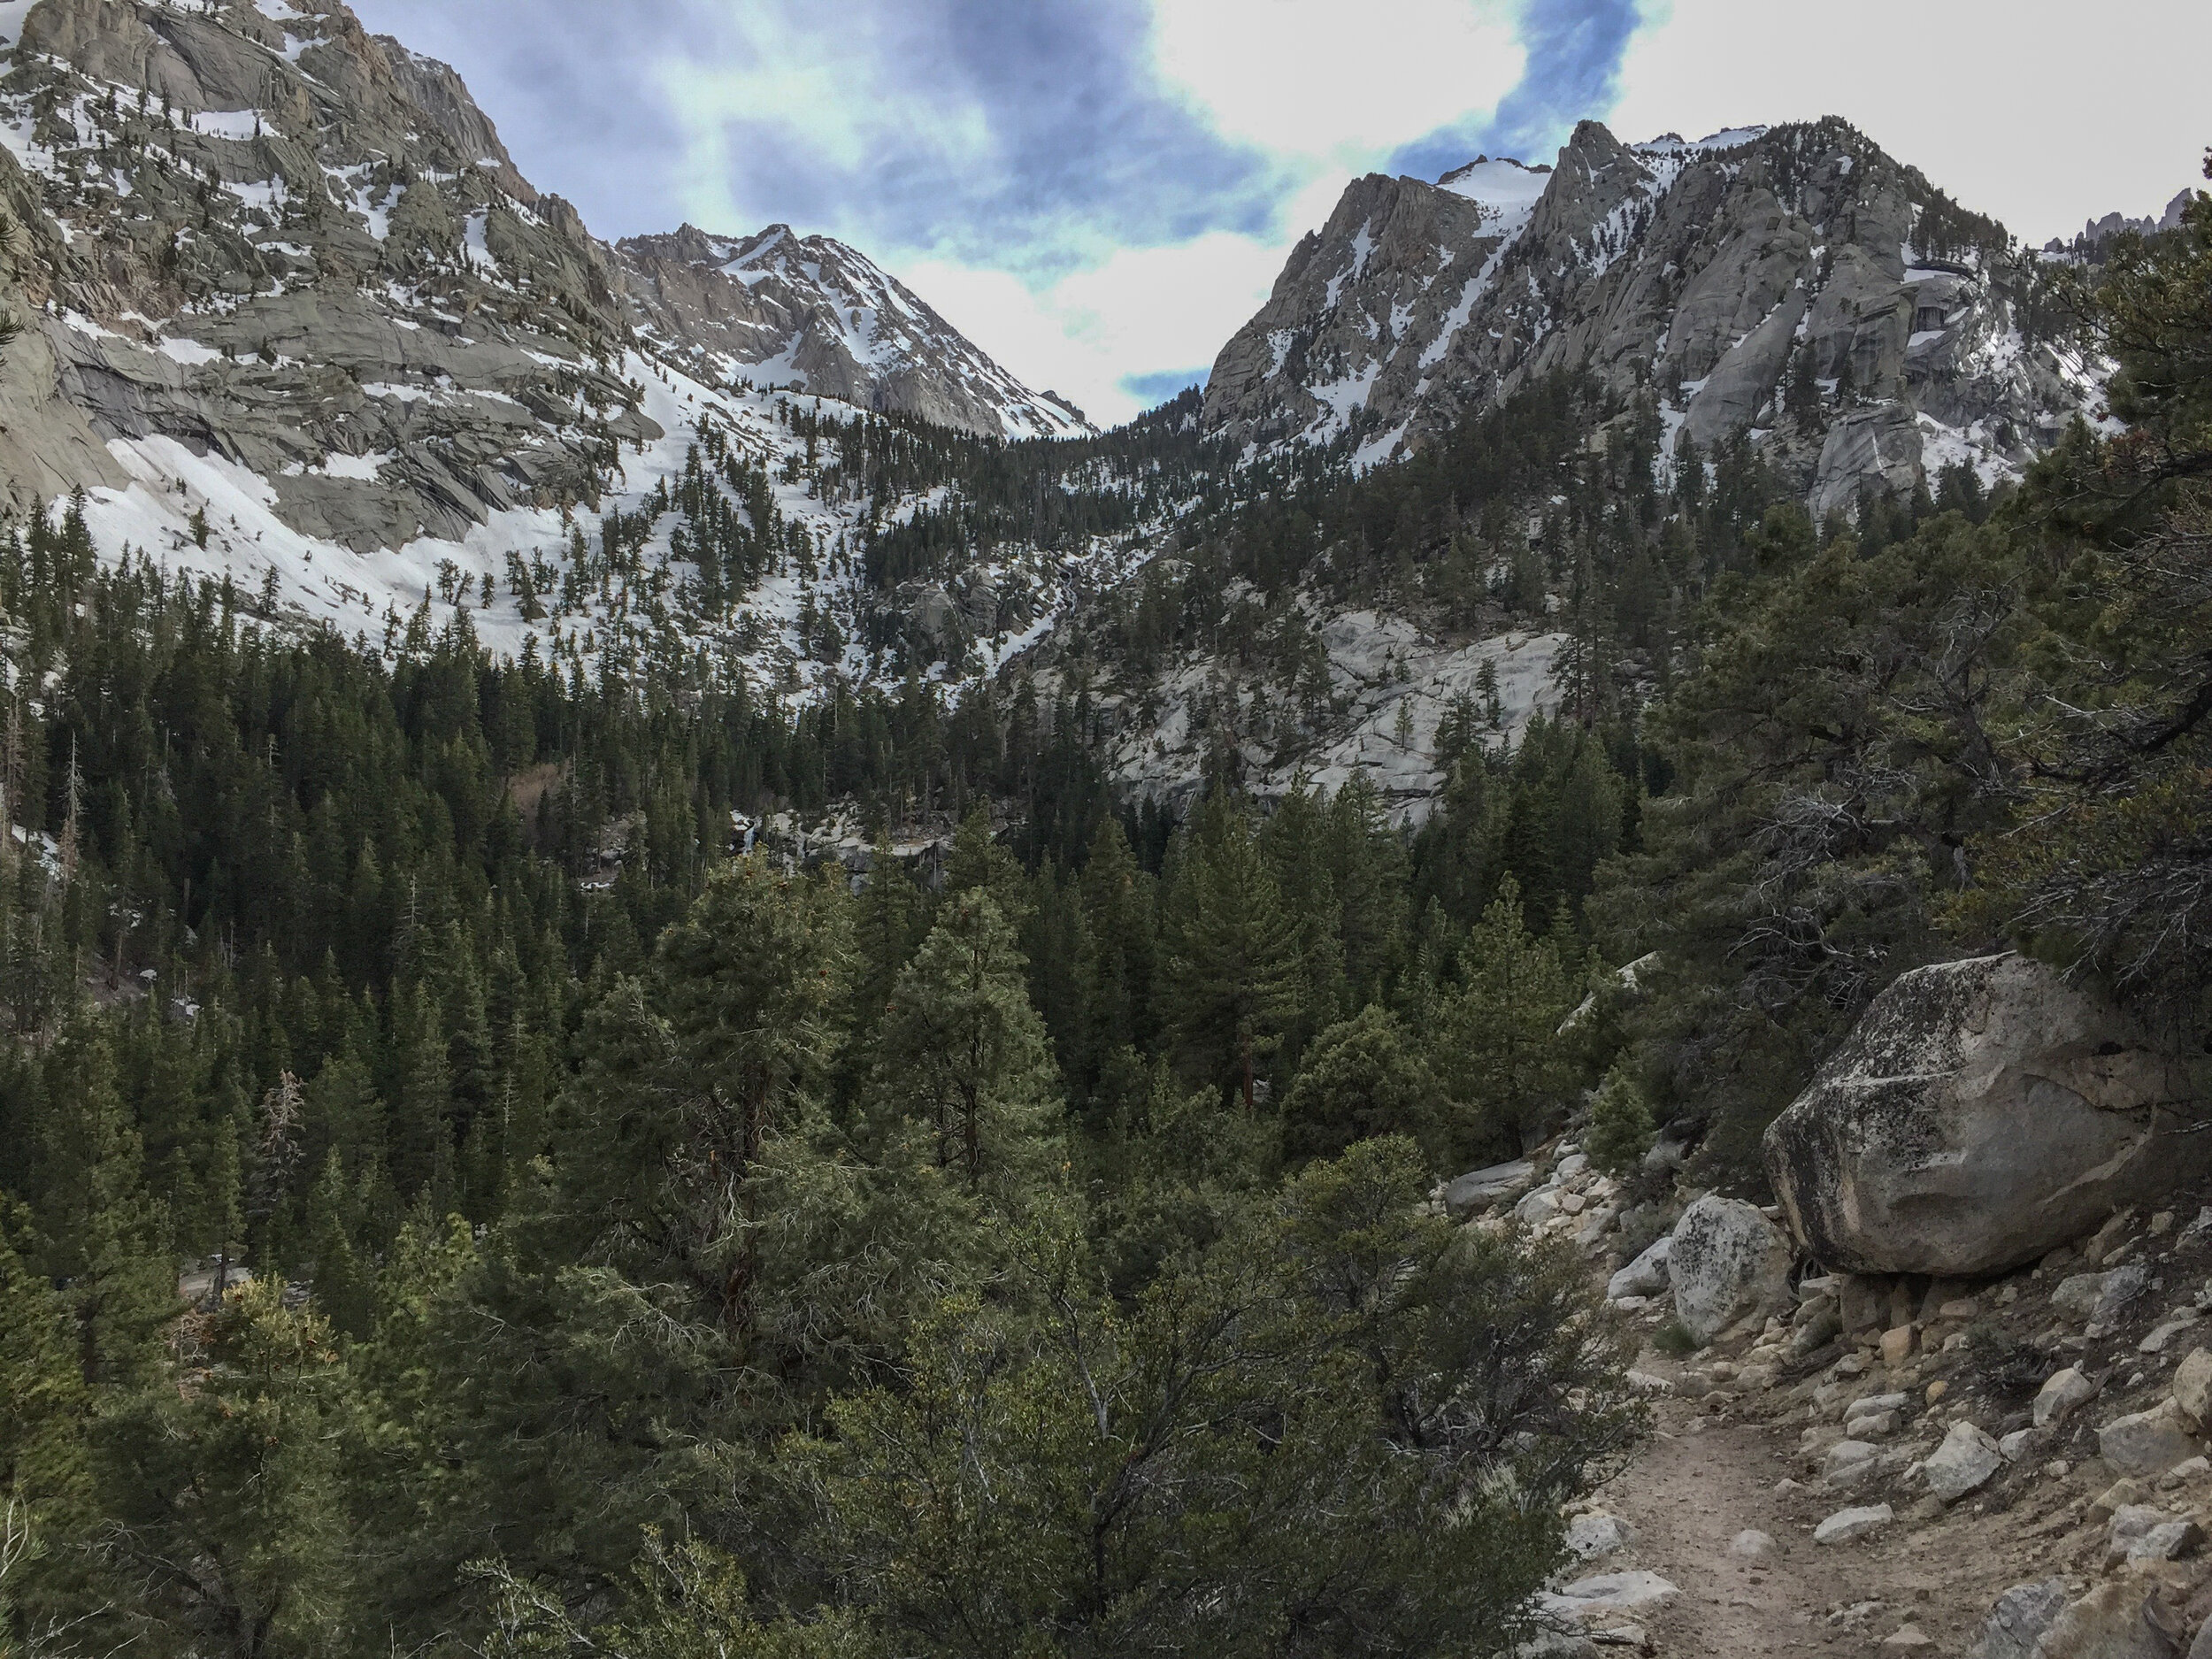
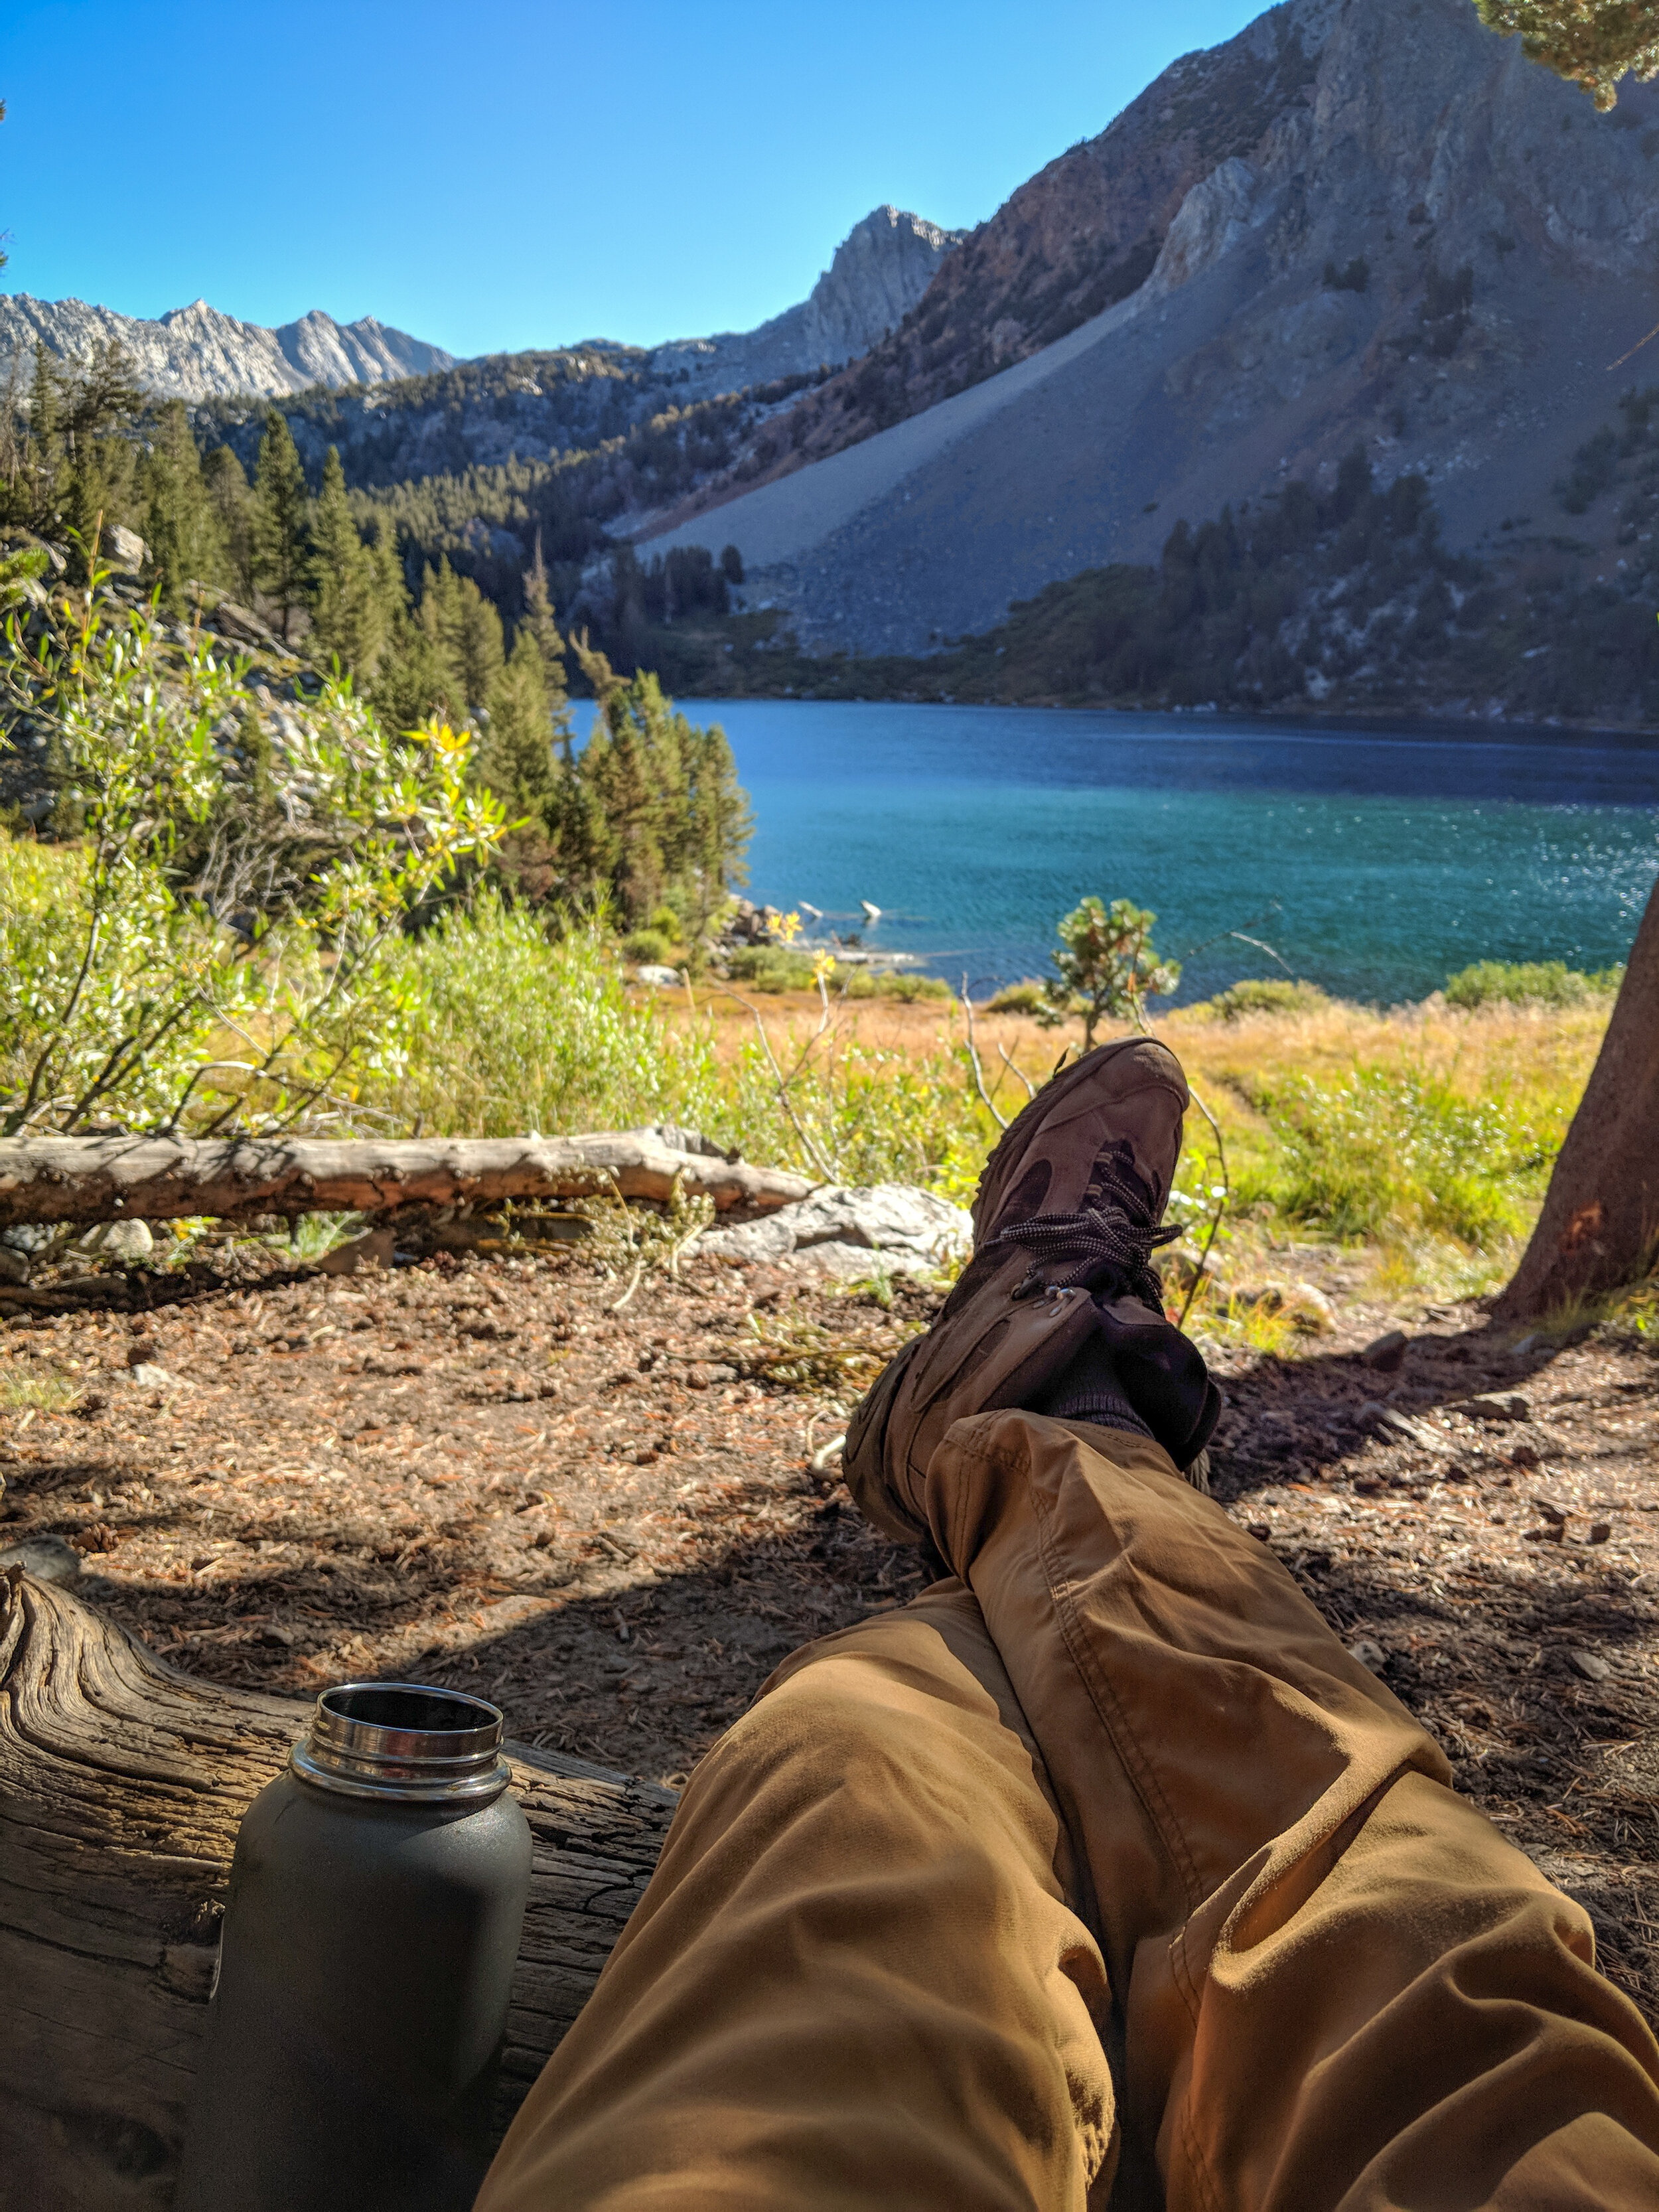
Whitney Portal to Lone Pine Lake (day hike + swim)
Summary - Stunning out-and-back hike up the trail of Mt. Whitney through towering granite walls that will make you feel microscopic in comparison. You'll feel the high elevation in your lungs, but your reward is a dream-like alpine lake. It makes an amazing mid-day adventure, especially if you're staying in Alabama Hills and trying to escape the heat (see video above). Best of all, no permits needed.
Distance - 5.5 miles round trip
Elevation Gain - 8,374 ft. to 10,077 ft. (net gain 1,703 ft.)
Wilderness Permits - Mt. Whitney day use permits are NOT required for a visit to Lone Pine Lake. The photo on the right shows the "Mt. Whitney Zone" where permits become a necessity. Check out USDA Forest Service - Inyo National Forest Wilderness Permits for more details
Seasonal Timing - May through September
What to bring
Your swimsuit. The lake is cold, but definitely not too cold to jump in on a hot day.
A good camera (waterproof if possible)
Regular day hiking gear
Resources
Calitrails - Whitney Portal to Lone Pine Lake
TheLastAdventurer - Lone Pine Lake
USDA Forest Service - Map of the Mt. Whitney Zone (see map)
Whitney Portal to Meysan Lakes
A challenging 10 mi./4,200 ft. hike from Whitney Portal that doesn’t require a permit, gets up into elevation and packs a huge hit of adventure.
We haven’t personally done this one, but here are a few resources to check out if you’re interested:
ModernHiker - Meysan Lakes
AllTrails - Meysan Trail to Meysan Lakes
More Great Eastern Sierras Adventures
IVA BELL HOT SPRINGS
Backpacking to Iva Bell Hot Springs via Duck Pass

MT. LANGLEY
Hiking & backpacking to Cottonwood Lakes & Mt. Langley Summit

Want More Adventure??
Check out our other popular blog posts:


