


CLICK TO NAVIGATE:
- The Spearhead Community
- What Exactly Is Canyoneering?
- Southern California’s Best Starter Canyons
- Intermediate & Advanced Routes
1) Lytle Creek
2) Eaton Canyon

BEGINNER/INTERMEDIATE:
Mar. 23-24: 3 spots left
Apr. 27-28: 4 spots left
Private or group sessions also available.

OUR (NEW) ALUMNI HUB!
A massive collection of canyoneering education & community resources.
FREE FOR ALL STUDENTS
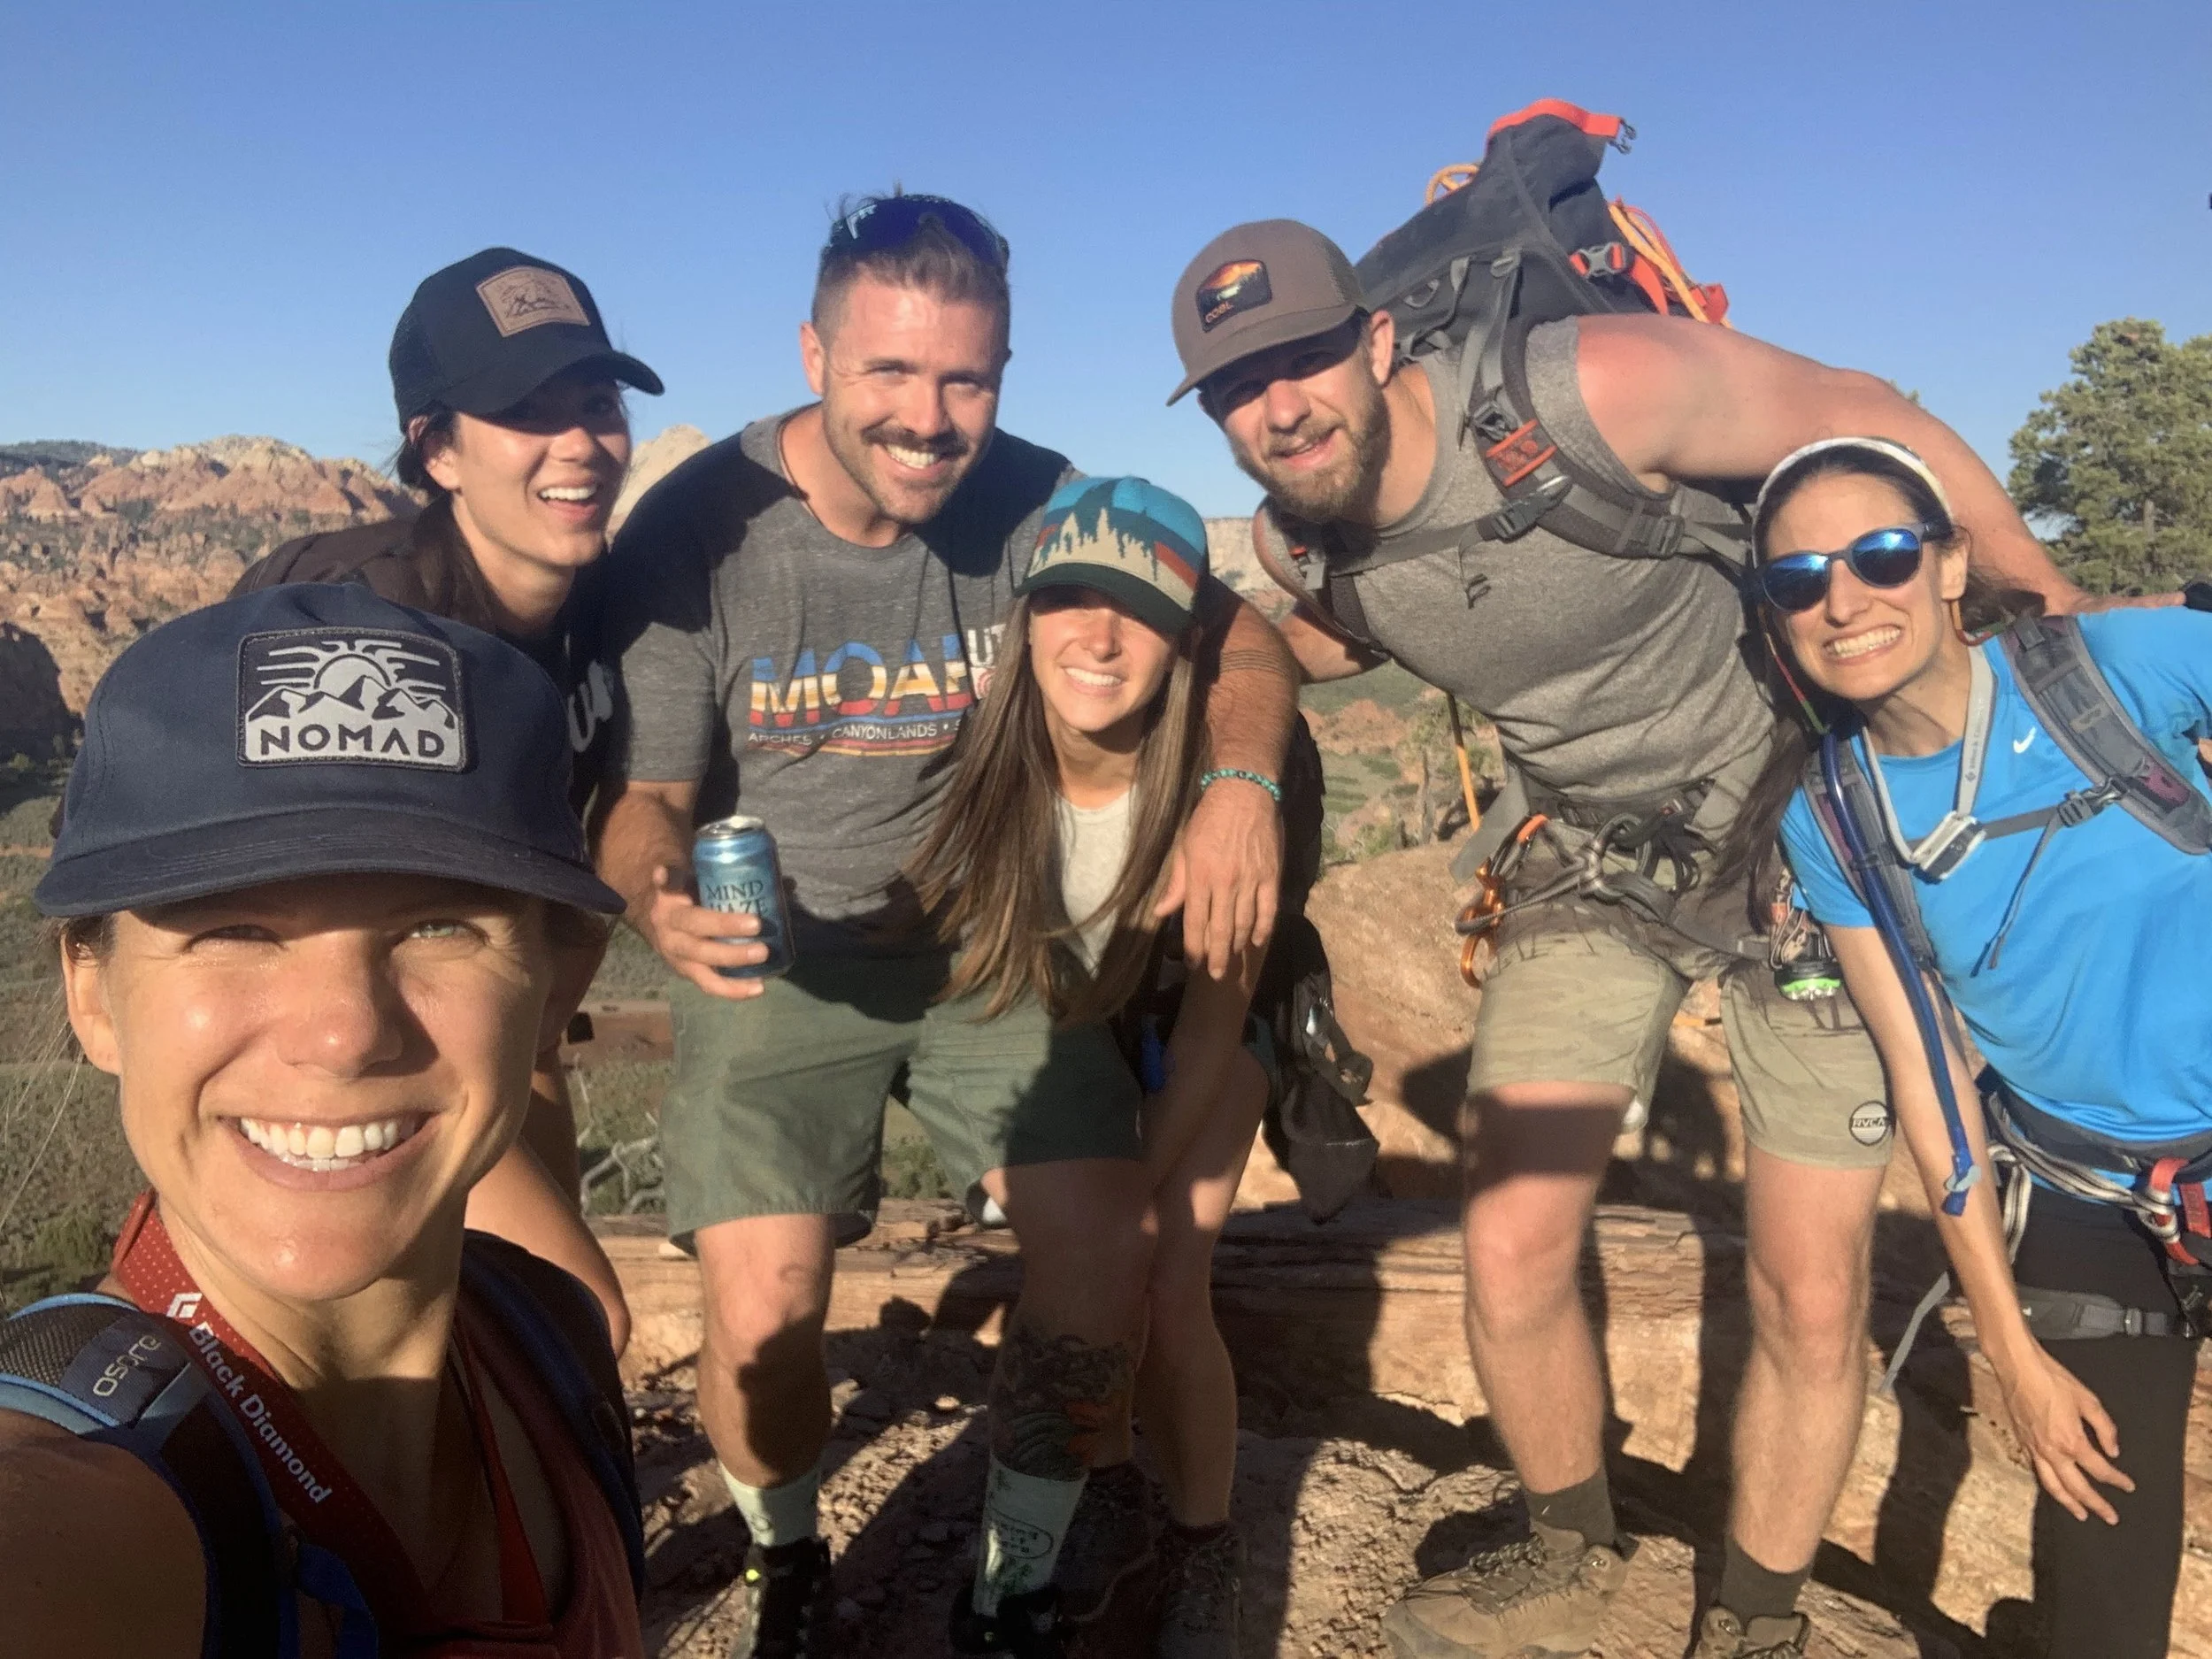
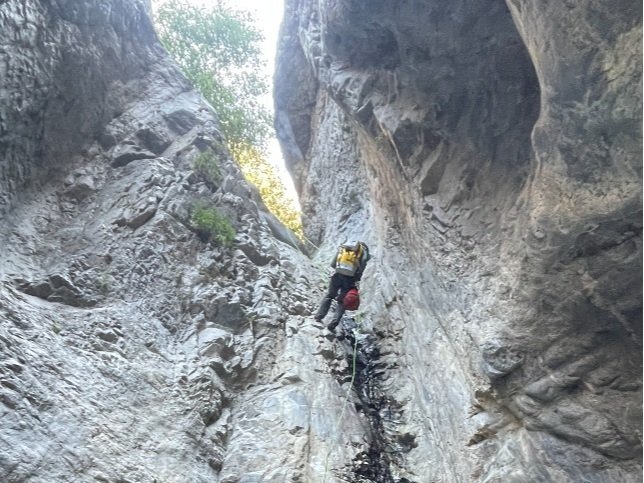
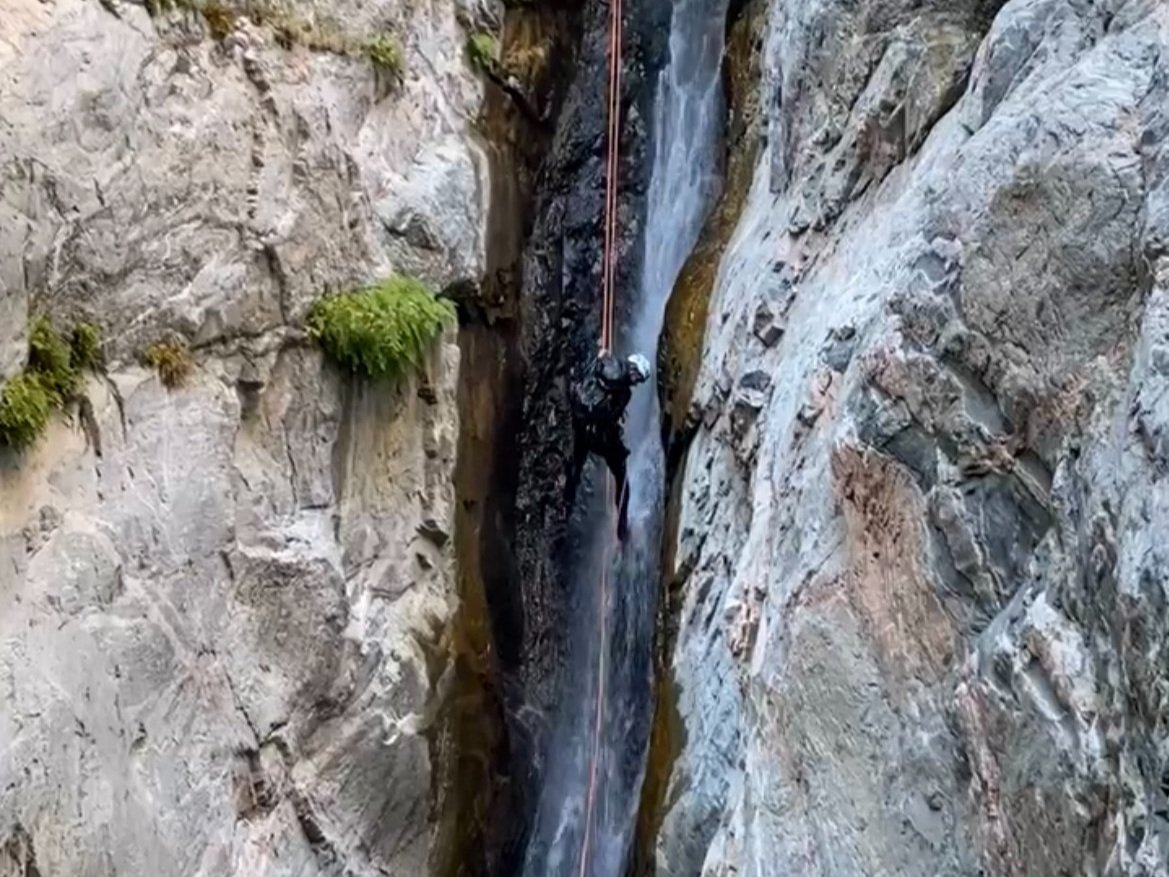
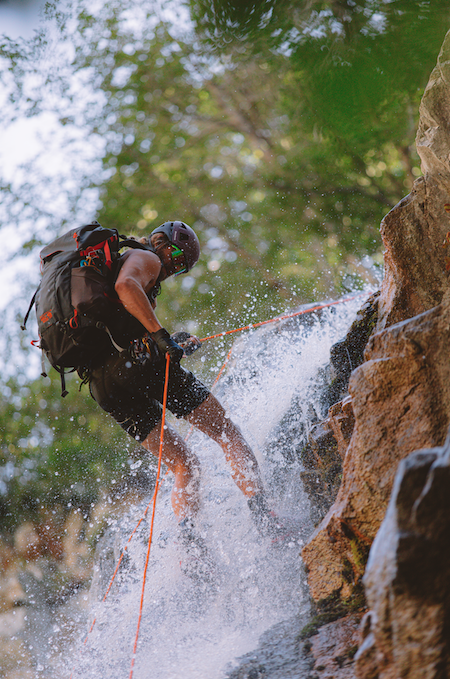
Recent Trip Highlights


Canyoneering 101

What Is Canyoneering?
Canyoneering Is Like a Hike on Steroids
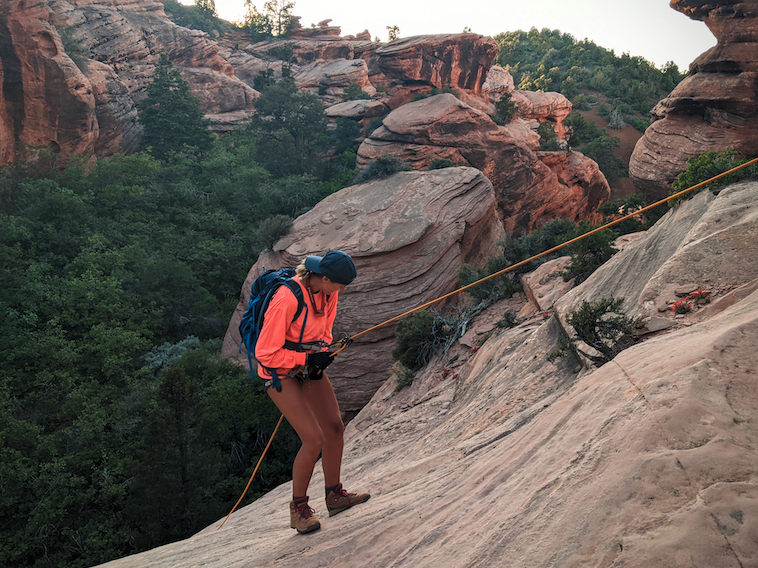
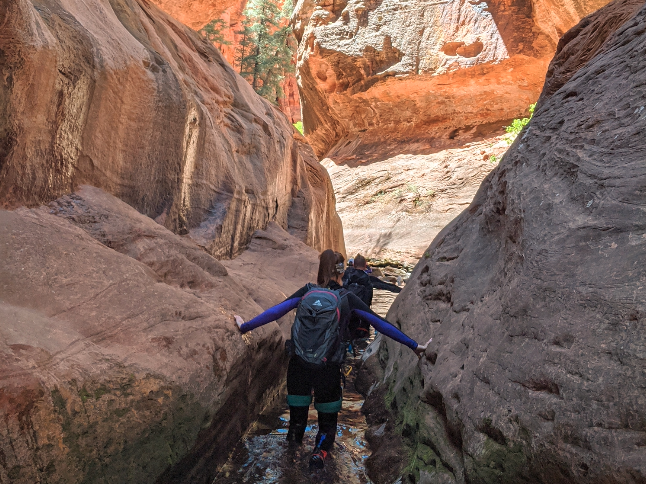
In its simplest form, one could describe it as rappelling down waterfalls. In practice, however, it’s a true multi-disciplinary outdoor obstacle course, typically involving a combination of hiking, boulder scrambling, rappelling, swimming, backcountry navigation, problem solving and teamwork.
Starting from higher elevation and running downhill, these canyons follow a watercourse, either through tight slot canyons or down a vast open mountainside. It’s common to hear friends and clients describe it as a Navy SEAL-like challenge due to its reliance on both teamwork and technical knowledge to conquer real backcountry terrain—wet and dry.
If you ever find yourself BORED on day hikes, this might just be your jam!
Still Not Sure?
It’s hard to fully understand it until you see it. Check out these videos below!
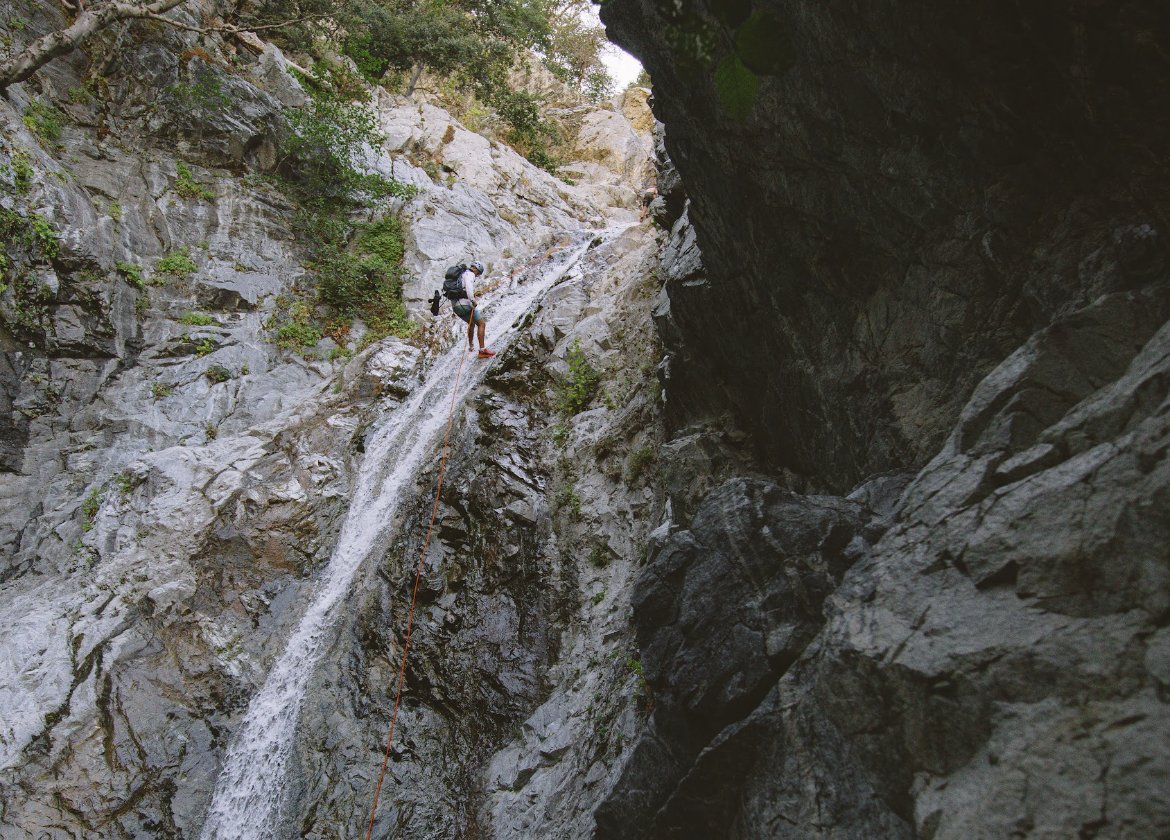
San Antonio Falls - Mt. Baldy, CA
Lower Matacanes Canyon - Nuevo Léon, Mexico
The Subway - Zion National Park, UT
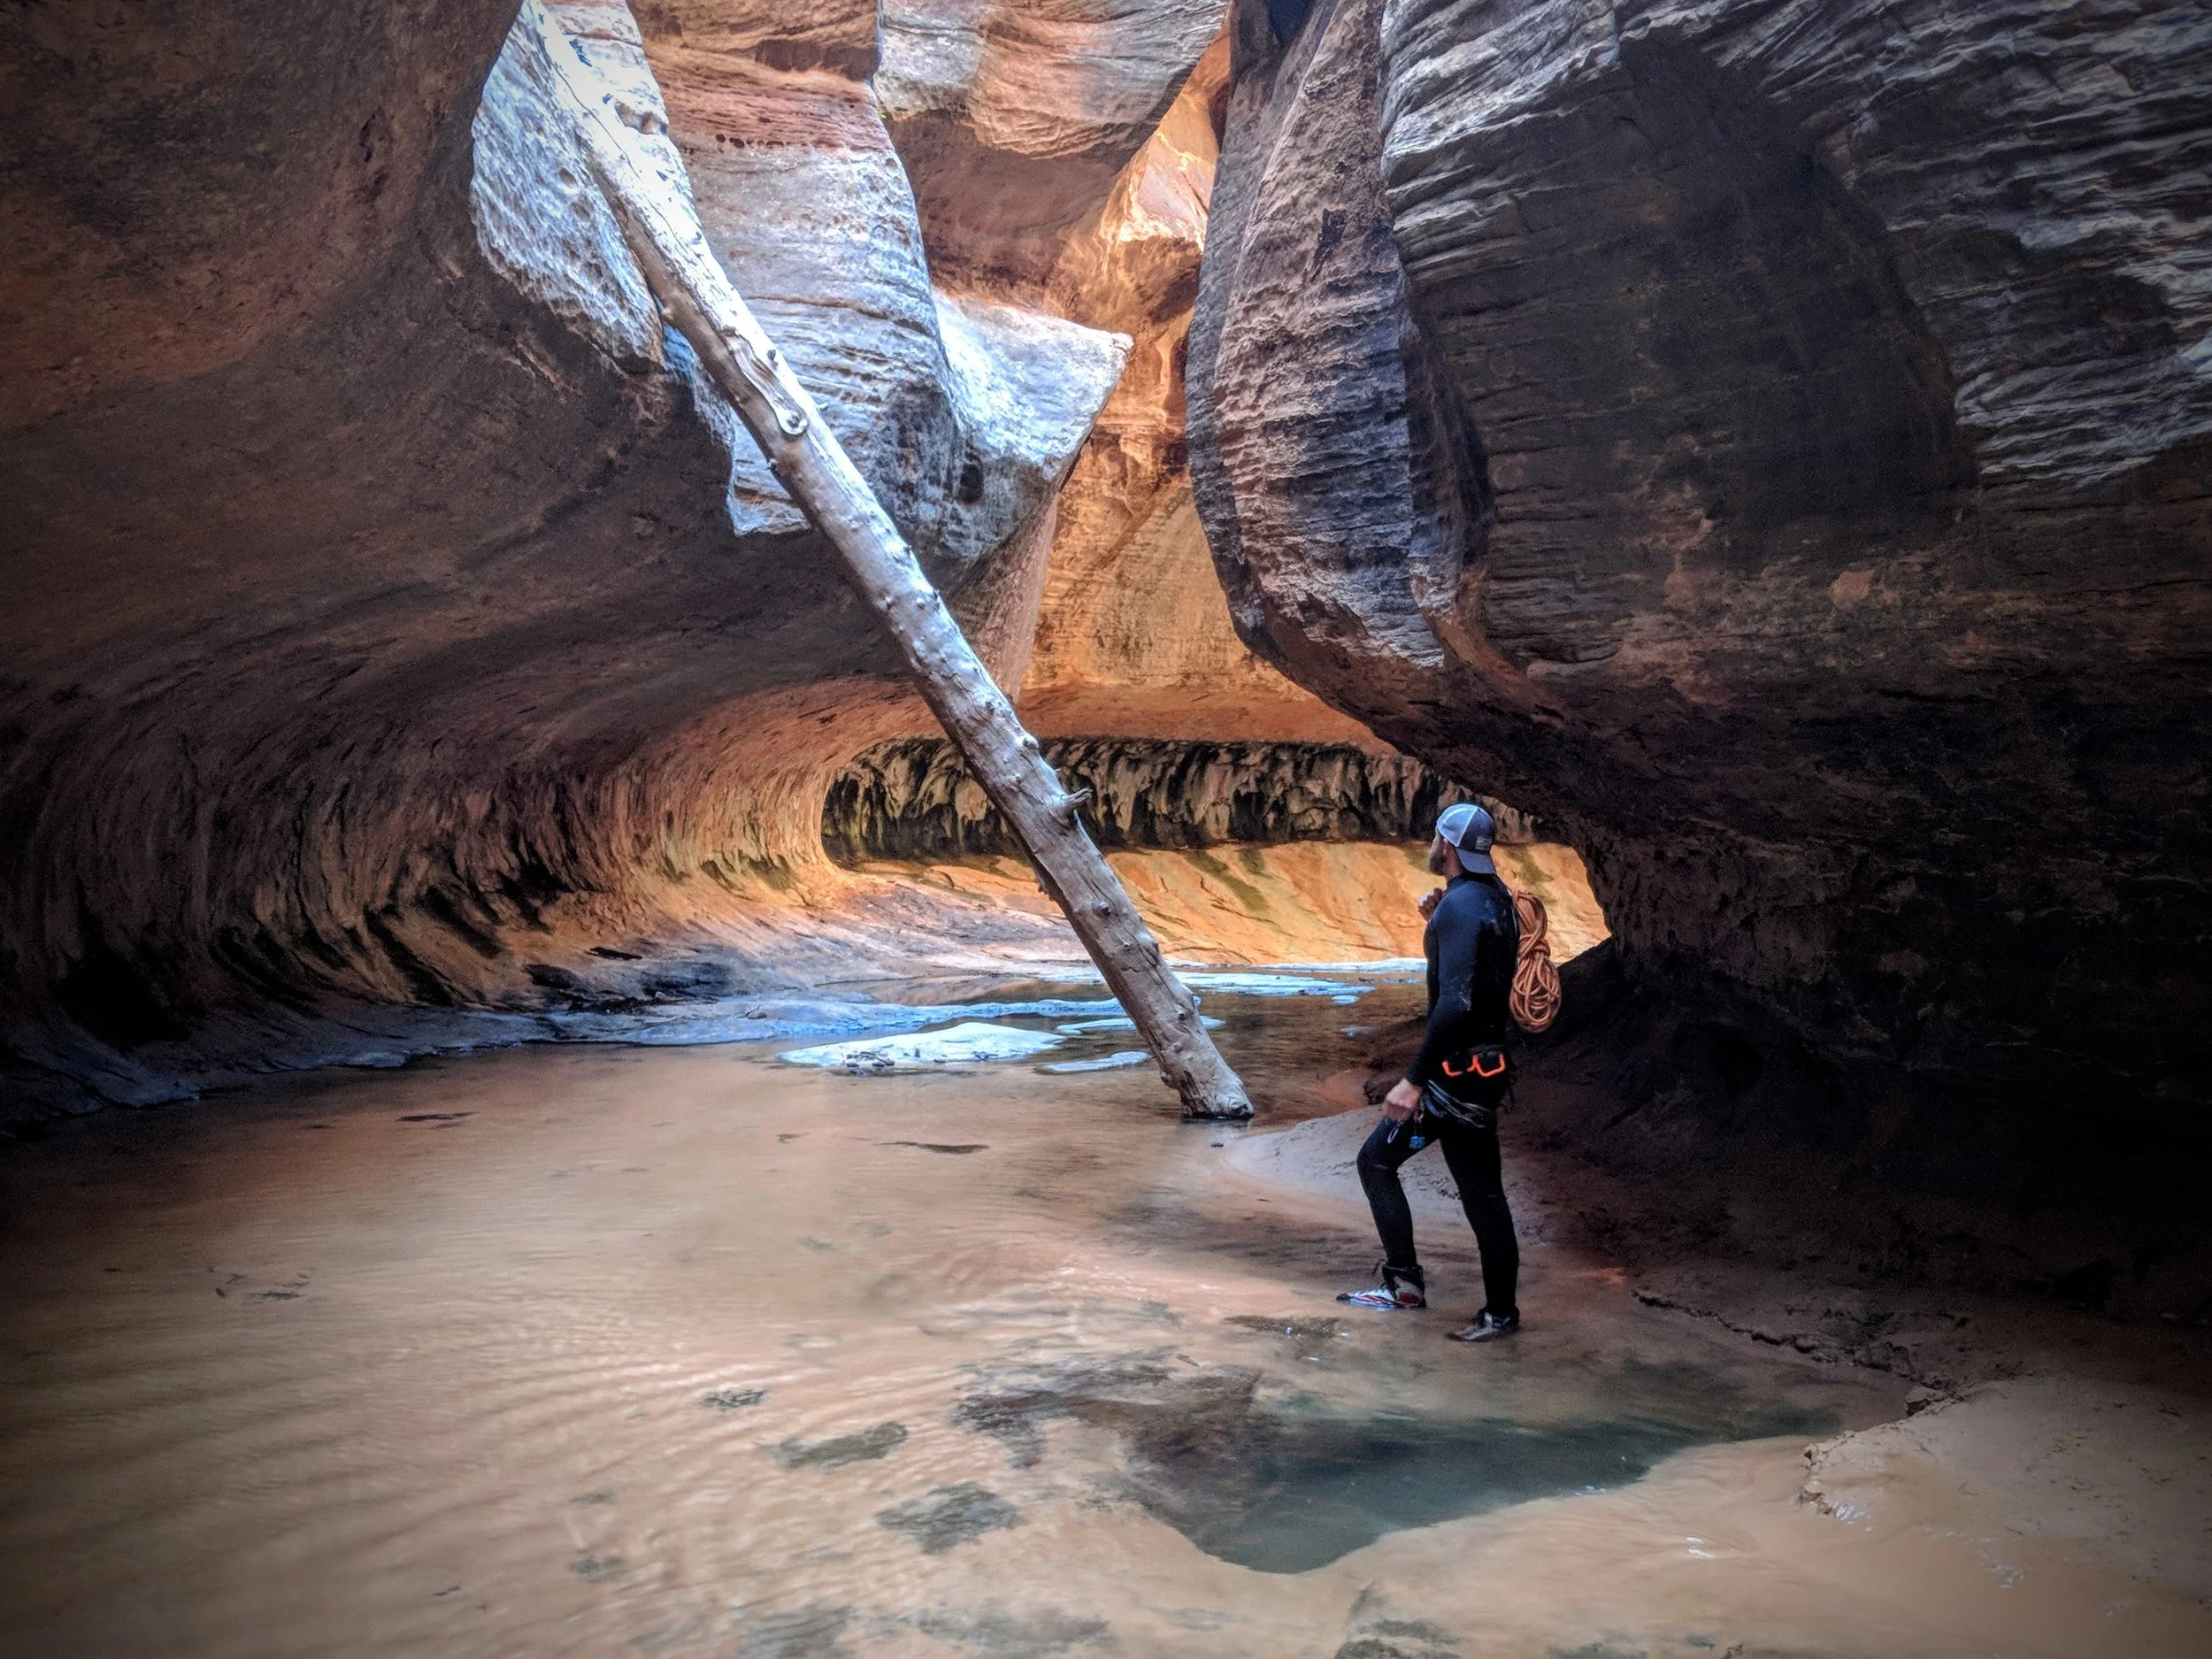
Video: Canyoneering through West Fork a.k.a. “The Subway” in Zion National Park.
How Do I Do It Safely?
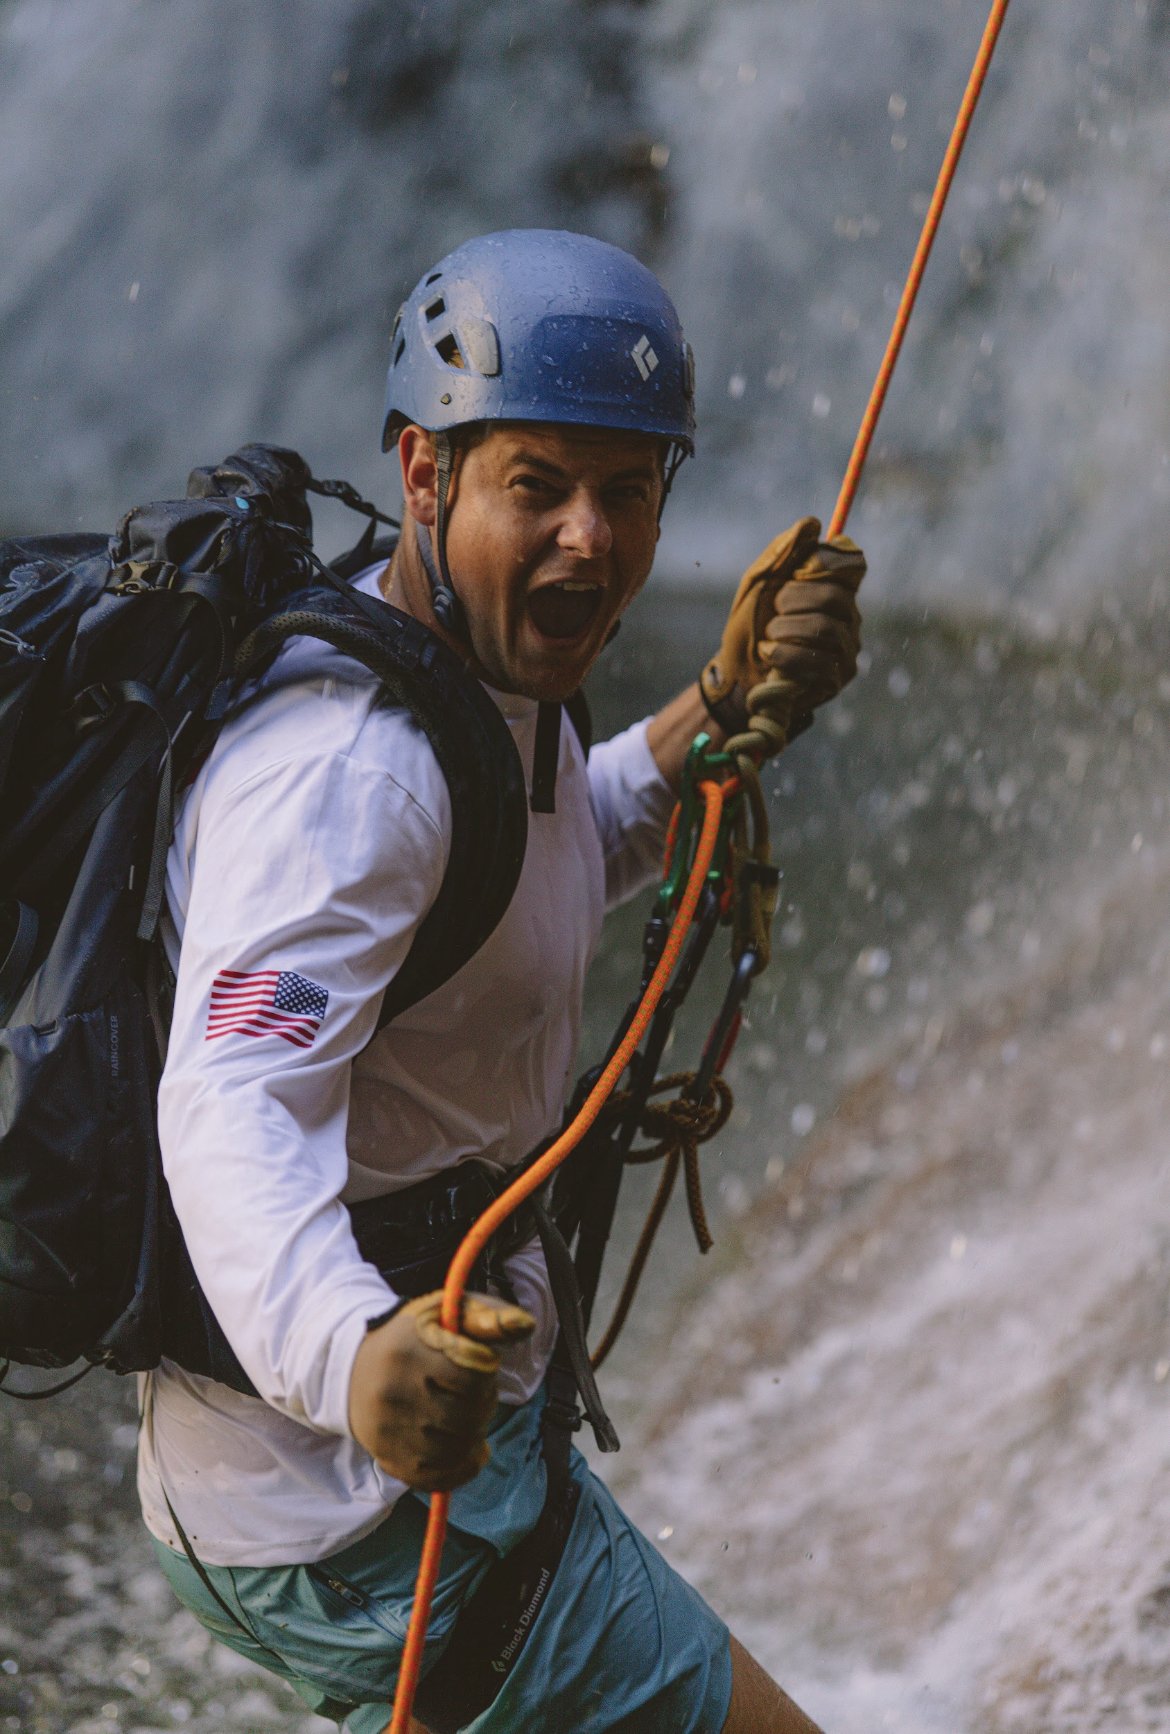
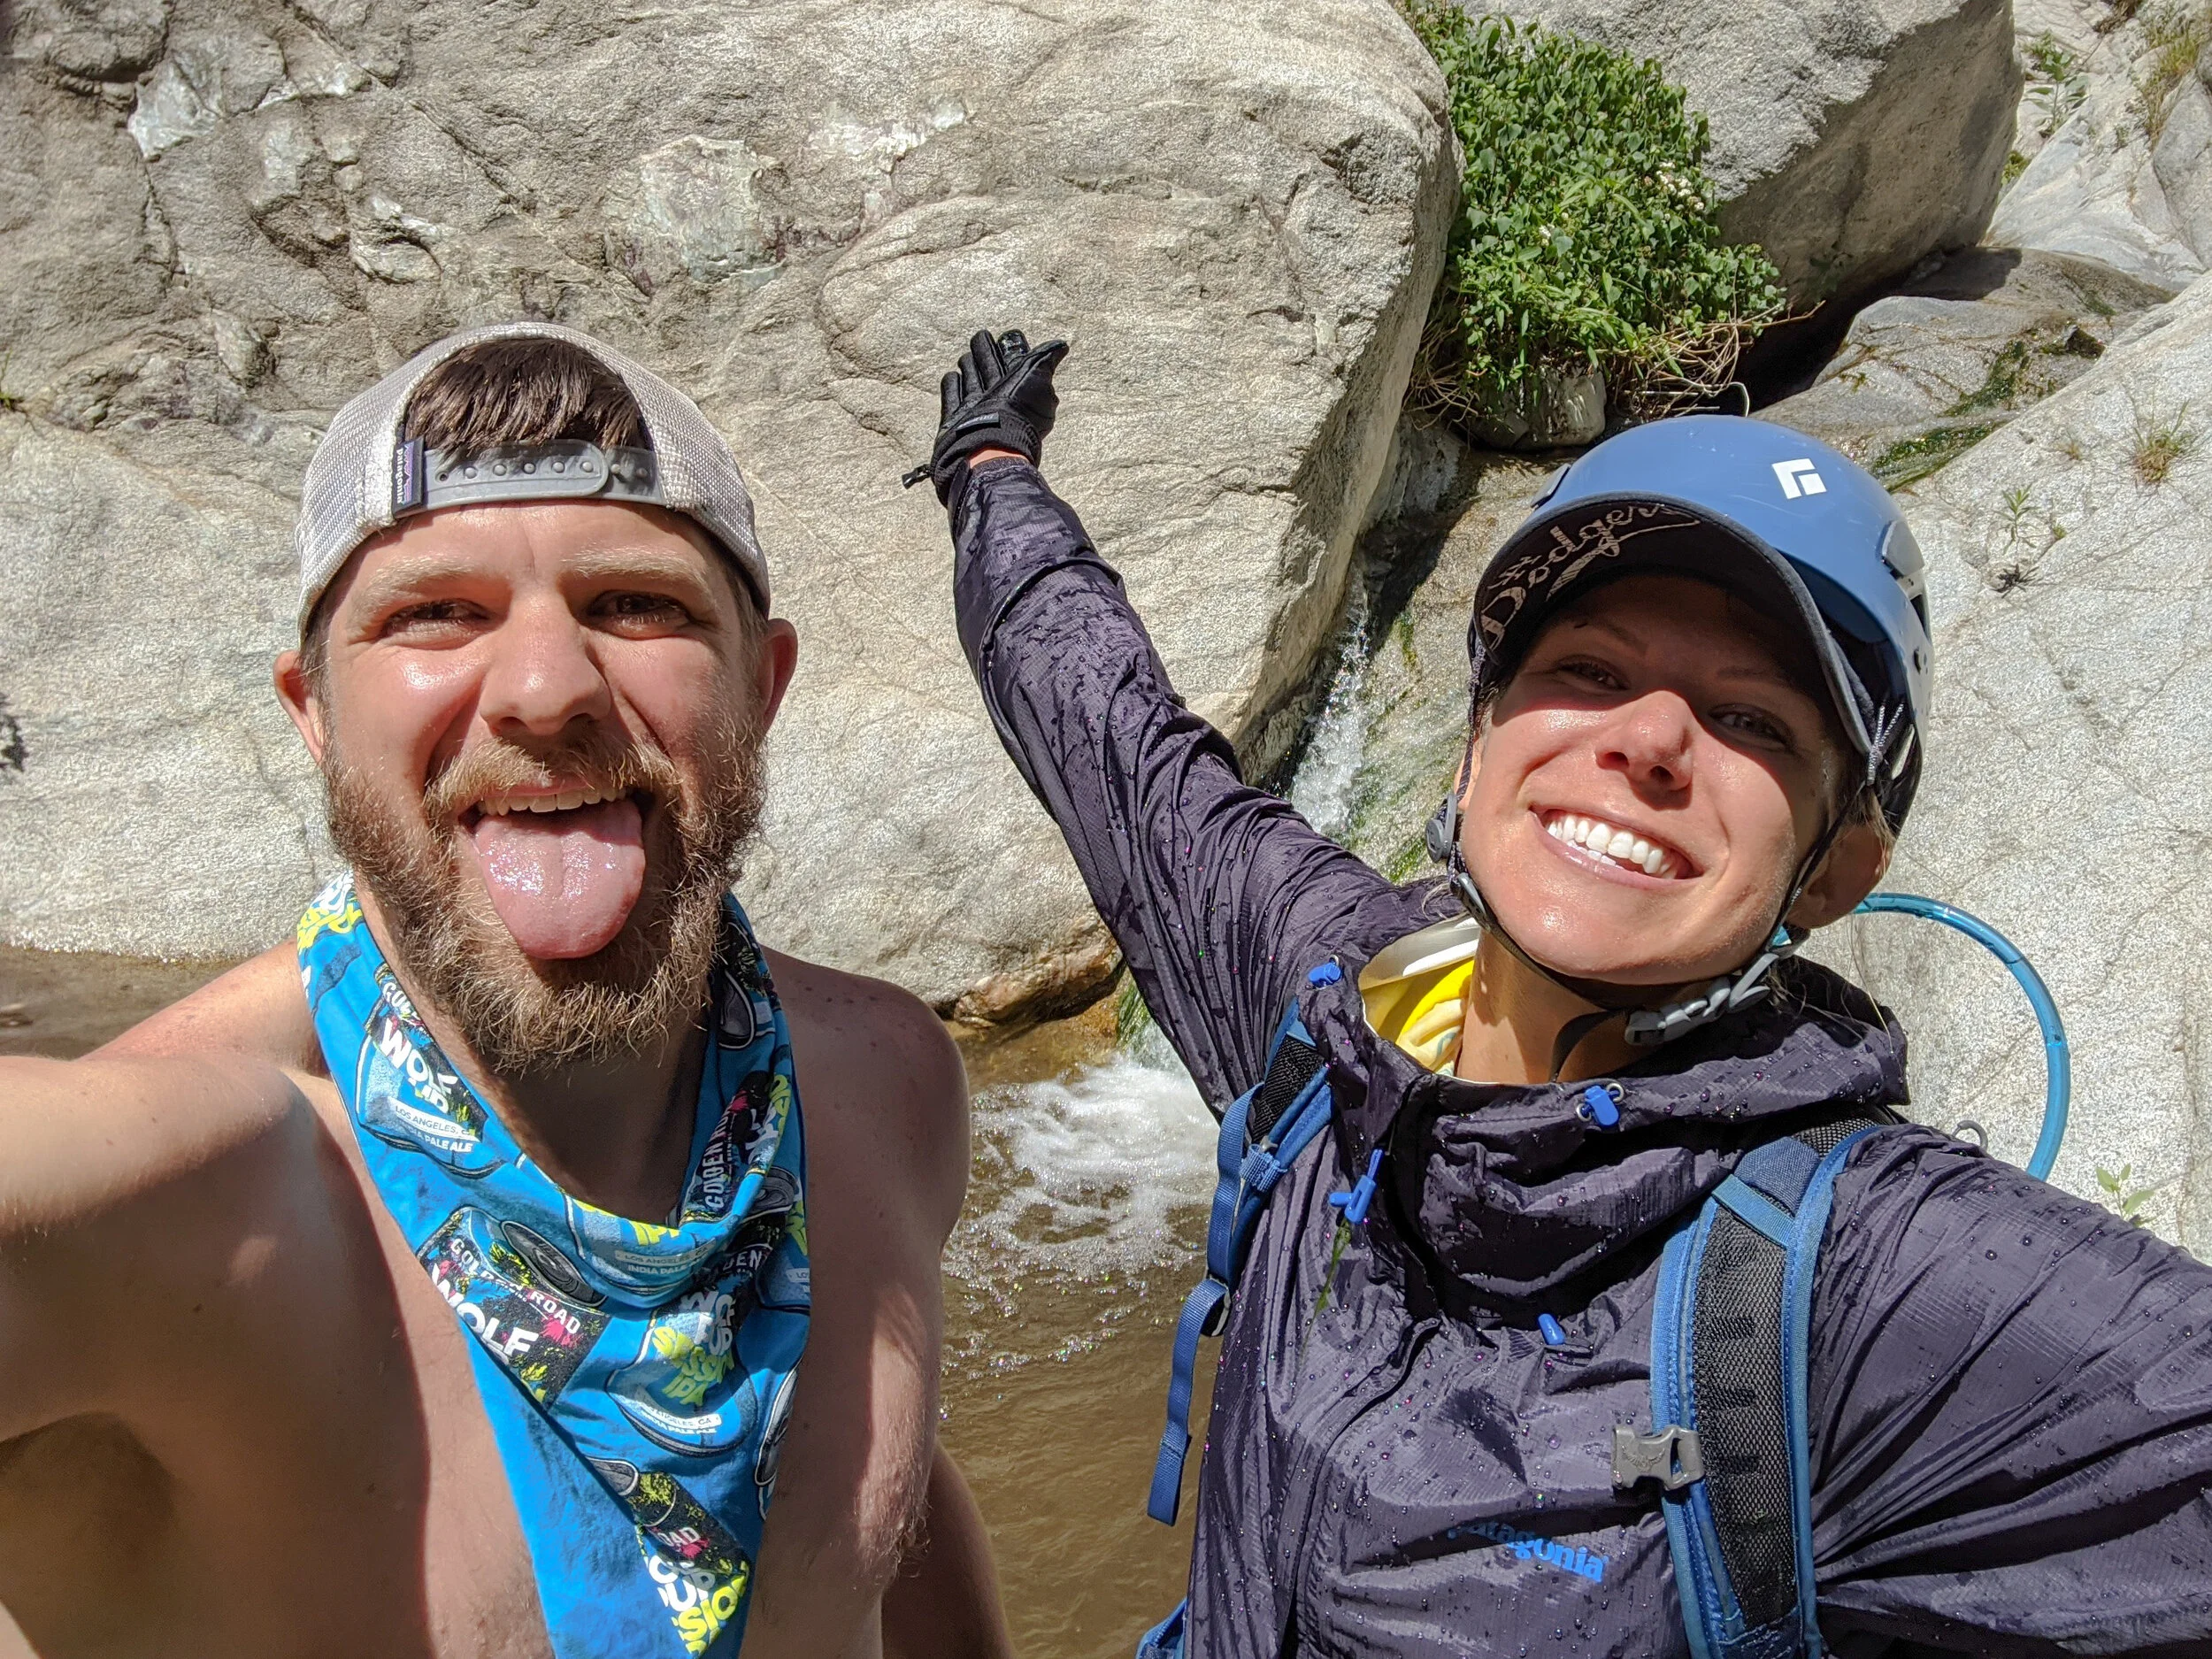
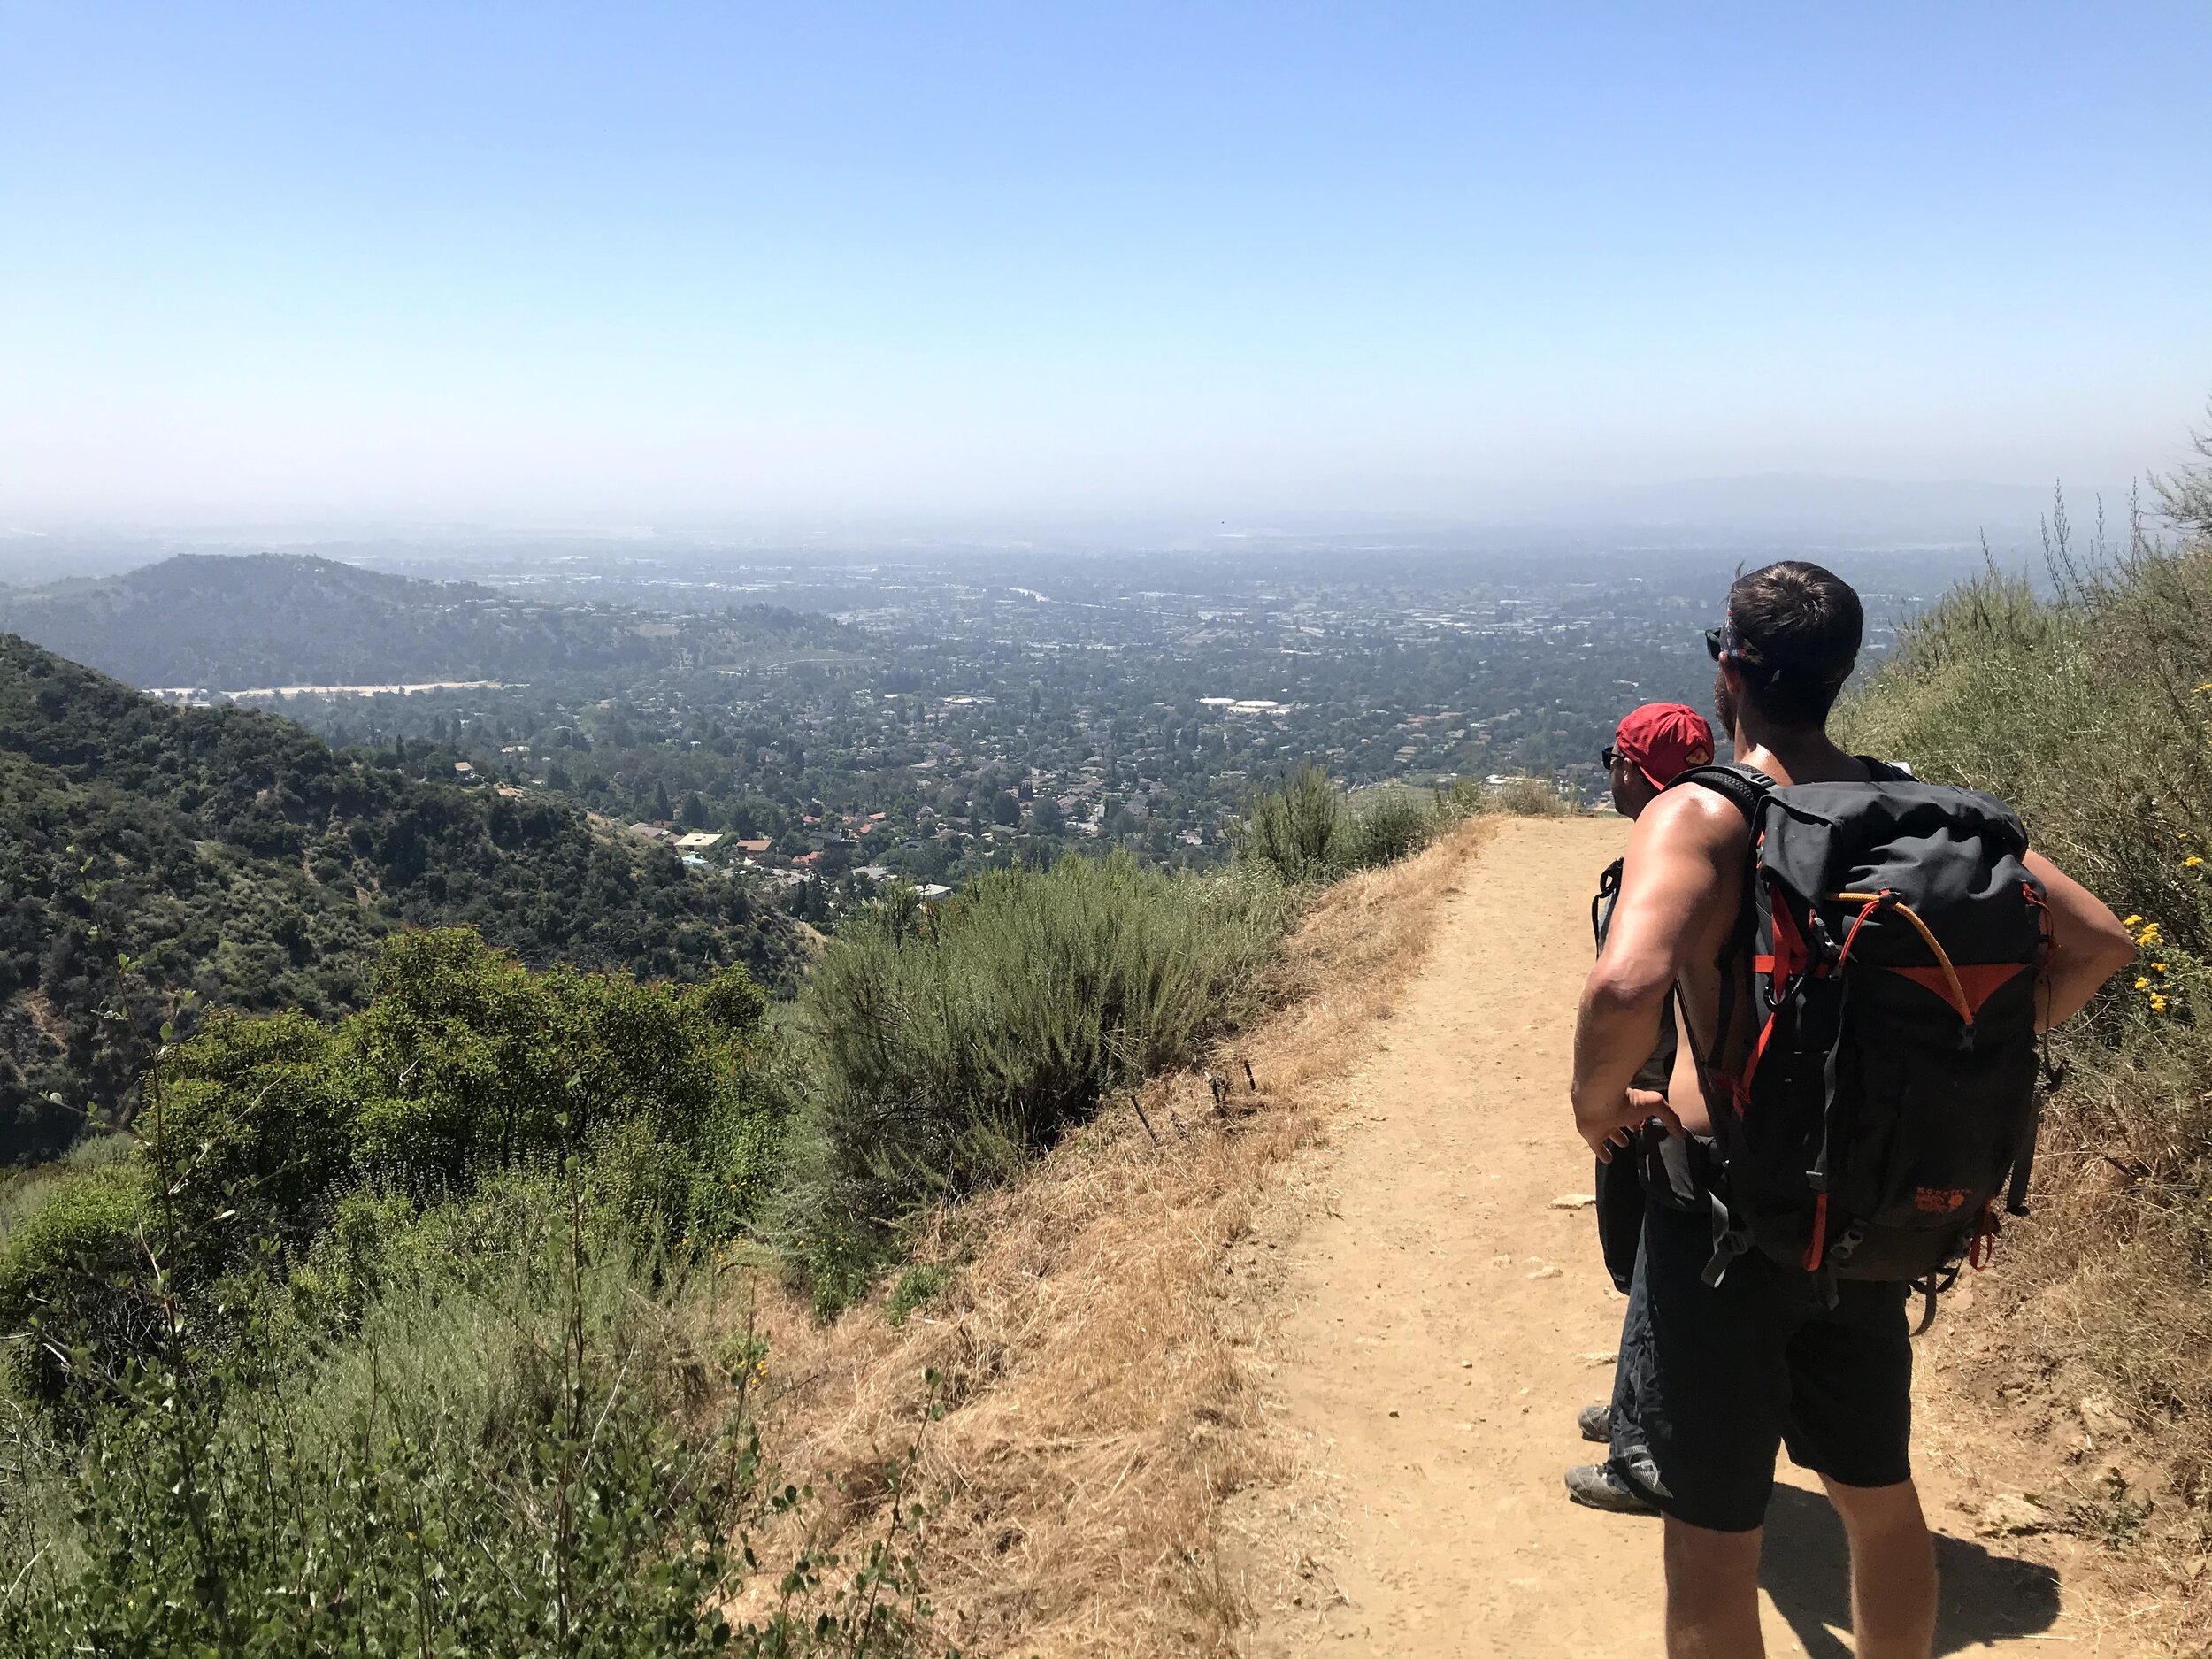
Photo: Austin, founder of Spearhead Adventure, is based in Redondo Beach, CA
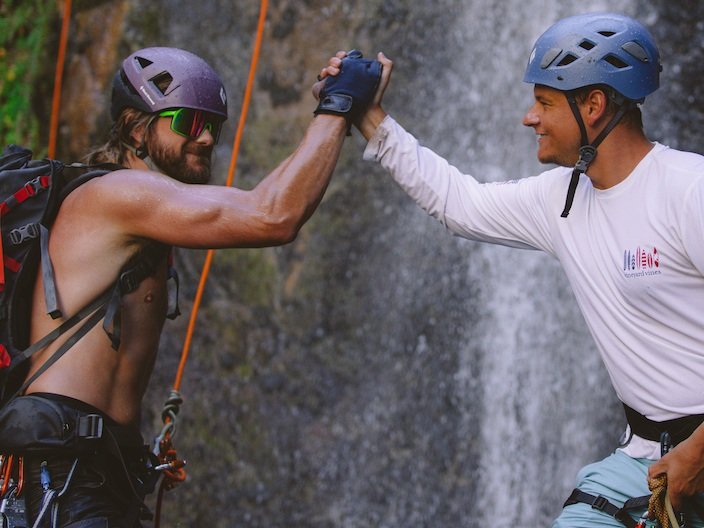
Canyoneering Is a Life-Changing Sport
I’ve seen canyoneering profoundly transform more lives than any other sport, activity or community in the world.
You’ll take on real adventure and see beautiful landscapes that you couldn’t have possibly imagined, all while gaining self confidence from watching yourself become a legitimate adventurer.
It’s also potentially very dangerous for newcomers.
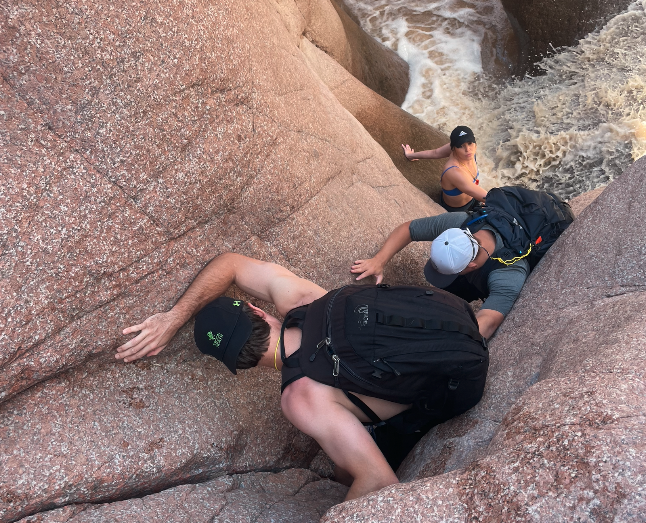
As recent as October 2023, two rock climbers with limited canyon experience were airlifted out of Eaton Canyon. Even with their knowledge of rappelling, their inexperience with swiftwater obstacles caused significant delays that kept them out in an aquatic route after dark.
Unfortunate and preventable accidents happen more often than they should, requiring Search and Rescue (SAR) teams to perform extremely risky and difficult rescues.
Key Safety Principles for Beginners
If you’re new, seek out experienced members of the community or hire a professional until you’re competent enough to lead routes. This sport requires a lot of skill development (even for rock climbers, which is what the SAR victims above were). Once you drop into your first rappel, you’re typically 100% committed to the route, with little to no options for escaping early aside from a full-scale evacuation.
DO NOT try to teach yourself how to lead a canyon with information on the internet. YouTube is an awesome tool for learning certain kinds of techniques, like gear selection and knotcraft. For skills that your safety depends on, like anchors & rigging, YouTube may give you the confidence to help you get into trouble—it won’t help you get out of it.
Never use any new techniques in a canyon until you’ve tested them out safely at a practice crag. You’ll almost always run into learning curve snags.
Anyone new to leading should be extremely comfortable with dry canyons first before attempting any canyons containing water. Flowing water canyons require not only advanced rappelling skills, but also knowledge of water hazards. If you do attempt any water canyons, do diligent research on conditions; bring the proper wetsuit for the canyon’s water temperature and duration.
Learn from Accident Reports
The Canyons Are Calling Podcast
This podcast is an excellent resource for emerging canyoneers. While the shows features both the highs and lows of the sport (no pun intended), many of the guests are survivors of accidents who come on the show to educate the community on how to avoid mistakes and practice the sport more safely.
Flash Floods and Canyoneering
Heavy rain storms become an immediate life threatening hazard for anyone stuck in a narrow canyon during their occurrence. In Utah sandstone, even light rain can be a major risk.
If you see rain in the forecast or suspicious rain clouds on the horizon, stay out of the canyons. Narrow canyons fill up with water quickly, usually with no way to escape. Unfortunately, people die every year from easily avoidable conditions by failing to do the proper research before their trip.
Additional Resources:
Canyons & Crags - Meteorology: Air Masses & Fronts
Canyons & Crags - Meteorology: Relative Humidity
CanyoneeringUSA - Flash Floods and Other Canyoneering Hazards

LEARN THE ART OF CANYONEERING!
BEGINNER / INTERMEDIATE CLASSES:
Mar. 23-24: 3 spots left
Apr. 27-28: 4 spots left
Private or group sessions also available
You can also contact Austin directly at austindekoning@gmail.com :)
Skill Development Resources
The Canyons & Crags Knowledge Base, by Rich Carlson
With 40+ years of experience, Rich Carlson is one of the world’s top canyoneering instructors as well as a close personal friend & mentor. He co-founded the American Canyoneering Association (ACA) back in the 90’s and currently runs Canyon Guides International (CGI). You’d be hard-pressed to find a better instructor.
Rich lives by a selfless ethos and offers a lot of valuable knowledge on his website and YouTube channel for free (donations highly encouraged). We encourage you to check it out and begin your journey as a safe and well-informed canyoneer!

Here are a few videos to help get you started:
The information below is a primer only and should NOT replace actual hands-on instruction for beginners.
Additional Resources:
CanyoneeringUSA - How to Read Canyoneering Ratings
Canyons & Crags - Heuristic Traps
Canyons & Crags - The Dunning Krueger Effect
Southern California's Best Starter Canyons

LOCAL ROUTES
- Beginner Friendly (But Still Thrilling)
- The Intermediate & Advanced Stuff
1) Lytle Creek
2) Eaton Canyon
3) Monkeyface Creek (coming soon!)
Bailey Canyon
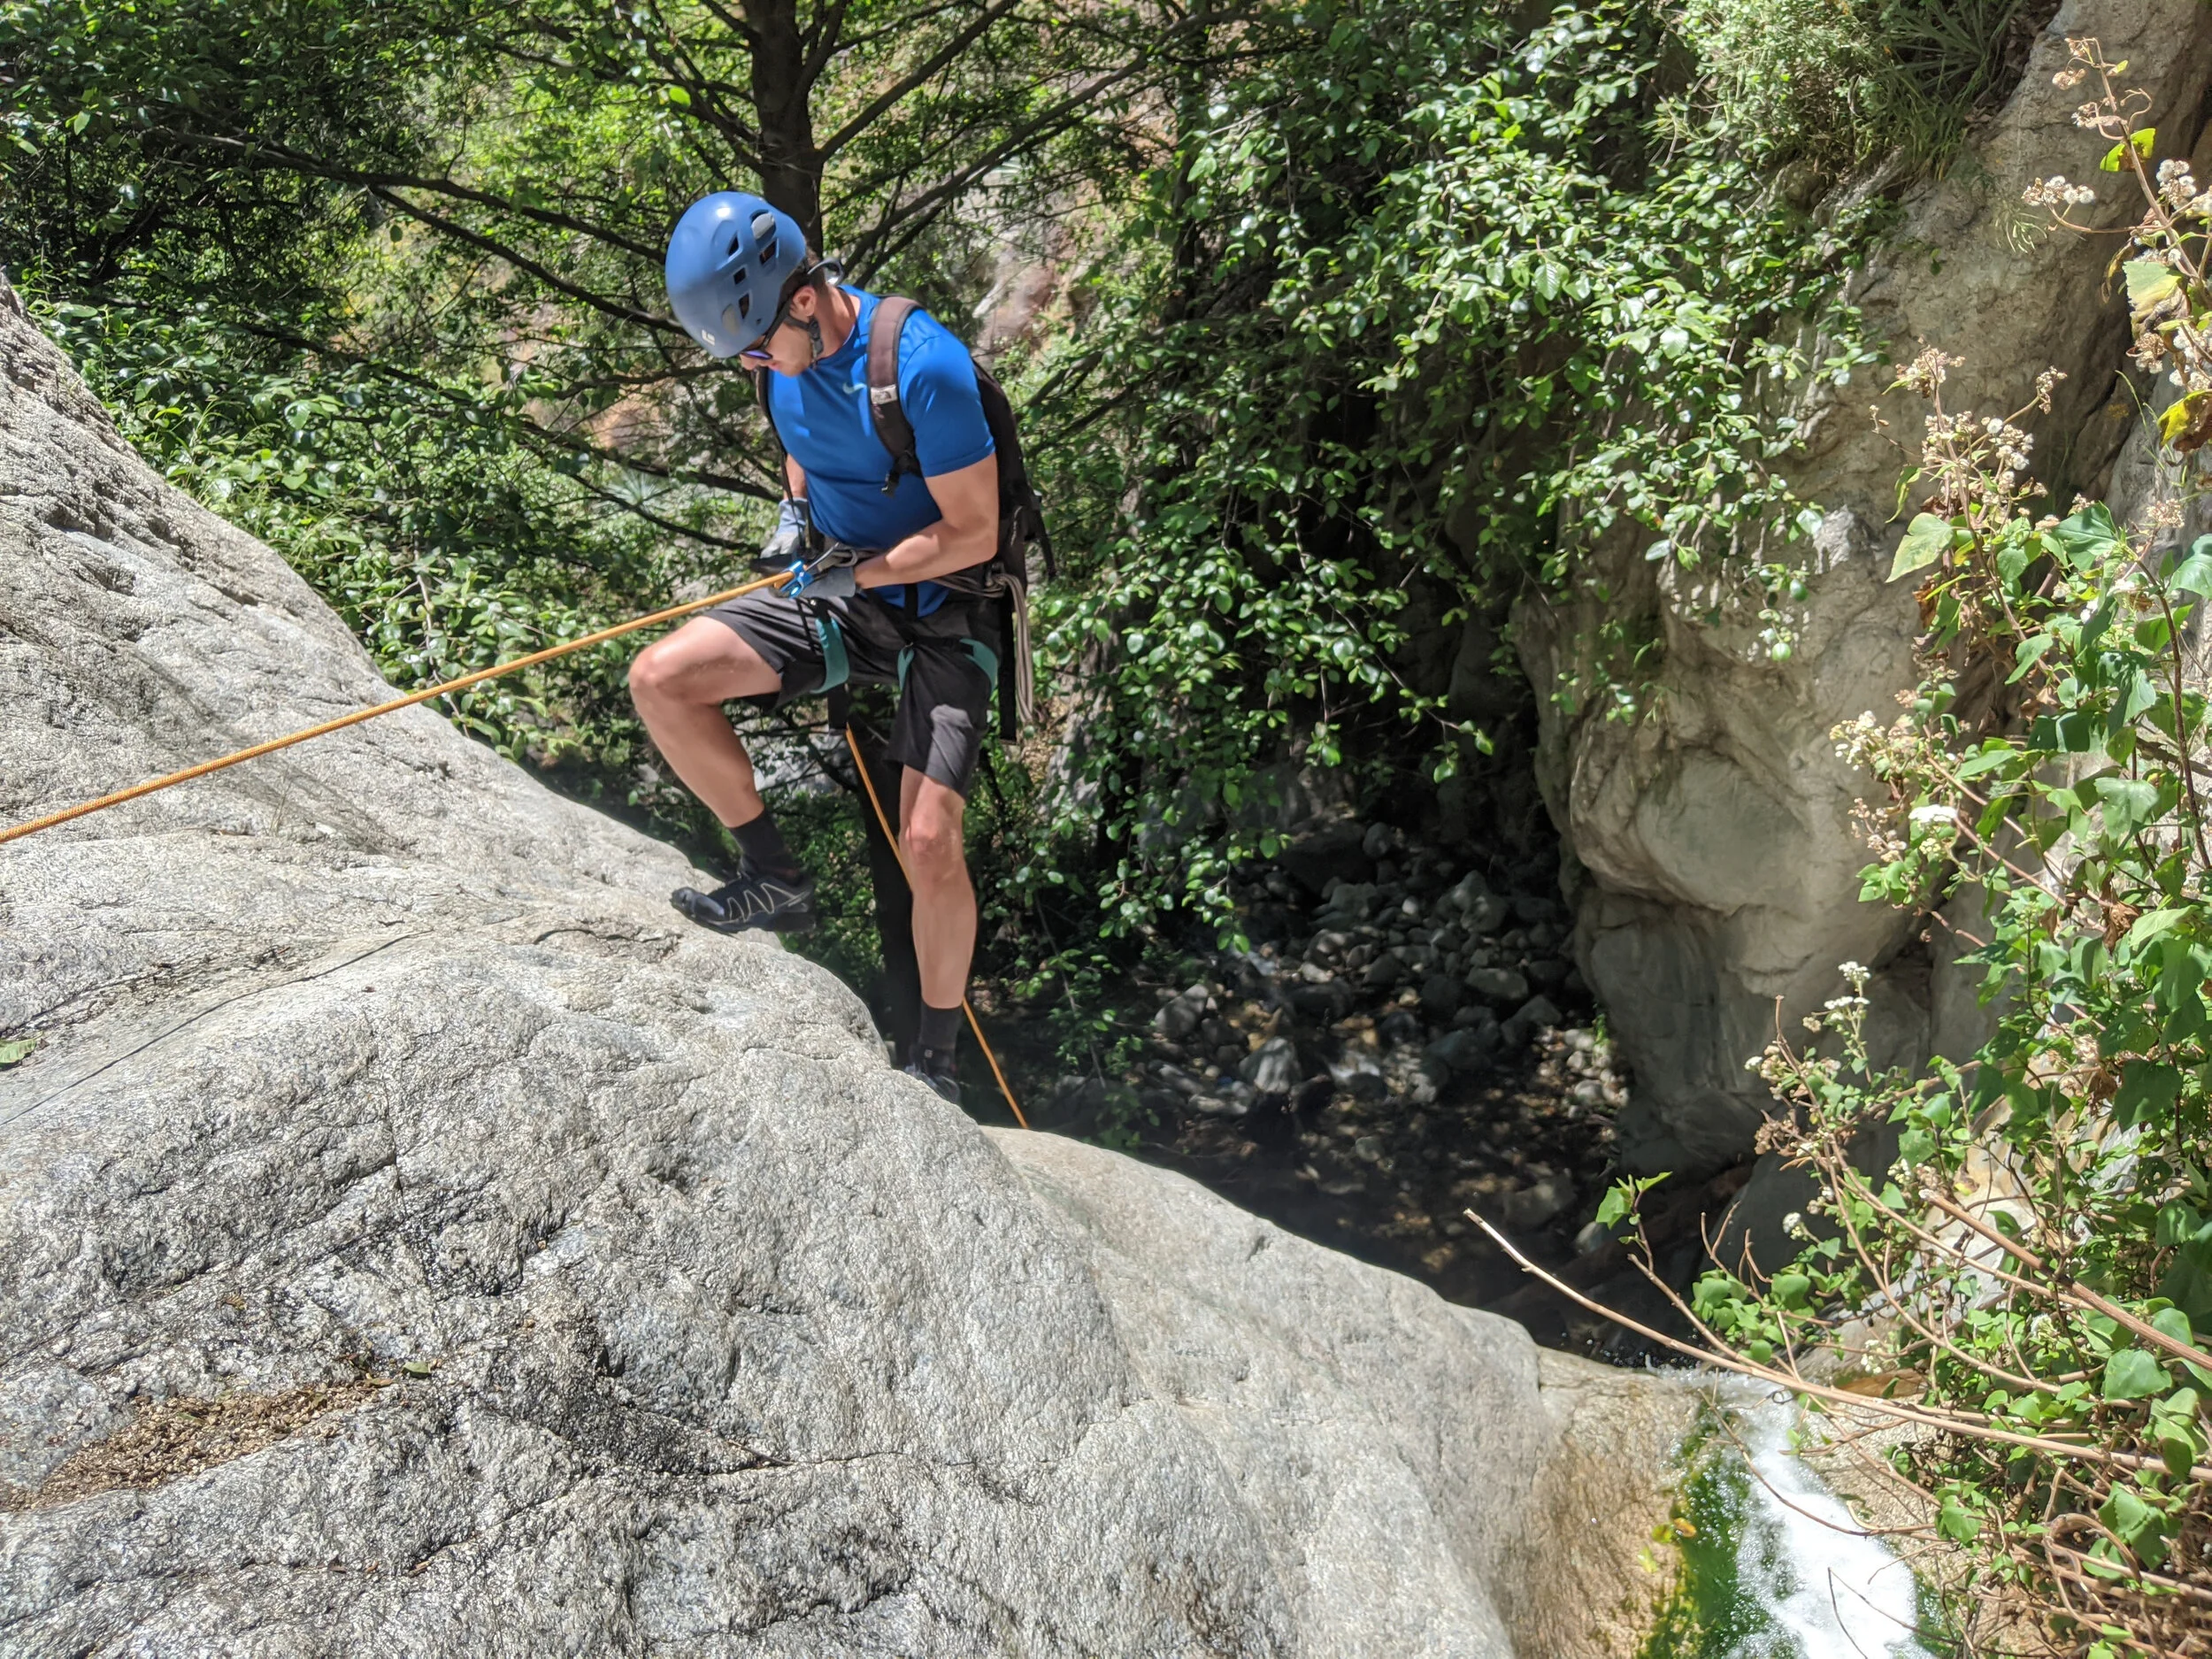
Standing over the longest rappel in Bailey Canyon (105 ft.) with an unbeatable view of Pasadena
DIFFICULTY - EASY
Technical Research
Overview - An impressive next-level adventure, given its proximity to LA’s city limits. Bailey Canyon is a great canyon for first-time canyoneers (with an experienced leader). With 14+ rapid-fire rappels and a great scenic view of the city, it’s a blast for experienced people as well.
The parking lot is located in a neighborhood of Sierra Madre, barely east of Pasadena, in the foothills directly south of the Mt. Wilson Observatory.
Difficulty Rating - 3AIII
Time - I’ve seen Bailey take beginners between 6-10 hours from car to car. Experienced canyoneers could certainly reduce their run time to 4-5 hours.
Hike - 3 mi. total (2.3 mi. steep uphill ascent, .7 mi. descent)
Raps - 14 (with an option for a 15th) - see detailed route plans in the Resources below.
Longest Rappel - 105 ft. (a 60m static rope is just long enough to complete the rappel).
Water Flow - To elaborate a little beyond the letter “A” in its rating, Bailey Canyon will be dry the vast majority of the time throughout a given year. We ran the canyon in mid January roughly two weeks after a major snow storm covered Mt. Baldy, and it rained for an hour the night before our trek. With all that, the heaviest water flow we experienced was a light trickle (approx. 1 in. deep) through avoidable sections in about half the canyon. The only time you should ever see flowing water is directly after a heavy rainstorm. Otherwise the canyon should be dry.
Wilderness Permits - No permits needed for the canyon or parking lot access.
When to Run It
Year around! Having run it at all times of year, it gets pretty overgrown during spring months when everything is blooming. I actually like it most in December/January, when you deal with less foliage. Just be mindful that it’s a long canyon, and it gets dark early in the wintertime (hint: bring headlamps).
Unexpected Challenges
This canyon runs much differently in the summer than it does in the winter. Pay close attention to the factors below as they relate to the season you’re experiencing:
Heat & Completion Time - Many people use this canyon to teach beginners. Each time I’ve done it, the day takes much longer than I expect, and I’m usually finishing the route in the dark. Start your day EARLY, taking into account both heat on the uphill hike and daylight on the way down. If you start too late, you’ll be punished by both. I’d recommend being on the trail no later than 8am.
Overgrown Foliage - I’ve noticed a BIG difference between cooler and warmer months. In January, we barely dealt with any issues with overgrowth whatsoever. In May I felt like I needed a machete. The next two points are a direct result of this one as well.
Snakes & Bugs - This one is big. As of 2024 (dozens of Bailey trips completed), I’ve encountered both ticks and scorpions in Bailey. In the summer, tall grasses particularly in the lower half of the canyon turn Bailey into Rattlesnake City. From June - August, it’s not uncommon to see 2-3 rattlers, often in the middle of the canyon, on any given run. If you do see a snake, please take all measures necessary to clear it from your path safely without harming or killing it.
Poison Oak - Poison oak plants are abundant but leafless in January, presenting some (but minimized) risk. Come spring and summer, it’s everywhere. Easy solution—wear long pants and long socks. Don’t go tromping through bushes outside of the watercourse.

Navigating through a small gully at the top of Bailey Canyon

The dry rappels of Bailey Canyon make for smooth, beginner-friendly descents (March, 2022)
If you time the weather perfectly during a wet year, descending Bailey Canyon in flowing water is a next-level experience (March, 2023)
Special Equipment
Standard gear kit (see Let’s Talk Gear section below)
Harnesses, rappel devices, tethers, locking carabiners, webbing & quicklinks, helmets, etc. with backup & rescue gear as needed.
Prusiks - This canyon is dry in most conditions. In standard dry weather, an autoblock should be used for safety.
Minimum Rope - 200 ft. static rope + 100 ft. backup rope.
ALWAYS bring a headlamp (one for each person), especially during winter.
Long pants & socks to protect against Poison Oak, snakes, ticks, etc.
Plenty of food & water
Wetsuits are not needed unless you’re specifically seeking flowing water after a heavy rain storm.

Getting There
You can easily find the parking lot by typing Bailey Canyon Wilderness Park into Google Maps. Important note: Be cautious of the gate being locked after sunset. Bailey Canyon can take a full day, especially for beginners. If you think there’s a chance you may be out after dark, find a parking spot in the surrounding neighborhood so your car doesn’t get locked in.
The trail to the start of Bailey Canyon isn’t short, easy or shaded. We recommend starting this route early to avoid the heat of the day and (most importantly) finish before dark.
The Approach
From the trailhead parking lot, take the one and only trail, which begins near the restrooms and heads west through an oddly-placed turnstile. You’ll follow an asphalt road uphill heading north, which leads past the Bailey Canyon debris dam. The road turns into a dirt trail as you approach Bailey Canyon trailhead.
As you begin your trail hike, ignore the footbridge on your right crossing over the stream; simply continue down the main path you’re on.
Roughly half a mile in, the trail forks left at a sign indicating access to the Canyon View Nature Trail. You’ll be heading back on this trail after your last rappel at the end of the day. For now, stay on the main trail to your right.
For the next two miles (it will feel like four), the trail winds directly uphill to the east of a very obvious chasm in the hillside (Bailey Canyon, of course). Luckily you’ll enjoy excellent views of downtown Los Angeles and the city of Pasadena on the way.
After two miles, when the trail curves in toward the hillside, you’ll see a noticeable side trail on your left veering toward the foundation of an old stone house. This is a great place to take a break and suit up. Your canyoneering descent starts directly behind the ruins of an old stone house leftover from early mining days.
Follow the trail downhill into the gully, and head downstream. Your first rappel begins roughly 5 min. into your hike.
Additional Resources
RopeWiki - Bailey Canyon (includes beta on each rappel in the canyon)
SummitPost.org - Bailey Canyon (detailed instructions from the parking lot to the start of the descent)
Chris Brennen Canyoneering - Bailey Canyon
World of Waterfalls - Bailey Canyon (for conditions regarding water flow in the canyon)
Bailey Canyon feels like rappelling through a garden!
Tossing rope down into an overhanging rappel that descends into a green, beautiful grotto.

The longest rappel in Bailey Canyon (105 ft) isn’t especially steep or technical. It’s a great route for beginners, providing they’re with a leader with solid experience.
Little Santa Anita Canyon

This may the most technical maneuver in Little Santa Anita Canyon—a tight V-trough followed by an overhanging drop with water flowing over the falls.
DIFFICULTY - EASY / INTERMEDIATE
Technical Research
Overview - The perfect intro to wet canyons during warm summertime months. An exciting, cruisey, well-bolted route that isn’t prohibitively long or technical, LSA is the perfect way to cool off while getting an adrenaline fix on a hot day in LA when everyone else is roasting in the city below.
Difficulty Rating - 3BIII during the summer; 3CIII during winter or after heavy rains
Time - 3-6 hours including the hike. It took us 5.5 hours (10:30am - 4pm) with one beginner and one first-timer.
Hike - Roughly 3 miles total (1.5 mile ascent plus .5 miles from the exit to the car; 1 mile descent)
Raps - 12 rappels unless you take the shortcut out, which looked like a lot more effort than it was worth.
Longest Rappel - 50 ft.
Water Flow - On a low/moderate flow year, June through September shouldn’t require a wetsuit (I’ve run twice in late May in swimsuits feeling very comfortable) but check waterflow on RopeWiki for conditions prior to your trip.
Gauge the weather appropriately. On a dry spring/summer day, expect steadily flowing water through the upper half of the route. The canyon’s light waterfalls may be a bit scary for an unseasoned beginner depending on their risk aversion, but shouldn’t present any substantial risk typically associated with C-class whitewater.
Wilderness Permits - No permits needed (neither for use of the canyon, nor parking lot access)
When to Run It
Typically year round, but early spring to early summer is best, depending on your water flow preference. In a low flow year (2022), it can get pretty swampy by August. In a high flow year (2023), the canyon is excellent all year.
Unexpected Challenges
This canyon runs much differently in the summer than it does in the winter. Pay close attention to the factors below as they relate to the season you’re experiencing:
Algae + Granite = Slick Waterfalls - Most of this route contains granite rock, which becomes very slick when wet. Additionally with algae covering nearly every waterfall, you’ll find a few dangerously slick rappels on this route.
Water Conditions - Pay close attention to time of year and rain in the forecast prior to your trip. This canyon is known to have C-class water flow after heavy rains, so avoid the canyon if the gentle stream at the top looks like rushing water. If the pothole is full, don’t jump it unless a proper depth check is conducted (minimum 8 feet of depth required).
Poison Oak - We saw LOTS of Poison Oak in May, including several massive bushes growing over the trail around the midway point. If you’re not wearing a wetsuit, I’d highly recommend wearing tights/leggings under your swimsuit for extra protection.
Gate at the Bottom - The gate at the bottom of route near the dam is locked, but can easily be climbed on the right hand side near the retaining wall.


Special Equipment
Standard gear kit (see Let’s Talk Gear section below)
Wetsuits shouldn’t be necessary on a hot day (80F or higher) between late May & late September. During winter months, cooler days and heavily flowing water, wetsuits are highly recommended or required.
Food & Water - Pack smart with your food and water. A light lunch is perfect—don’t bring a picnic, it’s not a long canyon. I would bring 1-2L of water max unless it’s especially hot out.
Getting There
Park at the standard Mt. Wilson trailhead, as shown in Google Maps. A small park with a bathroom marks the spot.

The Approach
Take the Mt. Wilson trail approximately 1.6 miles uphill to the well-marked First Water junction. Gear up at the shady grove near the stream to your right and follow the water downhill to your first rappel.
Additional Resources
Ropewiki - Little Santa Anita Canyon
Christopher Brennen - Little Santa Anita Canyon (winter or heavy water flow conditions)
SummitPost - Little Santa Anita Canyon
YoutTube - Little Santa Anita Canyon in the San Gabriel Mountains of Southern California
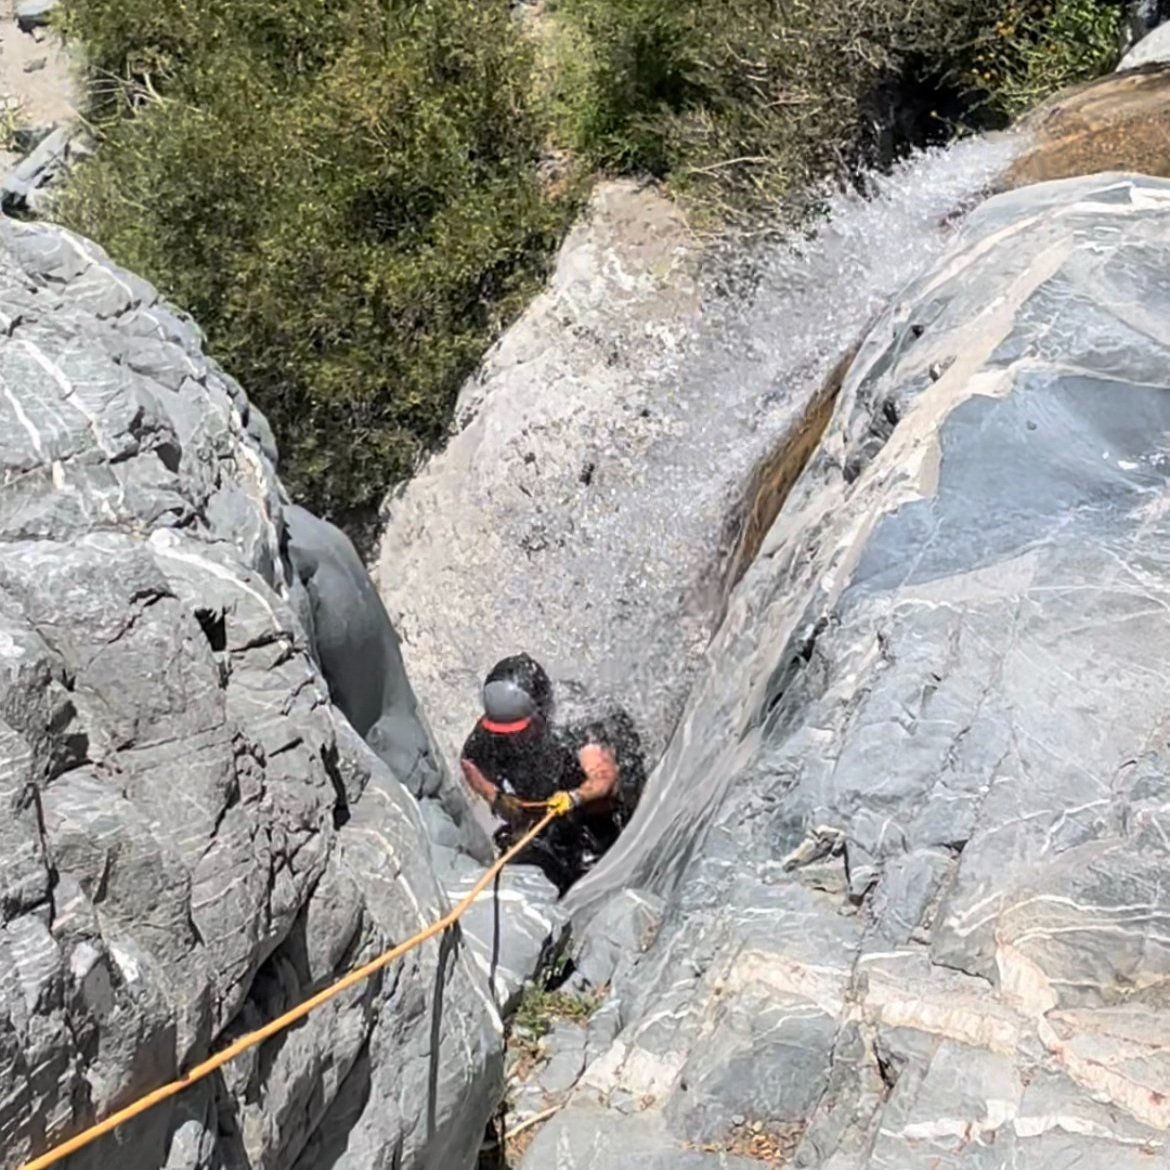
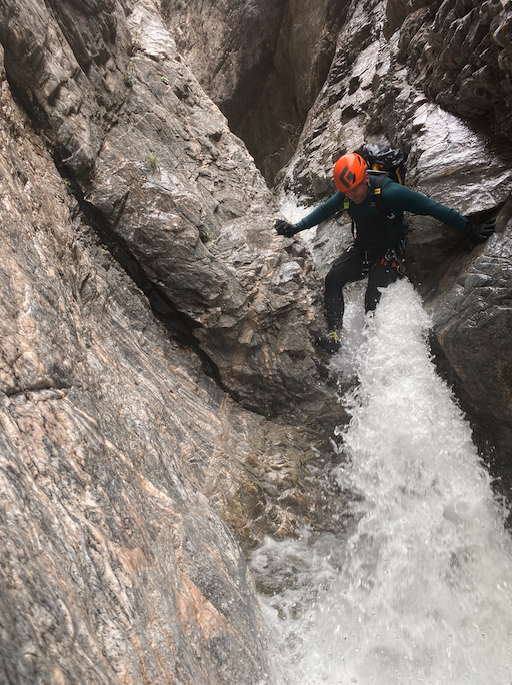
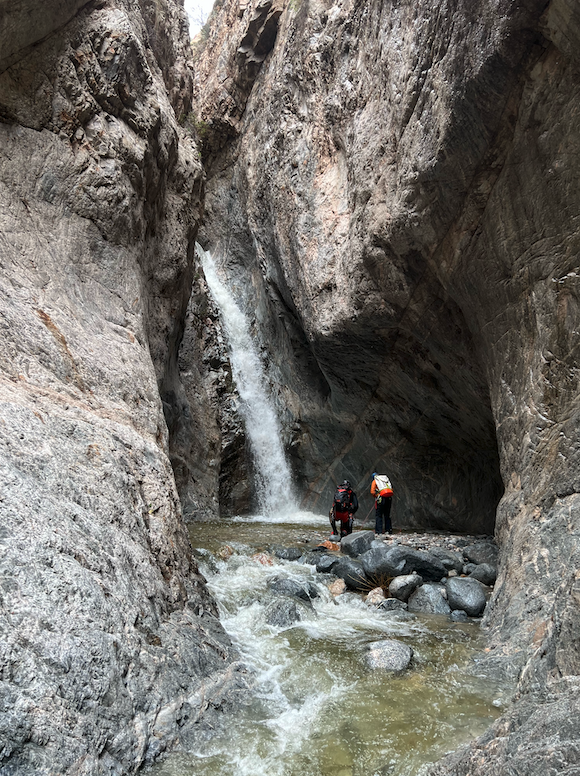
Starting the first rappel in Little Santa Anita Canyon. Stay high on the route to avoid the slick algae covering the waterfall.

The first rappel is great in high flow! Water levels only reach this high after big storms. Most of the time LSA is much more beginner-friendly.
During high flow, the LSA Pothole can occasionally be cliff jumped. It’s an exceptional feature in this canyon, but the Pothole drains quickly, so a depth check must always be performed before leaping.
San Antonio Falls
DIFFICULTY - EASY / INTERMEDIATE

Technical Research
Overview - San Antonio Falls is one of my favorite courses in Southern California. Its well established anchors, year around waterflow and close proximity to the parking lot make it an ideal intro course for beginners during warm summer months. For advanced canyoneers, this route is still an excellent cruiser packed with great views and fun water-soaked rappels.
Full Route vs. Sneak Route - There are two versions of the route, the details of which can be found on San Antonio Falls’ Ropewiki page.
I highly recommend the sneak route over the full route from the ski hut. The five best rappels are all back-to-back at the bottom of the route (the sneak route leads directly to the top of the first of these five raps).
The full route adds on several hours of downclimbing boulders through the stream, with only one decently fun rappel added near the top. You’ll also found that, even with an early start, the heat of the day (and light) often pass by the time you get down to the final rappels. The sun drops behind a tall SW ridge early (roughly 4pm), meaning you’ll be doing the bulk of the watercourse in the shade. You may lose a bit of the fun factor if members of your group start getting cold.
Difficulty Rating
Sneak Route (recommended): 3BII
Full Route from the Ski Hut: 3BIII
Time
Sneak Route: 1.5-3 hrs
Full Route: 4-6 hrs
Hike
Sneak Route: Just a 20 min. hike up a gully with a light but obvious trail
Full Route: 5 miles total—expect a 2.5 mi. (roughly 1.5 hrs) steady up hill slog to the ski hut
Raps
Sneak Route: 5 rappels
Full Route: 6 rappels - the first one starts at the top near the ski hut
Longest Rappel - 90 ft.
Water Flow - Just about any Class B canyon can turn into a C if you catch it on the right day (i.e. in early spring or during/after a heavy downpour). Make sure to check the weather conditions before you go.
Wilderness Permits - None
When to Run It
San Antonio Creek is spring fed, and runs essentially year around! Hot days in July and August are ideal, especially because temps on Mt. Baldy are usually around 5-10 degrees cooler than the scorching valley below. Even in Sept. and Oct. during a low-flow year, you can expect a light but still refreshing stream of water flying off the falls.
Unexpected Challenges
Daylight - If you do the full route from the ski hut, expect that you’ll be in the shade on the final five rappels unless you start the day really early (i.e. before 7am). The sun sets earlier than expected due to a tall SW ridge that blocks light & warmth in the afternoon.
No Cell Service - Expect literally zero cell service on Mt. Baldy. You’ll lose it as soon as you start your drive up the hill and won’t get it back until the end of the day when you return. If you’re meeting people up at the trailhead, make sure you coordinate before your drive.
Stuck Rope - Sometimes the V-shaped trough at the top of the tall rappel (rap #3 on the sneak route) will try to eat your rope on the pull. I’ve literally seen the plastic tip on the end of the rising rappel side get wedged into a tight crease below the anchor, rendering it completely stuck. Stepping up on the dirt mound DCR (down canyon right) of the falls and organizing your rope before the pull usually does the trick.
Special Equipment
Standard gear kit (see Let’s Talk Gear section below)
Wetsuits shouldn’t be necessary on a hot day (+80F) between late May & late September. During winter months, cooler days and heavily flowing water, wetsuits are highly recommended or required. Keep in mind the elevation of Mt. Baldy will produce temps at least 10-15 degrees cooler than the valley floor below.
The Approach
Both routes are easy as far as canyoneering approaches go. For the full route, follow Baldy Bowl Trail to the ski hut (you can’t miss it), where you’ll see a conveniently located creek, marking the start of the route.
You’d almost expect the sneak route to be harder to find since it’s a bit off-trail, but this one’s even easier. From the paved road, head downhill toward the falls, and follow a wide gully going straight up the hill to your right. You’ll see an obvious hiking trail that leads you to the start of the route. Gear up at the top of the first waterfall.
Getting There
Type in “Mt. Baldy Trailhead” into just about any maps app, and you should be able to find the parking lot. You’ll want to park at the primary hiking trail parking lot for Mt. Baldy, located near Manker Flats Campground. If you reach the ski resort parking lot, you’ve gone a bit too far.
Additional Resources
Ropewiki - San Antonio Creek
YouTube - Canyoneering San Antonio Falls (I’m not affiliated with these guys, they just made an awesome video)
SummitPost - San Antonio Falls: Canyoneering


Eaton Canyon
DIFFICULTY - INTERMEDIATE / ADVANCED
Technical Research
Overview - One of the most beloved canyoneering routes in Southern California, Eaton Canyon is a fun and scenic canyon whose smooth, sloped granite form a series of natural slides into deep pools, giving it a cool outdoor waterpark vibe!
While most of the rappels are not overly technical, Eaton packs a challenging punch (sometimes haymaker) if you catch it on a day with high water flow—especially the final two rappels. For many others, its aquatic conditions and sheer length alone can provide a dangerous challenge on their own (see disclaimer below).
The final waterfall is a popular hiking destination, so you’ll likely finish your day with a group of interested spectators waiting for you at the bottom.
Difficulty Rating - 3BIV or 3CIV (depending on water flow)
Time - 6-12 hours. If you’re not sure where you’d be, assume it’s on the higher end of the range.
Hike - Expect a 9+ mile day with roughly 1,600+ ft elevation gain. Most of the distance and elevation is knocked out in your 4.6 mi. approach (roughly 2-3 hours) that ascends up and over Telephone Flat. The technical course itself is relatively flat aside from the rappels.
Raps - Up to 9 rappels
Longest Rappel - Bring enough rope for a 75 ft. rap, since some anchors are set away from the ledges of the rappels. Despite that, I’ve generally never encountered any rope pull issues in Eaton. It’s still best to carry extra rope (240+ ft total), since the bottom rappels are two of the longest.
Water Flow - Depending on time of year and waterflow Eaton will vary between Class B and Class C (sometimes even extreme Class C) conditions. Always check conditions beforehand, especially if you’re planning your trip in spring months or after a heavy rainstorm.
There’s also an unofficial (but very straight-forward) flow gauge at the start of the approach hike, just upstream from the Mt. Wilson Toll Rd bridge, as noted by Willie on RopeWiki.
Wilderness Permits - None
Important Disclaimer about Eaton (Please Read)
Eaton is not a beginner friendly canyon, especially without competent leadership. People from the climbing community making self-guided debuts to the canyoneering world often experience a brutal awakening when they discover the highly aquatic nature of Eaton Canyon. In Sept. 2023, one group required a SAR team helicopter rescue after an exhausting day filled with unfamiliar challenges kept them out after dark.
The bypass around the final waterfall is extremely dangerous. This ridge trail specifically has led to multiple fatalities (at least five since 2011) and dozens of injuries and evacuations. It is extremely dangerous, even for experienced canyoneers. DO NOT ATTEMPT.
Come prepared with proper equipment and leadership. If you’re thinking of trying this route without a wetsuit, think again. Same thing goes for a headlamp and proper rescue gear (as well as the ability to use it). If you don’t know what releasable contingency anchor is, seek out experienced leadership.
If you’re determined to run Eaton and don’t know where to find competent leaders - try the SoCal Canyoneering Facebook group, or contact us for lessons and learn how to lead your own canyons.
When to Run It
Timing is everything with Eaton. It’s a blast with healthy water flow (i.e. all year long in 2023). In stagnant summer months or drought years (i.e. August 2022), Eaton can be swampy and unchallenging.
Experienced canyoneers should shoot for windows between January and June, while keeping an eye out for ideal water conditions.
Special Equipment
Standard gear kit (see Let’s Talk Gear section below)
Bring a 3 or 4mm wetsuit if you’re going anytime during the winter or spring
Bring dry bags and full submersion gear during winter and spring months when there’s deep water in the canyon
Eaton is a long day. Bring a full lunch and plenty of water for the approach.

Caution: The final approach into Eaton Canyon is steep and dusty. Wear grippy shoes!
Getting There
Parking - The PineCrest entrance is the way to go. I’ve been told the gate locks at sunset, but haven’t been out late enough to find out. If there’s any doubt about your exit time, the small dirt parking lot on Altadena Dr. near Henniger Flat works as well.
The Approach
Three important takeaways before you start your journey into Eaton Canyon:
Be attentive about start time and weather on the approach. I typically start Eaton before 9am to avoid a blistering hot approach hike, which also allows plenty of extra time to correct for errors if we experience any challenges or delays.
Wear long pants or tights, and consider bringing tick repellant (Permethrin). The approach into Eaton Canyon has a lot of dried brush that’s known to be a hot spot for ticks. After the approach hike is over, check yourself head-to-toe before putting on your wetsuit.
The final descent into the start of Eaton Canyon is steep and loose. Wear grippy shoes and tread carefully. Have your group be careful with falling rocks.
Additional Resources
Ropewiki - Eaton Canyon
BluuGnome - Eaton Canyon (lower) 3BIV
Tackling a constriction point in the canyon on a high flow (C2) day. Eaton Canyon typically only yields this much water directly after rainstorms.

The beautiful granite hallways of Eaton Canyon.

During summer months, Eaton canyon turns into a beautiful sanctuary for frogs, newts, lizards, snakes and bears! We saw a ton of bear scat this particular day.

Descending the final rappel of Eaton Canyon in January. Being a popular waterfall destination in Pasadena, you’re almost guaranteed to have a curious audience.
Lytle Creek
DIFFICULTY - INTERMEDIATE*

Technical Research
*Lytle Creek is OK for beginners with a good trip leader and low to moderate water flow
Overview - Located up in the mountains on the north side of Cucamonga Peak, Lytle Creek has a cool high alpine vibe, and is one of the most scenic and adventurous canyoneering routes in SoCal. Every rappel is excellent. The final three are jaw-dropping. Several rappels drop into pristine granite bowls where the fresh mountain water forms clear turquoise pools. The natural beauty combined with the brilliance of the adventure will compose a day you absolutely will not forget.
Difficulty Rating - 3BIII
Time - Due to a long-ish approach hike, it can take up to 8 hours to complete this route from car to car with a crew of beginners. An experienced team may be able to complete it in as little as 4-5 hours.
Hike - 6-7 miles total, +2,000 ft. elevation gain; expect a 3.1 mi. (roughly 2 hours) steady uphill slog to the start of the first rappel.
Raps - 5 rappels
Longest Rappel - 100 ft.
Water Flow - Water flow feels like a perfect Class B during early July. In August, you’ll still get waterflow, but it’s noticeably weaker. Best time of year would be April - early July on a typical year, where you could get some fun Class C conditions if you time it right.
Wilderness Permits - You will need to pick up an Adventure Parking Pass on the way in for $5, which you’ll display on your dashboard in the parking lot. There’s a charming farm selling fresh fruit on the way in that sells them, and the fruit is excellent.
When to Run It
For experienced canyoneers, Lytle Creek would be a blast in April through June when water flows are high and the scenery is lush and beautiful. In mid-summer, it’s a blast for ambitious newbies, as long as you have an experienced and competent leader in the group. I would not recommend this route for timid first-timers at any time of year.
Unexpected Challenges
Distance - Everyone agreed the hike felt longer than the distance reported on the map.
R3 - The pool at the bottom of the third rappel has a dangerous pour-over ledge. The water runs through a slick narrow granite channel, and speeds up as it flows toward the edge. Several years a go, a woman slipped in this spot and was flushed off the 65ft cliff, resulting in a critical injury and helicopter evac (luckily she survived it). If water flow is heavy, have the anchor manager feed ~30ft of extra rope once the first person is at the bottom, allowing him/her to remain on rappel until they reach the next anchor.
Special Equipment
Standard gear kit (see Let’s Talk Gear section below)
A good portion of this route is shaded. Wear a wetsuit if you’re going any month other than July or August.
While you probably won’t be swimming on this route, bring dry bags and full submersion gear, because you will get completely soaked and blasted with water.
The Approach
While the trail map will tell you the entire trail is 6.2 miles (3.1 mi each way)., it’s going to feel like a little more than that. Maybe that’s due to the 2,000 ft. in elevation you’re going to climb on the way up.
Either way, your friends will complain about the approach (mine tried to convince me his GPS read 15 miles). Either way, everyone will agree, it’s 100% worth the effort.
Getting There
Did you know there’s a town called Scotland, CA? Well there is. Wouldn’t exactly call it the next Idyllwild, but it does exist. From the town of Scotland, head up Middle Fork Rd. all the way to the parking lot.
The gravel road leading up to the parking lot is VERY bumpy. In some years (i.e. 2022), this road has been manageable even with a passenger vehicle. Last year (2023), a non-4WD Toyota Tacoma barely made it. That’s a hard thing to monitor conditions for, so make your life easier and bring a high clearance vehicle.
Additional Resources
Ropewiki - Lytle Creek (Middle Fork)
YouTube - Middle Fork Lytle Creek HIDDEN Waterfalls - Canyoneering in San Bernardino National Forest (Jesse St. Louis is the man, definitely follow his channel for all kinds of great hidden waterfall hikes & canyoneering trips in SoCal)


Rappel 3 in high flow. Pictured: Tony Magno

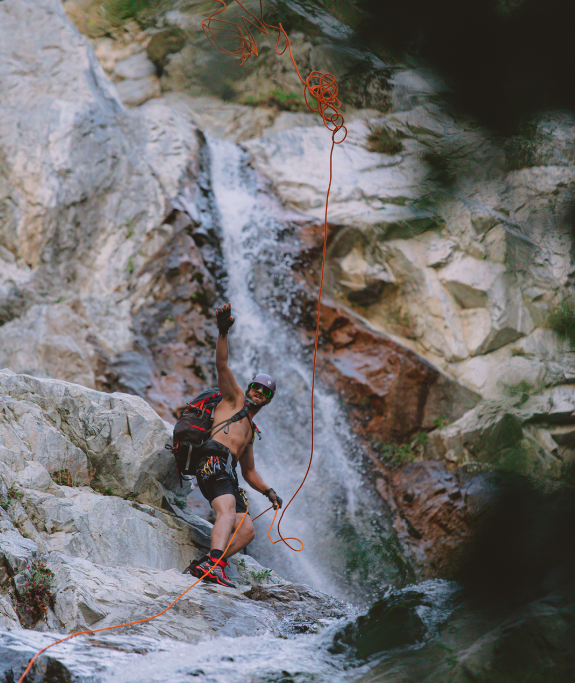

Lytle Creek is known for the beautiful granite bowls at the base of its rappels, forming turquoise-colored pools with its crisp mountain water.
Monkeyface Creek
DIFFICULTY - INTERMEDIATE / ADVANCED
Technical Research

Overview - With the right amount of water flow, Monkeyface Creek is one of the most exciting outdoor adventures in Southern California. Known for its tall, steep rapid-fire rappels, this route is a combination of both challenge and thrill for intermediate and advanced canyoneers.
Difficulty Rating - 3BIII
Time - 4-5 hours
Hike - 1-2 miles or less (short, but steep and challenging - details below)
Raps - 10-12
Longest Rappel - 88 ft. if you avoid the 200ft drop-in rappel on the approach (most people typically do)
Water Flow - Typically Class B, but very capable of reaching Class C (or C2) level flows in winter/early spring or after rain storms.
Wilderness Permits - N/A
When to Run It
If it’s your first time running it — consider going between June and October to familiarize yourself with the obstacles. This canyon gets noticeably more technical in higher flow. If you go during warmer months, get an early start to avoid doing the steep approach in the heat.
For experienced canyoneers — anytime the water is flowing nicely. January and February typically yield the highest flows (bring plenty of neoprene). Like neighboring canyon Vivian Creek, this area is high enough in elevation to see snow if it’s after a major storm in the winter.
Unexpected Challenges

Starting the rappel at R7. The treacherous shelf is just 10-15 ft below her in the photo where the water is splashing over the front of the chalkstone.
The Slimy Stem - After the upside-down log rappel (R6), you’ll reach a tricky narrow down climb over a chalkstone boulder into a 5’ wide x 15’ long pool of water.
The pool is usually deep enough to slide into, but should be depth checked for rocks & debris before jumping in blindly. In high flow, the walls on each side are typically covered in algae, making a difficult stem.
Send a competent person down first (to rig R7) using a meat anchor from a teammate (best option) or a transient anchor (i.e. CEM) around the large tree above the obstacle. Rig high on the tree. DO NOT let the rope slide down to the base of the tree, or it will get pinched and you will not be able to retrieve it.
R7 & R8 - The narrow shelf between R7 & R8 can be a little nerve-racking on this route. Everyone but the last person typically combines these two for a relatively harmless (albeit soaking wet) rappel. In low to moderate flow, the last member down (aka LAMAR), may want split them up into two separate raps to avoid getting the rope getting caught in a chalkstone boulder part way down the route.
This narrow chamber with a single bolt (R8) takes the full brunt of the water flow. When the water is cold and flowing above moderate levels, this spot can be really dangerous. Efficiency is key while you’re getting blasted with icy water from above, so stay organized with your rope to avoid tangling.
Best option for moderate flow (C1) - When LAMAR reaches the shelf, have teammates ready to pull the main rope from the bottom (be ready to free it and toss it down if it sticks), while you use a separate shorter rope just for the 25 ft drop from R8. That should avoid the long rope from above tangling up in the rocks, leading to costly delays in a bad area. Ropewiki gives a solid description.
Best option for high flow (C2+) - LAMAR combines both rappels like everyone else. Use an old rope you don’t care about, because you’ll be risking a tricky rope pull. Be sure to rig the pull cord on the downhill-facing side of the quicklink for an easier retrieval.
Chalkstone Boulders - In general, this entire route has been known to eat a lot of ropes. Its tight granite corridors are filled with chalkstone boulders that create a lot of pinch points (and awkward rappel starts). Come prepared with a knife, enough rope to forgive accidents (recommend at least 300 ft total), and a good contingency plan with your team.
Cold Water in High Flow - Gear up and be prepared for cold water in winter and early spring. The canyon sits at the base of San Bernadino Peak and adjacently Mt. San Gorgonio, so expect slightly colder water than other routes in the San Gabriels (i.e. Eaton) as the canyon may be fed directly by snowmelt in the winter and early spring. Luckily Monkeyface is a south-facing canyon, giving it solid sun exposure, even in the middle of winter.
Special Equipment
Standard gear kit (see Let’s Talk Gear section below)
December through March, you’ll be happy in a thick wetsuit (4/3 or 5mm), rain jacket and neoprene socks/gloves.
Bring a hooded rain jacket if facing high flow conditions, and wear your hood on the rappels that pass directly through the waterflow. I’ve had some dangerous brain freezes on this route from relentless cold water to the face.
While you won’t really be swimming on this route, bring dry bags and full submersion gear, because you will get completely soaked and blasted with water.
The Approach
Steep, hot and sustained. Expect a dry, loose Class 3 scramble all the way to the top. On your first time, it will seem like hell. Once you’re familiar with the best line, it’s really not that bad (especially compared to the long treks up to Eaton Canyon or Great Falls of the Fox).
Take the ridge ascent + earthen slope drop-in as opposed to the traditional gully route (both are outlined on Ropewiki). Don’t make the mistake of getting on the ridge path right away though. Stay on the sturdy (noticeable once you’re in it) trail in the gully for the first 100 yards up the hill and cut left once you’ve passed most of the loose rock at the bottom.
Everyone should be extremely careful of loose rockfall from team members climbing above. Wear helmets and give space. Avoid climbing directly underneath the person in front of you.

Looking up the climb on the approach.
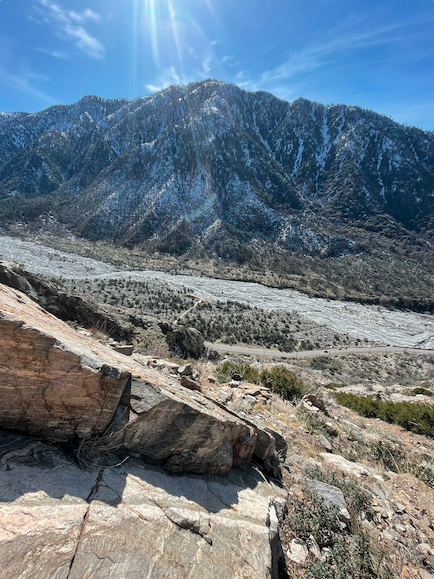
Looking across the valley near the top of the approach climb.
Getting There
Park at the dirt pull-out on the left to avoid any potential break-ins. The shoulder on the right is a little closer to the main road and more visible to passers-by with sticky fingers.
Additional Resources
Ropewiki - Monkeyface Creek

Rappelling down onto the upside down log in very low flow.

The same rappel in moderate/high flow. Due to its narrow width, a little water has a big impact on the difficulty of this canyon.
Let's Talk Gear
What I Bring on Every Trip
On the Person
No cotton clothing - Neoprene, wool, or synthetic material (polyester, nylon, spandex, etc) clothing & socks.
Long pants or tights - I wear tights in just about every canyon that doesn’t require a wetsuit. Southern California trails are COVERED in Poison Oak and scratchy vegetation. Bees, ticks and mosquitoes are common as well.
Always bring hair ties + extras - Mandatory for ALL canyoneers with long hair. You REALLY don’t want hair getting caught in your rappel device.
Food & Water - I like to bring a solid lunch. Snacks alone rarely get the job done for me.
Rain jacket (optional) - I like to wear a lightweight hooded rain jacket or windbreaker tucked under my harness in wet canyons. It protects the wetsuit from cold splashing water near waterfalls and seals in heat. In the brunt of high water flow, you can put the hood on to block cold water and prevent dangerous brain freezes.
On the Harness
Rope + Rope Bag - For most cases, you’ll want to bring 3x the amount of rope of your longest rappel. For example, if the tallest rappel is 100ft, I bring one 200ft rope plus one 100ft rope as a backup.
Harnesses, slings, locking carabiners - LOTS of locking carabiners.
Tethers a.k.a. lanyards - I make mine with 7ft of 8mm dynamic rope (SoCal Adventure Gear sells it by the foot). The Petzl Dual Connect Vario adjustable lanyard is an excellent piece of gear if you don’t mind spending the money.
Rappel devices a.k.a. descenders - Totem/Phoenix, CRITR, SQWUREL, PaliKoa Pivot, Figure 8’s.
Prusiks & friction hitches - I highly prefer using a VT prusiks rigged above the descender rather than standard prusiks/autoblocks rigged below.
Ascending & hauling devices - Mechanical ascenders (i.e. Petzl Basic), pulleys, progress capture pulleys (i.e. Petzl Microtraxion).
Backup webbing & quicklinks - If it’s a well-trafficked route, I always bring at least enough gear for 2-3 backup anchors (much more for a low-traffic route). I always carry at least two quicklinks.
Canyoneering shoes - If you don’t own a pair designed specifically for canyoneering, wear shoes that are grippy (no worn tread), lightweight, ideally drain water well and won’t get heavy when wet. Bestards and Adidas Hydrolaces are both great boots designed specifically for canyoneering. Avoid bulky hiking boots in deep water canyons.
Helmets
In the Pack
Dry bags - Depending on water levels.
A first-aid kit - Includes an emergency warmth blanket, a small BIC lighter and toilet paper.
Water filtration - The first-aid kit also includes a Sawyer ultralight water filter with sterilization tablets as a backup. Do not get caught without those sterilization tablets if you’re in a desert area like Utah or Arizona (trust me).
Garmin InReach Mini - Or GPS beacon of your choice.
ALWAYS bring a headlamp - One per person to every canyon—batteries charged, no exceptions.
Poison Oak defense (optional): Doesn’t hurt to have extra reserves of Tecnu (poison oak defense) and sunscreen in the car, especially in Southern California.
Additional Gear for Wet Canyons
This includes “Class B” with deep pools or “Class C” aquatic routes:
Wetsuits - Make sure the thickness of your neoprene meets the requirements for the water temperature and length of your desired canyon
A sturdy dry bag - These give an extra advantage of being used as a floatation device for your pack during any swimming sections
A floating rope bag - You really don’t want to deal with sinking rope in a deep pool.
GoPro or waterproof phone case (optional): I use a waterproof phone case attached to a cheap retractable lanyard found on Amazon. Ensures that the phone doesn’t slip out of your hands and tumble down a steep cliff when you sit back into your rappel (……that happened once).
Canyoneering packs - Backpacks made specifically for canyoneering with ample water drainage are a serious plus. Most regular backpacking packs won’t cut it in aquatic or deep-water canyons (class B & C). They quickly soak full of water and weigh down the person (not just annoying, but dangerous)! Completely waterproof backpacks won’t last long either. They look enticing but their seals simply aren’t durable enough for the impact they’ll take in canyoneering. In light water canyons (class A & B without frequent deep pools), regular hiking backpack are perfectly fine. Just keep your gear in a dry bag if there’s water, and be prepared to dump it out occasionally.
Towel and change of clothes - Waiting in the car with victory drinks/snacks when you’re done. Surf ponchos are clutch if you’re fancy.
My Favorite Gear
Canyoneering Companies I Love
Don’t expect any giant generalists like Petzl or Black Diamond. The brands below are innovative canyoneering-specific companies from California and the PNW, all of whom are dedicated to the responsible growth and preservation of the sport.
Most importantly, they create & sell EXCELLENT products.


What’s On My Harness?
Just a few of my favorite pieces of gear that I couldn’t live without. I own, use and love every item you see below.
I don’t make any commission from the gear that I recommend. For the sake of you guys and the quality of the content, I prefer that my suggestions be completely non-biased.
-Austin

Glacier Black 70m Cascade Newt Ultra-Static Rope

Petzl Dual Connect Vario Lanyard

Petzl Microtraxion Progress Capture Pulley (PCP)
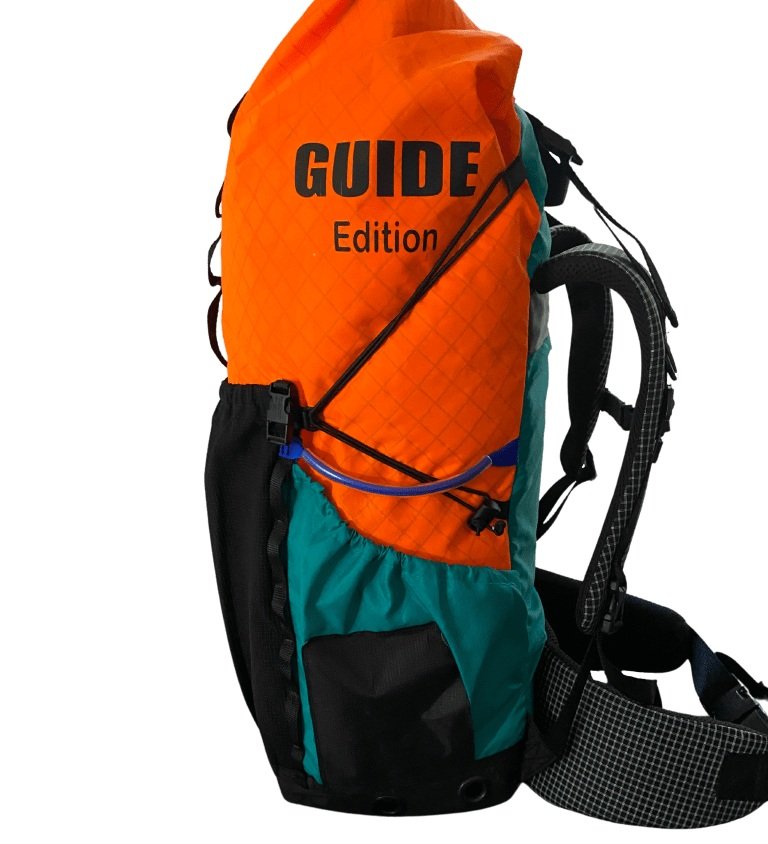
Gear Perspective Guide Edition Backpack

Garmin InReach Mini GPS Device
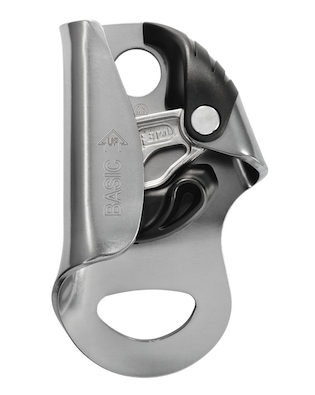
Petzl Basic Mechanical Ascender

Rock Exotica Totem

Grivel Vlad Master Point Carabiner
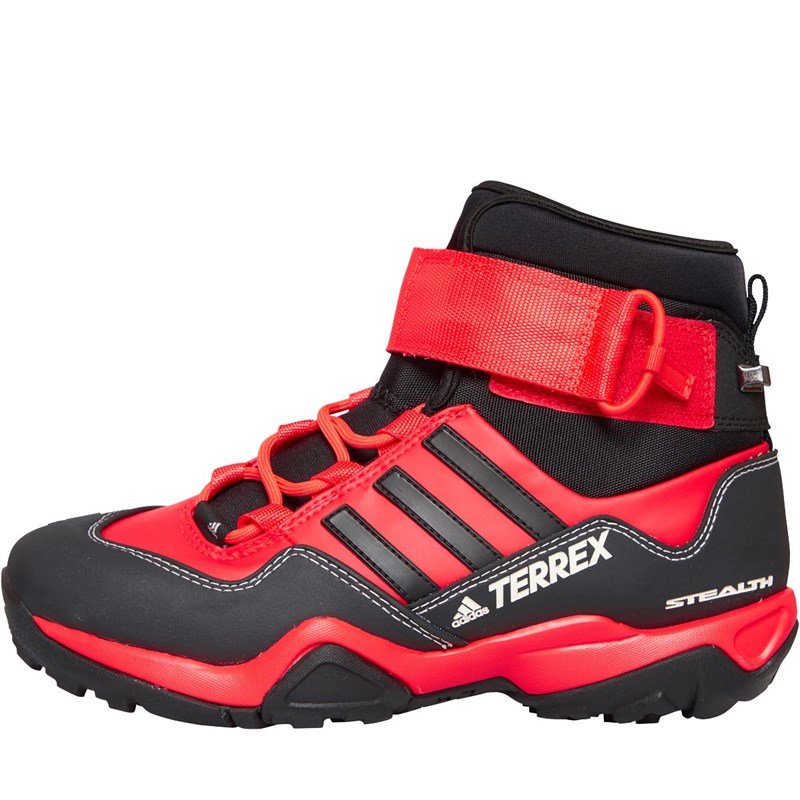
Adidas Terrex Hydrolace Boot
Other Exceptional Guides & Teachers
West Coast Canyoning Adventures
Vancouver B.C., Canada
Wild Sky Adventure Guides
Seattle, WA

Rich Carlson - Canyons & Crags
Las Vegas, NV & Cedar City, UT

Adolfo Isassi - Canyons & Crags
St. George & Cedar City, UT
Learn to Be a Canyoneer!

INTERESTED IN CANYONEERING?
Awesome, we’re interested in helping you!
Let us know below :)
CANYONEERING classes & Training
Whether you’re joining our next class or just asking questions, fire away—all inquiries are welcome!
Check out our 2024 Canyoneering Course Schedule.
Note: ALL of your info is 100% confidential! Phone number is optional but really helps us out :)
2024 Canyoneering Course Schedule
January - June, 2024
Location: Santa Susana Park & Railroad
JAN. 13-15: Canyon Leadership & Rescue
FEB. 24-25: Beginner’s Accelerated Class
MAR. 23-24: Beginner’s Accelerated Class
APR. 27-28: Beginner’s Accelerated Class
MAY 18-19: Canyon Leadership & Rescue
MAY 25-26: Beginner’s Accelerated Class
JUN. 22-23: Beginner’s Accelerated Class
JUL. - DEC. Course Dates Still TBD
To Reserve Your Class:
FAQ’S
Frequently Asked Questions
Q: What time of year can I go?
A: In Southern California, any time of year is great! In fact, some of the best runs of the year are often done in the winter and spring when water levels are higher (luckily we have wetsuits to keep us warm during that time). Some routes like Eaton Canyon and Little Santa Anita Falls are often completely dry by mid-summer, while others like Mt. Baldy are at their best in July and August.
Q: Do I need to own any gear?
A: No gear is necessary if you’re learning to rappel with us, other than athletic clothes, shoes and backpacks. Of course, if you want to bring your own, that’s perfectly alright. For a full list of what to bring, see our Let’s Talk Gear section above.
Q: What if it rains?
A: Unexpected high water flow can be potentially dangerous for canyoneers. If there’s rain in the forecast, we’ll reschedule for a day with better weather (in SoCal, luckily we probably won’t to wait very long).
Q: What kind of programs do you offer?
A: That totally depends on what you’re looking for. We can do a single half-day session in a practice environment so you can see if you like it. We also offer multi-day courses if you’re looking to lead canyons on your own. If you’re unsure, give us a shout via the form above! We’ll be happy to help, even if you’re simply just gathering info for now.

