


Day Hiking
The South Rim
Hermit trail to Santa Maria Springs (5 mi.) & Breezy point (11 mi.)
Summary - A steep descent down a side canyon on the southern-most point of the South Rim Village area. Hermit Trail passes through visibly stunning rock layers and rewards the hiker with progressively better views as the hike continues. Santa Maria Springs itself is a worthy and beautiful turn-around point. For an extra adventure with a big panoramic payoff (conditions permitting), double your distance to Breezy Point (details below).
Seasonal Timing
The Waldron Basin is a colorful garden of wildflowers during the spring.
You’d be wise to limit your distance on this hike when temperatures exceed 90°F; seek advice from the Backcountry Information Center for hikes past Santa Maria Spring.
In the winter, Hermit Trail’s south-facing exposure makes it less treacherous than other winter hikes in the canyon, but you’ll still want to bring footwear traction devices.
Distance & Elevation Gain
To Waldron Basin - This spot is primarily a benchmark, for example if the heat and elevation prove to be too dangerous. If conditions allow, you’ll be much happier if you continue on toward the impressive views and adventurous trails of Santa Maria Spring and Breezy Point.
Distance - 3 mi. round trip
Elevation Change from Top - 1,240 ft.
Time - 2-3 hours
To Santa Maria Spring - A fascinating natural spring and lush plant-covered shelter located along the steep face of the canyon wall. Continue a quarter-mile further past the trail for a great viewpoint and lunch area looking down into the canyon.
Distance - 5 mi. round trip
Elevation Change from Top - 1,680 ft.
Time - 4-5 hours
To Breezy Point - Huge payoff of jaw-dropping panoramic views of the inner canyon without much incremental change in elevation from Santa Maria Spring. From the spring, follow Hermit Trail as it traverses three miles further into the canyon. Highly recommended for fit hikers only—don’t attempt this extension in severe heat.
Distance - 11 mi. round trip
Elevation Change from Top - 1,680 ft.
Time - 4-5 hours
Options for Completing the Hike
Alternate Day Hike to Dripping Spring - At the Dripping Spring Trail Junction in Waldron Basin, hang left and head uphill instead of proceeding downhill toward Santa Maria Spring.
Distance - 7 mi. round trip
Elevation Change from Top - 1,040 ft.
Time - 5-6 hours
Backpacking Trip to Hermit Rapid - If you really want to do this trail justice, strap on a backpack and take Hermit Trail all the way down to Hermit Rapid, one of the most legendary white water sections of the Grand Canyons. It’s a beautiful trail with a fascinating history.
Backpackers can acquire their permits for Hermit Creek Campsite at the Backcountry Information Center. For more info, see our section on Backpacking Permits in the Grand Canyon.
Distance - 18.7 mi. round trip
Elevation Change from Top - 4,200 ft
Time - 2-3 days
What to Pack - In addition to your regular hiking essentials, consider bringing a water filter, in case extra water is needed from the springs.
Reaching the Trailhead - Between Mar. 1 - Nov. 30, the Hermit’s Rest trailhead can only be reached via the park’s shuttle bus system, which is free upon entry to the park. From the South Rim Village, take the red shuttle bus line to the Hermit’s Rest stop.
From Dec. 1 - Feb. 28, Hermit Road is open to private vehicles.
Stay Safe - Drinking water and restrooms available at the Hermit’s Rest trailhead and general store only. Water from both Dripping Spring and Santa Maria Spring must be treated before drinking.
Day of the Hike - Expect a sharp drop in elevation for the first 2.5 miles of this trail.
Resources
Wikipedia - Hermit’s Rest Trail
WildLandTrekking - Hermit Trail Hiking and Backpacking
JamesKaiser - Hiking and Backpacking the Hermit Trail
South Kaibab Trail to Cedar Ridge (3 mi.) & Skeleton Point (6 Mi.)
Summary - If you can avoid the crowds, you’ll be rewarded with some of the best canyon-wide vistas in the South Rim area. It’s an absolutely stunning hike. Because of its complete lack of water, we wouldn’t recommend this one on a 90°F+ day.
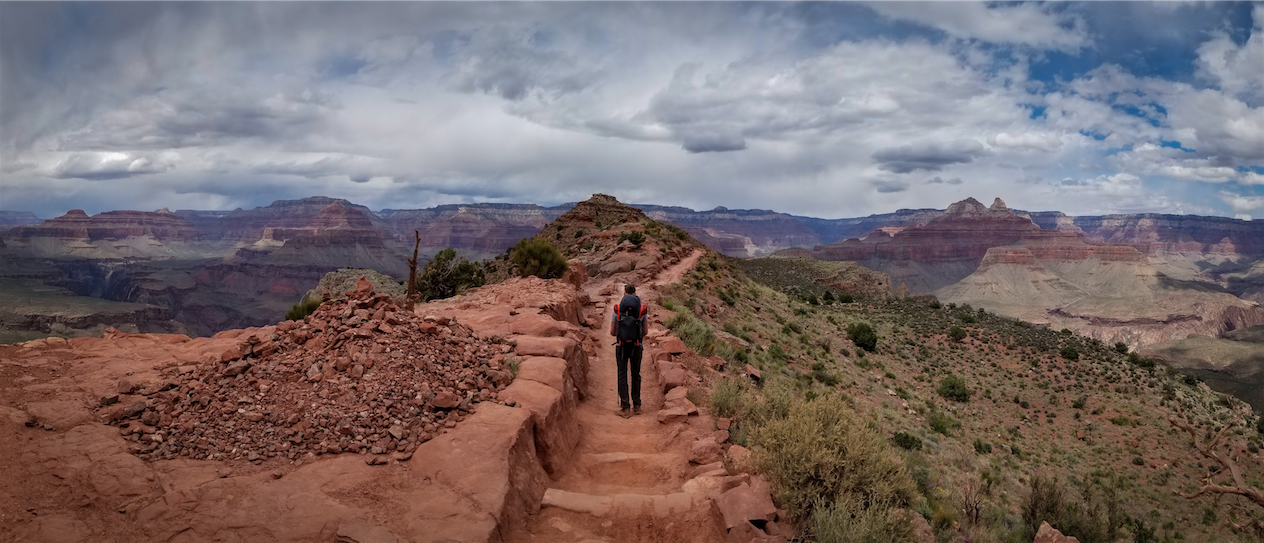
Seasonal Timing - Anytime but summer. With such dramatic views, timing your hike out with any cloud cover will give even more dimension and beauty to your photos. Wear bright clothing to stand out against the massive landscape.
Distance & Elevation Gain
To Ooh Aah Point
Distance - 1.8 mi. round trip
Elevation Change from Top - 790 ft.
Time - 1-2 hours
To Cedar Ridge - The crowds tend to clear up significantly after Cedar Ridge.
Distance - 3 mi. round trip
Elevation Change from Top - 1,120 ft.
Time - 2-3 hours
To Skeleton Point - A great sunset viewpoint with a westward facing vista if you don’t feel like making the full 12 mile trek to Plateau Point (see below).
Distance - 6 mi. round trip
Elevation Change from Top - 2,040 ft.
Time - 4-5 hours
Options for Completing the Hike - Backpack the South Rim Loop!
See our section on South Kaibab to Bright Angel Trail via Phantom Ranch.
Reaching the Trailhead - Park your car at the South Rim Lodge or Visitor Center and take the free shuttle to the South Kaibab trailhead stop.
Day of the Hike - Expect a sharp drop in elevation for the first 2.5 miles of this trail.
Stay Safe - Bring all of the water you will need for this hike. After the trailhead, this trail has zero water whatsoever. Trekking poles make the climb back out a lot easier; you can rent them from the South Rim Village Market Plaza for $3 per pole per day.
Unexpected Challenges - The crowds are insane here. Would be a great spot for a sunset or sunrise hike, due to its views directly west down the canyon. If it’s peak season, I wouldn’t recommend starting the hike between the hours of 9am - 3pm.
Resources
NPS.org - Hiking the South Kaibab Trail
10Adventures - South Kaibab Trail Hike
Trails.com - South Kaibab Trail Photos & Reviews
Bright Angel Trail to Plateau Point at Sunset
Summary - One of the premier hiking trails of the South Rim, Bright Angel genuinely looks just as impressive from the bottom looking up as it does from the top looking down.
Plateau Point is a rocky perch that lies smack in the middle of the canyon, giving you a 360° view of every rocky layer. It’s one of the most stunning viewpoints in the park, somehow made even more spectacular by a direct westward view of the sunset straight over the Colorado River.
Seasonal Timing - For an ambitious hiker, this is the perfect sunset adventure to take on during warmer summer months.
Distance & Elevation Gain
To Indian Garden Campground
Distance - 9 mi. round trip
Elevation Change from Top - 3,040 ft.
Time - 6-7 hours
To Plateau Point
Distance - 12.2 mi. round trip
Elevation Change from Top - 3,080 ft.
Time - 7-9 hours (not including rest time at Plateau Point)
Plateau Point at Sunset - In this scenario, leave roughly 4 hours before sunset to give yourself ample time to get down there and enjoy the view (the hike itself should take roughly 2.5-3 hours).
After sunset, factor roughly 4-4.5 hours to hike back out. You’ll obviously be out late, so bring headlamps, jackets and any gear you need for night hiking.
Finding your way back in the dark is as safe and straight forward as it gets, but still come prepared. Head straight back in the direction you came from, clearly marked by the gigantic wall you hiked down earlier. Indian Garden Campground is a clear checkpoint. From there, it’s a 4.5 mile hike on the single well-maintained trail leading back up the wall toward Bright Angel Lodge.
More Options for Completing the Hike - Backpack the South Rim Loop! See our section on South Kaibab to Bright Angel Trail via Phantom Ranch.
Reaching the Trailhead - The Bright Angel trailhead is located in the South Rim Village on the west end of Bright Angel Lodge, near the Hermit’s Rest bus route transfer station.
Day of the Hike - Heading straight out from the lodge, Bright Angel is one of the most highly trafficked hiking trails in the South Rim, so if you’re looking for seclusion, you’ll either want to hike during off hours as we did, or pick a different route.
Expect a sharp drop in elevation for the first 3 miles of this trail. Trekking poles make the climb back out a lot easier; you can rent them from the South Rim Village Market Plaza for $3 per pole per day.
Stay Safe - There’s a drinking water refill station both at the trailhead and at Indian Garden Campground.
Resources
RoamingSpices - Bright Angel Trail to Plateau Point
TheWanderingQueen - An Ultimate Guide to Hiking to Plateau Point Grand Canyon
Grandview Trail to the Secret Caves of Horseshoe Mesa
Summary - A beautiful, highly exposed and strenuous trail built in the late 1800’s as a mining route.
Seasonal Timing - Steep, strenuous and high sun exposure for most of the hike. One guy in our group really suffered from prolonged time in the heat, and that was in mid/late September. I wouldn’t recommend it as a mid summer hike; any other time of year should be ok.
Distance & Elevation Gain
Distance - 3 mi. each way from the trailhead to the beginning of Horseshoe Mesa; consider it a 6.5-7 mile hike if you hike to the end of Horseshoe Mesa plus the caves.
Elevation Change from Top - 2,500 ft.
Time - 4-6 hours
Finding Horseshoe Mesa Cave (aka Cave of the Domes) - At the 3 mile mark, as you approach the beginning of Horseshoe Mesa itself, you’ll find an old stone cabin leftover from the trail’s mining days. Follow Grandview Trail past the building to the left, leading you to the western arm of the U-shaped butte. Within a quarter mile or so, the trail crosses a small drainage that leads you left (west) toward the edge of the cliff. You should see a very faint unmarked path heading down the drainage to let you know you’re on track. At the cliff’s edge, the trail turns right (north) and hugs the wall as it descends below the rim, leading you down to the entrance of Horseshoe Mesa Cave.
Exploring Horseshoe Mesa Cave - This is the only cave in the park that doesn’t require a permit to explore, but trust when we say, this thing is no joke. Crawl through the small entrance and you’ll find several large chambers heading out in multiple directions. We explored roughly 200-300 ft. away from the entrance before we started feeling uneasy and headed back.
Bring a backup light source (headlamp with extra batteries, plus a cell phone light would probably be plenty). A very long ball of string would be highly recommended as well, if anything for peace of mind. These caves seemed extensive enough that, If a hiker got lost and stranded deep in the cave, he/she could face serious trouble.
Finding the Grandview Mining Caves and Miner’s Spring - From the Page Spring spur on the Grandview Trail, you can access the entrances of two original mining caves, known as the Grandview Mine and the Last Chance Mine. In 2009, the entrance of these mines were gated, both to protect the public and the bat populations living inside the mines. The gates were installed for good reason—research indicates unstable 100 year-old wooden support beams, tall vertical mine shafts, evidence of previous cave-ins and high levels of radiation.
I’ll include a few resources below for further research on their history:
MineGatesInc - Grandview and Last Chance Mines (cool photos and history of the mine)
Grand Canyon Explorer - Trail Description: Miner’s Spring Spur of Grandview Trail (excellent detailed instructions for the Mining Caves)
Wikipedia - Grandview Mine
What to Pack - Aside from regular hiking gear, bring plenty of water. If you decide to explore the caves, bring the proper gear covered above (extra light source, preferably some string, etc.).
Reaching the Trailhead - Take Desert View Drive roughly 12 mi. east of the South Rim Village; Grandview Point is roughly halfway between that and the Desert View lookout.
Day of the Hike - Expect a sharp drop in elevation essentially down to the beginning of Horseshoe Mesa.
Once you get down to Horseshoe Mesa, you can take a trail on the west end (left, if you’re walking from the trailhead) to the very end of the ledge, where you’ll find a great lunch spot and lookout point. On that same side of the mesa lies the entrance to Horseshoe Mesa Cave. We highly recommend that as well, if you’re up for the challenge.
Stay Safe - Bring all of the water you will need for this hike—this trail has zero water whatsoever.
Resources
NPS.org - Grandview Trail and Horseshoe Mesa: Official Park Service Hiking Guide
HikeArizona - Grandview Trail (history and directions for both the caves & mines)
Grand Canyon Explorer - Trail Description: Grandview Trail (excellent detailed instructions for Horseshoe Mesa Cave)


