


Hiking


Exploring the Soldier Pass Caves

Summary - One of the most exciting and photo-worthy adventures in the Sedona wilderness is finding and exploring the Soldier Pass caves, added to an already jaw dropping hike through Soldier Pass Trail. If you have the time, we highly recommend doing the 5.4 mile loop around Brins Mesa. The views you’re rewarded with far exceed the additional mileage and elevation.
Seasonal Timing - Given its relatively low mileage and proximity to town, you can really do this hike any time of year without much time or planning.
Distance & Elevation Gain from the Soldier Pass Trailhead
Out-and-Back to the Caves Only: Approx. 2.5 miles round-trip, +200 ft. elevation gain
Out-and-Back to the Top of Soldier Pass: 4.5 miles round-trip, +400 ft. elevation gain
Loop Around Brins Mesa Trail (Recommended): 5.4 miles, +550 ft. elevation gain
Permits and Reservations - The Red Rock Pass is required to park at both the Jim Thompson and Soldier Pass trailhead.
What to Pack - Bring a good camera, ideally one that smoothly captures low-light environments.
Reaching the Trailhead - You can initiate this hike from either the Soldier Pass or Jim Thompson trailhead.
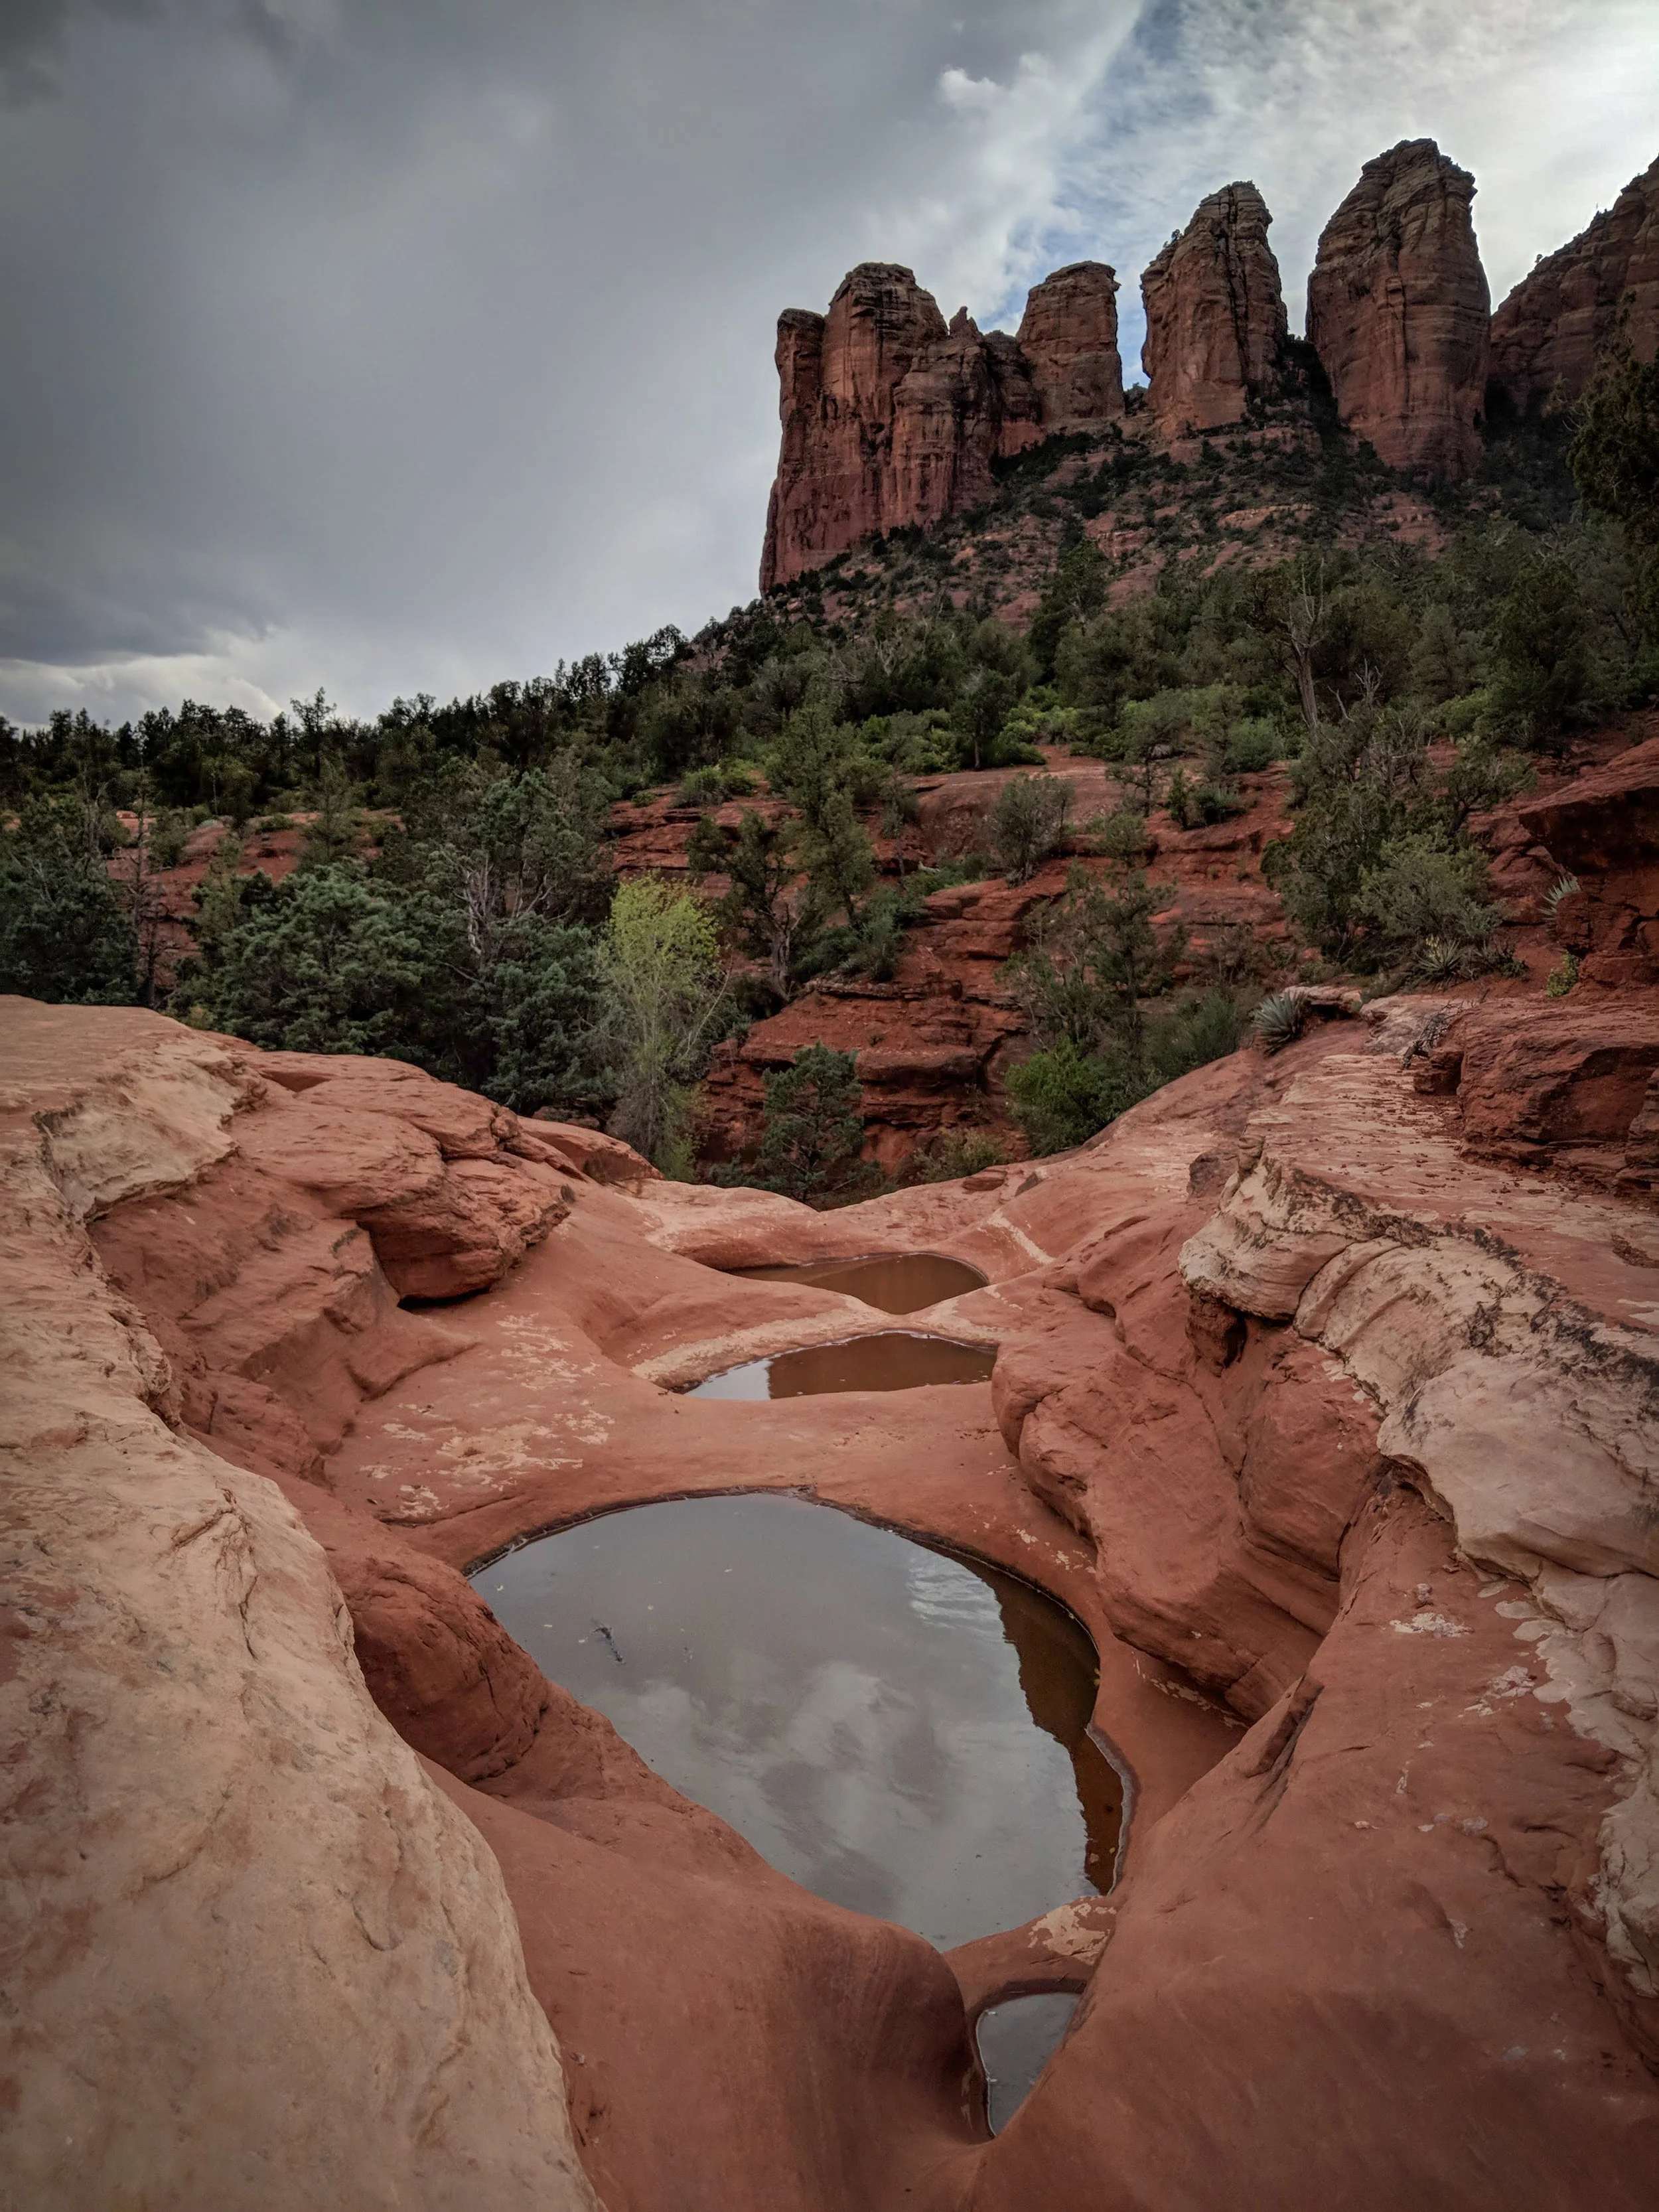
Finding the Caves - The Soldier Pass caves are an offshoot of the main trail, which will add maybe a half-mile total to your journey, regardless of where you start and end your hike. Instructions to the caves are below.
Hiking North from the Parking Lot: Roughly a quarter-mile past the Seven Sacred Pools, you’ll see an offshoot of the main trail leading uphill to your right, which is blocked off by a border of stones and branches (as shown in the first photo below). Finding this trail offshoot is usually the most confusing step for new people reaching the caves. A great reference marker is the wooden Secret Mountain Wilderness sign below; if you come across it, you’ve barely gone too far.
Follow that trail up a short hill, which opens up to a flat rocky expanse, roughly the size of a basketball court. From this vantage point, you can already see the caves off in the distance, just below the rim of Brin’s mesa. Intuitively follow the cairns (rock stacks) uphill to the opposite end of this open area until it narrows off to a trail again, which will take you straight uphill to the caves.

Photo: Look for the border of rocks and branches for the entrance to the cave approach trail.

Photo: If you pass this sign, you’ve gone a little too far.

Photo: Once on the trail, cross this flat, rocky opening toward the caves in the distance.
Stay Safe - Be careful climbing around inside the caves. There’s a lot of cliff exposure up on the ledge!
Unexpected Challenges - If you find yourself bushwhacking or hiking through drainages at any point, you’re doing it wrong. Locate the trail markers above. The trail that takes you there is intuitive and well-maintained.
Resources
ProTrails - Brins Mesa - Soldier Pass Trail Loop
MyNomadicLens - Hiking and Photographing Soldier Pass Trail and Secret Cave


Sterling Pass to Vultee Arch

Summary - This route rarely gets attention from the online hiking community, which is surprising, but I couldn’t be more thrilled. We went on a beautiful day in May and saw just two other hikers the entire trip, while Devil’s Bridge got swarmed.
By far one of my favorite hikes in Sedona, this route has everything you could ask for—fun scrambling ascents, enormous panoramic views, winding paths through lush Sedona backwoods, and last but not least, a big arch that you can walk across.
Seasonal Timing - This could be the single best hike in Sedona during the fall when the leaves are changing. Much of the hike passes through a lush section of the forest, where you’d be surrounded by colorful leaves.
Distance - 5 mi. round-trip (out-and-back)
Elevation Gain - Roughly 1,000 ft. up over the pass and back down again (each direction)
Permits and Reservations - The Red Rock Pass is required NOT for vehicles parked at this trailhead.
What to Pack - In addition to regular hiking gear, we recommend the following standout items:
Plenty of water - due to steep elevation gain both directions with no water on the trail
Long pants - there were reports of poison ivy from other hikers, but we didn’t see any directly
Reaching the Trailhead - The parking area is a small gravel pull-out on the side of the road, located just south of Manzanita Campground on Hwy 89A in Oak Creek Canyon. The trailhead itself is just 100 yards further north up the road—you’ll walk past Manzanita Campground on your right, then look for the trailhead on your left.
Unexpected Challenges - The initial climb over Sterling pass is steep and feels more like a scramble than a hike at times. For the most part, thats a plus, as it makes for a more fun and interesting hike, but if you have bad knee problems, you might need to evaluate it for your way back down.
Resources
TheHikeHouse - Sterling Pass Trail to Vultee Arch
AZUtopia - Sedona’s Sterling Pass Trail to Vultee Arch


Overlook Sedona from the Summit of Wilson Mountain
Summary - This is easily one of Sedona’s top three hikes. Scaling the highest point in Sedona isn’t simply just a mark of pride; it’s a genuinely awesome hike in its own right.
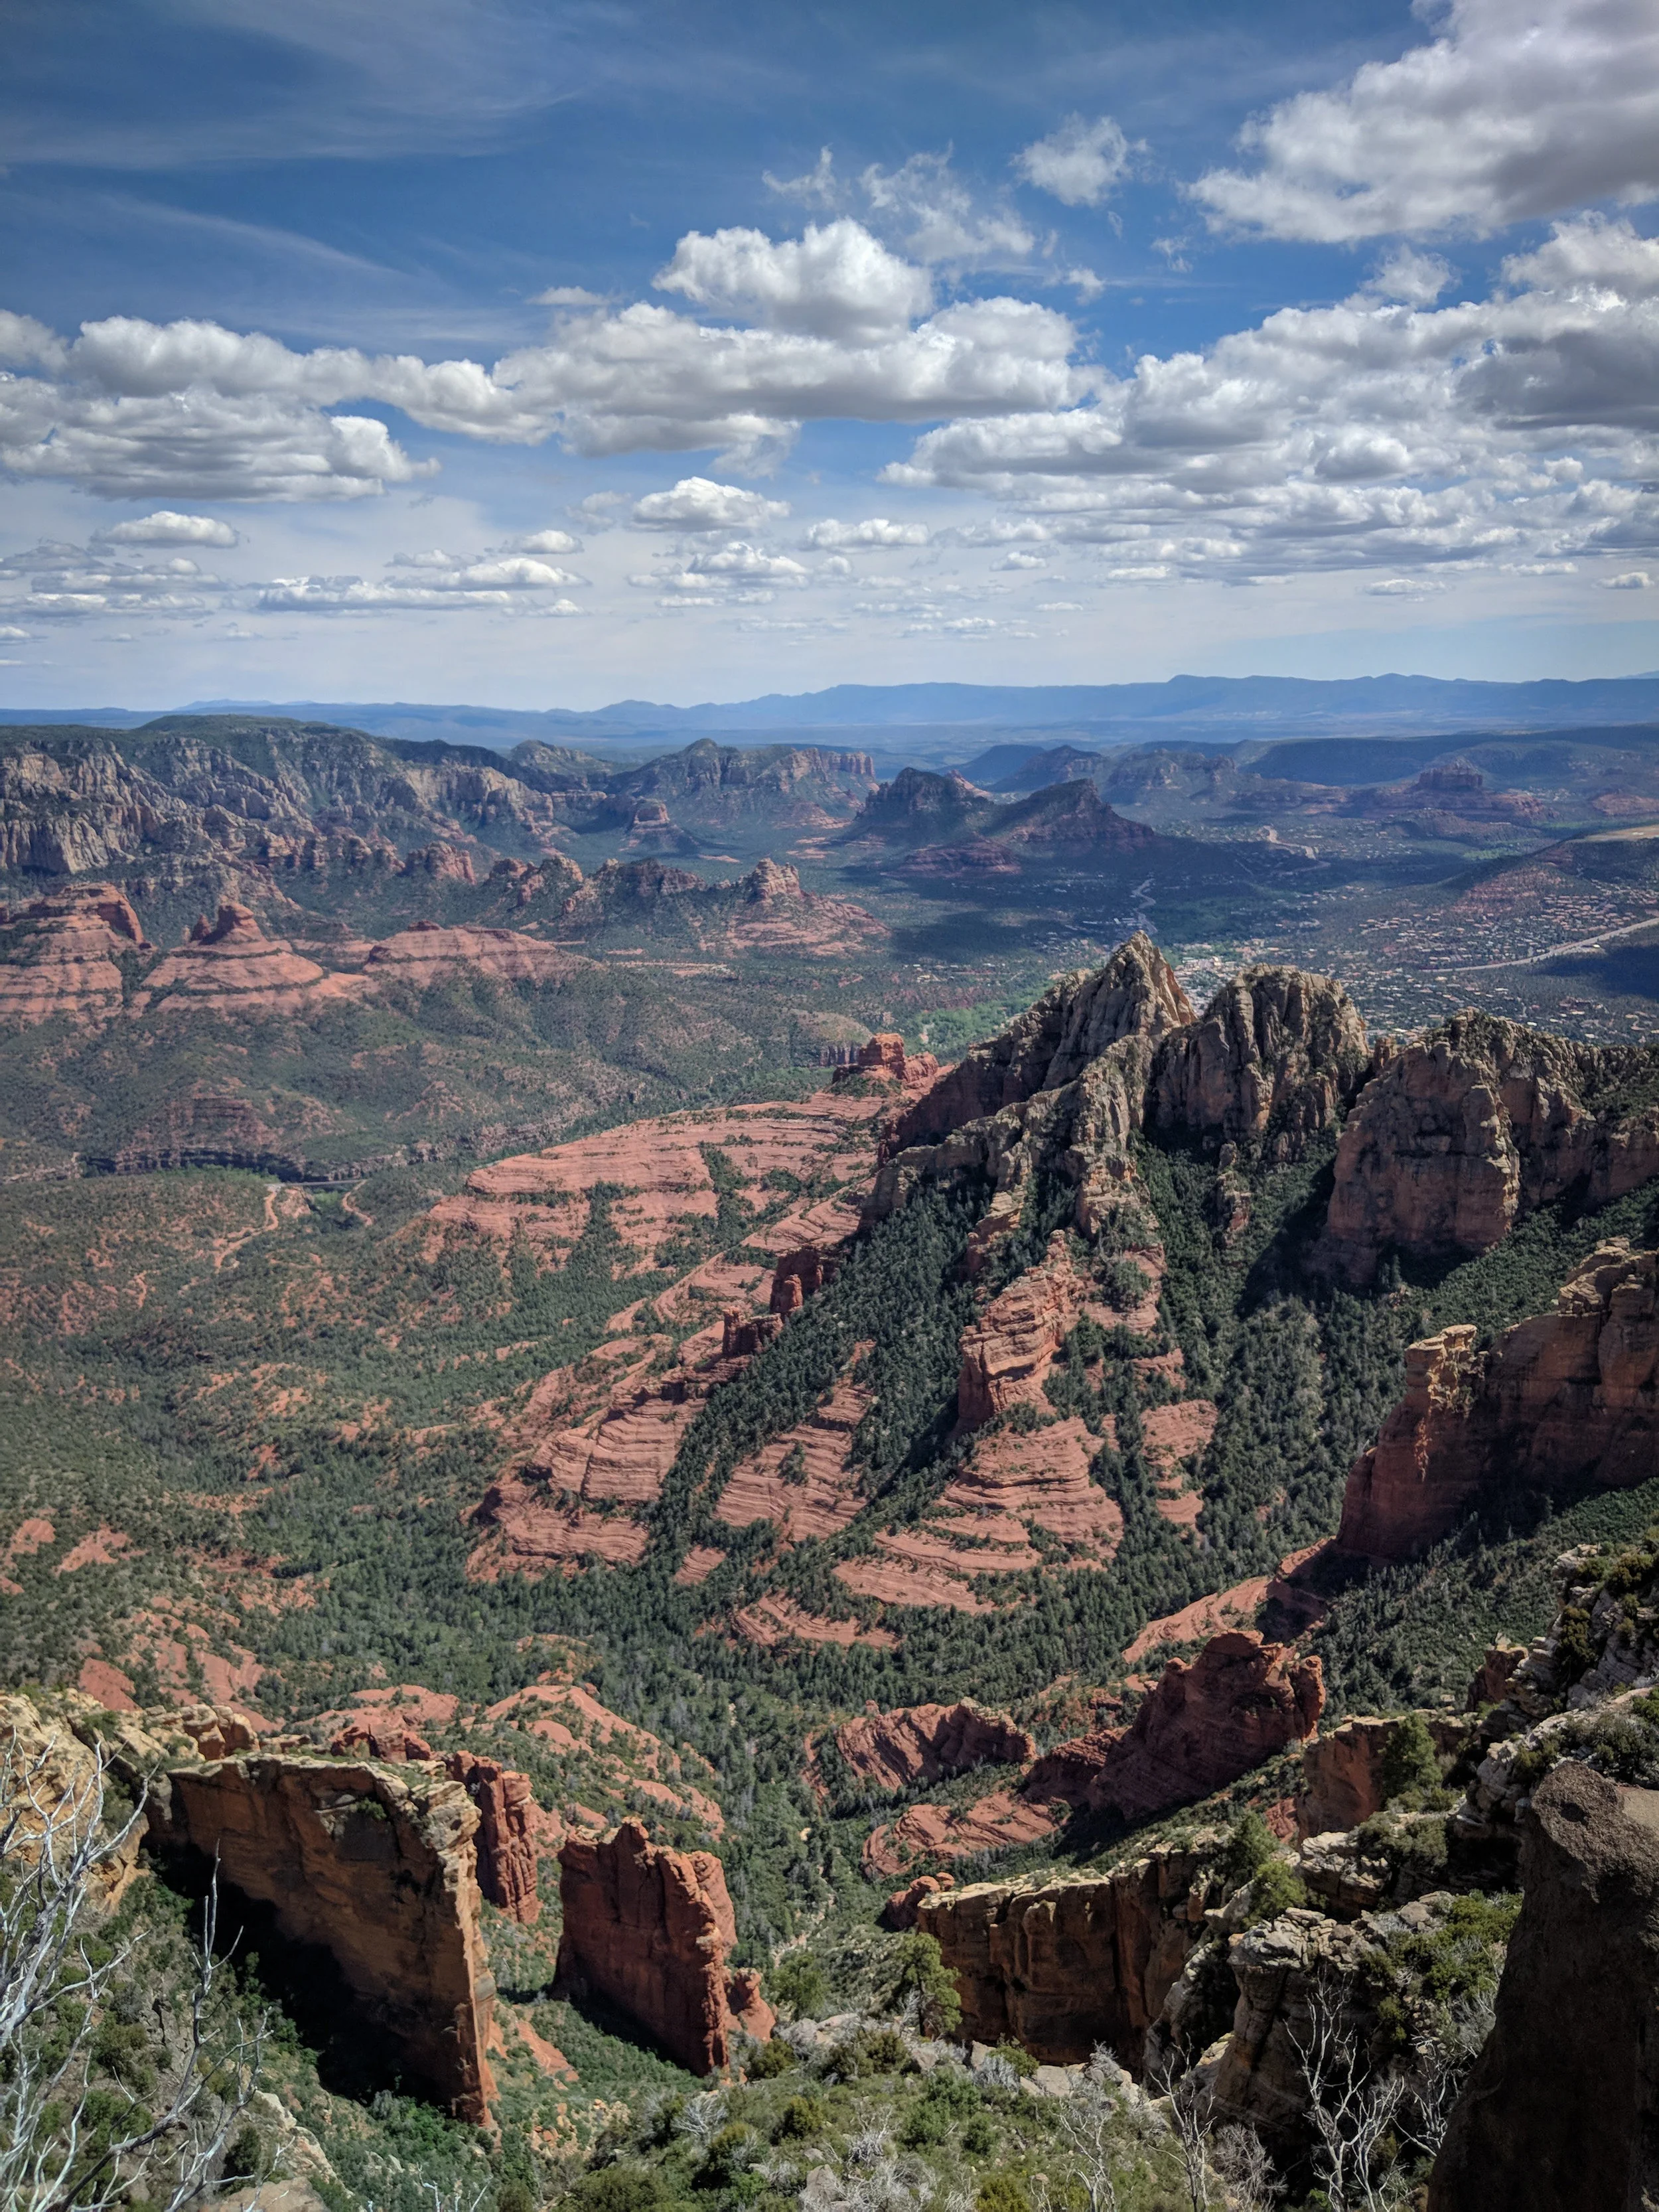
Equal parts challenging and beautiful, Wilson Mountain features two summits roughly two miles away from each other, offering hikers a completely different perspective of some of the most impressive panoramas in the Sedona area.
From the south-facing Sedona overlook, you’ll get possibly the best view over downtown Sedona of any peak in the Red Rock county area. From the North Canyon overlook, you’ll peer down into Oak Creek Canyon, Sterling Pass and the Red Rock Secret Mountain backcountry wilderness.
Seasonal Timing - Great most times of the year, especially during the cooler months. Unless you leave really early, I wouldn’t recommend doing this hike in July or August, where the threat of 100°+ heat, monsoons and thunderstorms become a very real safety concern for anyone on an exposed mountain top.
Options for Completing the Hike - This hike can be initiated from either the Midgley Bridge trailhead or the North Wilson trailhead; the Midgley Bridge route is 3.6 miles longer in total.
We chose the North Wilson trailhead for its unbeatable north-facing overlook of Oak Creek Canyon. The southern Midgley Bridge side can be seen from the summit, so it felt we’d be getting the best of both worlds that way.
Alternatively, if you have two vehicles and want to see both sides, set up a shuttle with one car in each parking lot, allowing you to start from one and end at the other.
Distance & Elevation Gain
From Midgley Bridge - 12.4 mi. round-trip (out-and-back) / 2,400 ft. elevation gain, including both North Canyon and Sedona overlooks
From North Wilson Trailhead - 9.8 mi. round-trip (out-and-back) / 2,400 ft. elevation gain, including both North Canyon and Sedona overlooks
Hiking route from the North Wilson Trailhead, hitting both summits. | Courtesy via: SummitPost.org
Permits and Reservations - The Red Rock Pass is required for vehicles parked at both trailheads.
What to Pack - In addition to regular hiking gear, we recommend a hammock for the top (the Sedona overlook is perfectly set up for it), a camera with a good zoom lens, a good sized summit lunch, and at least 3L of water per person.
Reaching the Trailhead - Both trailhead options lie along route 89A, heading out toward Oak Creek Canyon (they’re well-marked and easy to find).
Unexpected Challenges - While worth every drop of sweat, this is definitely not an easy hike. You’ll be taking on a lot of mileage and elevation gain. In the warmer months, the heat will add an additional level of difficulty. Come well prepared with food, water and proper hiking gear. Pay attention to the weather to avoid excessive heat or threats from thunderstorms while you’re up on an exposed mountain top.
Camping on the Ledge at the Sedona Overlook - This south-facing summit might be the best place in Sedona to watch a sunset. If you want to do this route justice, pack up your overnight gear and set up your camp right next to the ledge (I’m not the first to think of this—there’s already stone fire rings set up there). You’ll be rewarded with a truly mind-blowing view of the sun setting over the entire city of Sedona.
Resources
SummitPost.org - Wilson Mountain/Oak Creek Canyon
EarlyRiseHiker - Wilson Mountain Trail #10


Cathedral Rock at Sunset
Summary - Undoubtedly at some point during your trip, you’re going to wonder about the best place in town to watch a sunset. If you’re up for a quick steep hike, scramble up to the overlook on top of Cathedral Rock. The view is angled perfectly westward.
This is a great ace-up-your-sleeve option if you 1) want a short sunset hike after a bigger, more ambitious adventure earlier in the day, or 2) see some beautiful clouds forming late in the afternoon and need a quick last-minute outing to catch the sunset.
It’s a popular hike, so bring some beers to share with your neighbors, and enjoy a great experience together. You shouldn’t expect a lot of solitude here.

Seasonal Timing - Given its low mileage and proximity to town, you can really do this hike any time of year without much time or planning. However, with a steep slope and moderate exposure, avoid it when it’s either wet or icy.
Predicting a Great Sunset - Look for high, wispy late afternoon clouds, or even heavy cumulus clouds as long as they’re not blocking the sun itself. Start your hike about 1-1:30 hours before sunset.
Avoid this rock like the plague if there’s lightning (or if you don’t, have some fun with your death wish and paint a target on your shirt).
Distance - 1.5 miles round-trip (out-and-back)
Elevation Gain - Approx. 550 ft.
Permits and Reservations - The Red Rock Pass is required for vehicles parked at this trailhead.
What to Pack - Snacks for the sunset, and of course, headlamps for the way back down
Reaching the Trailhead - The trailhead is easy to find and starts directly from the parking lot.
Resources
BackOBeyondBlog - Cathedral Rock Hiking Guide
TheMandagies - Cathedral Rock Trail During Sunset


The Shaman's Cave a.k.a. Robbers Roost
Summary - This sacred natural cave formed in the side of a cliff has a fascinating history. Locals believe Native American spiritual leaders once used this room-sized nook to perform spiritual ceremonies. It’s also believed to have been a hideout for bandits of the Wild West era.
Seasonal Timing / Stay Safe - Accessing the cave requires hikers to traverse a steep and highly exposed cliff edge to reach the cave itself. The ledge is wide enough to comfortably walk across, but has a low margin of error for anyone who slips and falls. This hike isn’t for everyone, so know your comfort level before attempting. Check the weather before attempting—I definitely wouldn’t recommend doing it with rain or snow in the forecast.
Distance - The cave itself is less than a mile from the trailhead; it’s more of an exploration than a hike. Since many cars aren’t capable of traversing the high-clearance road all the way to the official trailhead, many people park further down the road and hike in, adding just over a mile each direction to the hike.
Elevation Gain - Roughly 500 ft.
Permits and Reservations - The Red Rock Pass may be required for vehicles parked at this trailhead.
What to Pack - Grippy shoes, if anything for peace of mind, during the steep cliff traverse.
Reaching the Trailhead - Reaching the trailhead is tricky—you’ll be navigating around a web of unmaintained dirt roads in the Sedona desert. A high clearance vehicle is required.
Turn-by-turn directions: HikeArizona - Shaman’s Cave
GPS coordinates: (34.93092, -111.971853)
Nighttime in Shaman’s Cave - The real secret here is to pack in your camping gear and spend a warm summer night stargazing from Shaman’s Cave.
Be Respectful - Keep in mind that this is a sacred historical site. Even today, you can still see charred marks on the floor of the cave from the spiritual ceremonies that used to take place there. Unfortunately the inside of this cave was recently was vandalized with graffiti. Please don’t add to the problem. Leave no trace—pack out what you bring in.
Resources
ArielBravy - Shaman’s Cave and Intuition (step-by-step photo directions)
AllTrails - Robers Roost Trail (good photos, trail map, hiker reviews' & updates)
HikeArizona - Shaman’s Cave (good directions and trail data)

Video: Courtesy via Benjamin Kastelic

